




<?xml version="1.0" encoding="UTF-8"?><rss version="2.0"
	xmlns:content="http://purl.org/rss/1.0/modules/content/"
	xmlns:wfw="http://wellformedweb.org/CommentAPI/"
	xmlns:dc="http://purl.org/dc/elements/1.1/"
	xmlns:atom="http://www.w3.org/2005/Atom"
	xmlns:sy="http://purl.org/rss/1.0/modules/syndication/"
	xmlns:slash="http://purl.org/rss/1.0/modules/slash/"
	>

<channel>
	<title>tuto | Ildefonso Segura</title>
	<atom:link href="https://ildefonsosegura.es/tag/tuto/feed/" rel="self" type="application/rss+xml" />
	<link>https://ildefonsosegura.es</link>
	<description>Tutoriales de diseño y animación</description>
	<lastBuildDate>Sat, 29 Oct 2022 12:21:44 +0000</lastBuildDate>
	<language>es</language>
	<sy:updatePeriod>
	hourly	</sy:updatePeriod>
	<sy:updateFrequency>
	1	</sy:updateFrequency>
	<generator>https://wordpress.org/?v=7.1</generator>

<image>
	<url>https://ildefonsosegura.es/wp-content/uploads/cropped-Favicon-new-logo-website-32x32.png</url>
	<title>tuto | Ildefonso Segura</title>
	<link>https://ildefonsosegura.es</link>
	<width>32</width>
	<height>32</height>
</image> 
	<item>
		<title>Tutorial Photoshop // Tu retrato con aspecto vectorizado retro</title>
		<link>https://ildefonsosegura.es/tutorial-photoshop-tu-retrato-con-aspecto-vectorizado-retro/</link>
					<comments>https://ildefonsosegura.es/tutorial-photoshop-tu-retrato-con-aspecto-vectorizado-retro/#respond</comments>
		
		<dc:creator><![CDATA[Ildefonso Segura]]></dc:creator>
		<pubDate>Sat, 02 Oct 2021 13:06:45 +0000</pubDate>
				<category><![CDATA[Efectos]]></category>
		<category><![CDATA[Fotocomposición]]></category>
		<category><![CDATA[Photoshop]]></category>
		<category><![CDATA[Tecnicas]]></category>
		<category><![CDATA[Textura]]></category>
		<category><![CDATA[Tutoriales]]></category>
		<category><![CDATA[Video]]></category>
		<category><![CDATA[Wallpaper]]></category>
		<category><![CDATA[adobe]]></category>
		<category><![CDATA[creatividad]]></category>
		<category><![CDATA[diseño]]></category>
		<category><![CDATA[efecto]]></category>
		<category><![CDATA[estilo]]></category>
		<category><![CDATA[ildefonsosegura]]></category>
		<category><![CDATA[ilustracion]]></category>
		<category><![CDATA[photoshop]]></category>
		<category><![CDATA[ps]]></category>
		<category><![CDATA[retro]]></category>
		<category><![CDATA[tecnicas]]></category>
		<category><![CDATA[tuto]]></category>
		<category><![CDATA[tutorial]]></category>
		<category><![CDATA[vector]]></category>
		<category><![CDATA[vectorizado]]></category>
		<category><![CDATA[VIDEOTUTORIAL]]></category>
		<category><![CDATA[vintage]]></category>
		<category><![CDATA[wallpaper]]></category>
		<category><![CDATA[youtube]]></category>
		<guid isPermaLink="false">https://ildefonsosegura.es/?p=116000</guid>

					<description><![CDATA[<p>En este tutorial de Photoshop te mostraré como conseguir un estilo de ilustración vectorizada con tu retrato. Podrás editar posteriormente los colores creando tus composiciones ajustadas a los tonos que mejor se adapten al entorno donde se verá la ilustración. Te dejo mi referencia en Instagram para que chequees este post y otros que te [&#8230;]</p>
La entrada <a href="https://ildefonsosegura.es/tutorial-photoshop-tu-retrato-con-aspecto-vectorizado-retro/">Tutorial Photoshop // Tu retrato con aspecto vectorizado retro</a> apareció primero en <a href="https://ildefonsosegura.es">Ildefonso Segura</a>.]]></description>
										<content:encoded><![CDATA[<div data-elementor-type="wp-post" data-elementor-id="116000" class="elementor elementor-116000">
						<section class="elementor-section elementor-top-section elementor-element elementor-element-b7471a2 elementor-section-boxed elementor-section-height-default elementor-section-height-default" data-id="b7471a2" data-element_type="section" data-e-type="section">
						<div class="elementor-container elementor-column-gap-default">
					<div class="elementor-column elementor-col-100 elementor-top-column elementor-element elementor-element-5e938f2" data-id="5e938f2" data-element_type="column" data-e-type="column">
			<div class="elementor-widget-wrap elementor-element-populated">
						<div class="elementor-element elementor-element-7cf2e12 elementor-widget elementor-widget-text-editor" data-id="7cf2e12" data-element_type="widget" data-e-type="widget" data-widget_type="text-editor.default">
				<div class="elementor-widget-container">
									<p align="justify">En este tutorial de Photoshop te mostraré como conseguir un estilo de ilustración vectorizada con tu retrato. Podrás editar posteriormente los colores creando tus composiciones ajustadas a los tonos que mejor se adapten al entorno donde se verá la ilustración.</p>								</div>
				</div>
					</div>
		</div>
					</div>
		</section>
				<section class="elementor-section elementor-top-section elementor-element elementor-element-acfc913 elementor-section-boxed elementor-section-height-default elementor-section-height-default" data-id="acfc913" data-element_type="section" data-e-type="section">
						<div class="elementor-container elementor-column-gap-default">
					<div class="elementor-column elementor-col-100 elementor-top-column elementor-element elementor-element-03b0344" data-id="03b0344" data-element_type="column" data-e-type="column">
			<div class="elementor-widget-wrap elementor-element-populated">
						<div class="elementor-element elementor-element-af4e04c elementor-widget elementor-widget-text-editor" data-id="af4e04c" data-element_type="widget" data-e-type="widget" data-widget_type="text-editor.default">
				<div class="elementor-widget-container">
									<p align="justify">Te dejo mi referencia en Instagram para que chequees este post y otros que te pueden interesar <a href="http://instagram.com/ildefonsosegura" target="_blank" rel="noopener"><span style="color: #800000;"><strong>INSTAGRAM DE @IldefonsoSegura</strong></span></a></p>								</div>
				</div>
					</div>
		</div>
					</div>
		</section>
				<section class="elementor-section elementor-top-section elementor-element elementor-element-8b3b319 elementor-section-boxed elementor-section-height-default elementor-section-height-default" data-id="8b3b319" data-element_type="section" data-e-type="section">
						<div class="elementor-container elementor-column-gap-default">
					<div class="elementor-column elementor-col-100 elementor-top-column elementor-element elementor-element-903e236" data-id="903e236" data-element_type="column" data-e-type="column">
			<div class="elementor-widget-wrap elementor-element-populated">
						<div class="elementor-element elementor-element-52d8d69 elementor-widget elementor-widget-text-editor" data-id="52d8d69" data-element_type="widget" data-e-type="widget" data-widget_type="text-editor.default">
				<div class="elementor-widget-container">
									<p align="justify">El resultado del póster o wallpaper es alucinante :</p>								</div>
				</div>
					</div>
		</div>
					</div>
		</section>
				<section class="elementor-section elementor-top-section elementor-element elementor-element-1f0d10c elementor-section-boxed elementor-section-height-default elementor-section-height-default" data-id="1f0d10c" data-element_type="section" data-e-type="section">
						<div class="elementor-container elementor-column-gap-default">
					<div class="elementor-column elementor-col-100 elementor-top-column elementor-element elementor-element-6007654" data-id="6007654" data-element_type="column" data-e-type="column">
			<div class="elementor-widget-wrap elementor-element-populated">
						<div class="elementor-element elementor-element-1b72fee elementor-widget elementor-widget-image" data-id="1b72fee" data-element_type="widget" data-e-type="widget" data-widget_type="image.default">
				<div class="elementor-widget-container">
															<img fetchpriority="high" decoding="async" width="768" height="960" src="https://ildefonsosegura.es/wp-content/uploads/Ilde-retrato-oleo-colores-8-10-768x960.jpg" class="attachment-medium_large size-medium_large wp-image-116001" alt="" srcset="https://ildefonsosegura.es/wp-content/uploads/Ilde-retrato-oleo-colores-8-10-768x960.jpg 768w, https://ildefonsosegura.es/wp-content/uploads/Ilde-retrato-oleo-colores-8-10-240x300.jpg 240w, https://ildefonsosegura.es/wp-content/uploads/Ilde-retrato-oleo-colores-8-10-819x1024.jpg 819w, https://ildefonsosegura.es/wp-content/uploads/Ilde-retrato-oleo-colores-8-10-1228x1536.jpg 1228w, https://ildefonsosegura.es/wp-content/uploads/Ilde-retrato-oleo-colores-8-10-1638x2048.jpg 1638w, https://ildefonsosegura.es/wp-content/uploads/Ilde-retrato-oleo-colores-8-10.jpg 1861w" sizes="(max-width: 768px) 100vw, 768px" />															</div>
				</div>
					</div>
		</div>
					</div>
		</section>
				<section class="elementor-section elementor-top-section elementor-element elementor-element-4ecb01f elementor-section-boxed elementor-section-height-default elementor-section-height-default" data-id="4ecb01f" data-element_type="section" data-e-type="section">
						<div class="elementor-container elementor-column-gap-default">
					<div class="elementor-column elementor-col-100 elementor-top-column elementor-element elementor-element-00dfe98" data-id="00dfe98" data-element_type="column" data-e-type="column">
			<div class="elementor-widget-wrap elementor-element-populated">
						<div class="elementor-element elementor-element-a2d52fd elementor-widget elementor-widget-text-editor" data-id="a2d52fd" data-element_type="widget" data-e-type="widget" data-widget_type="text-editor.default">
				<div class="elementor-widget-container">
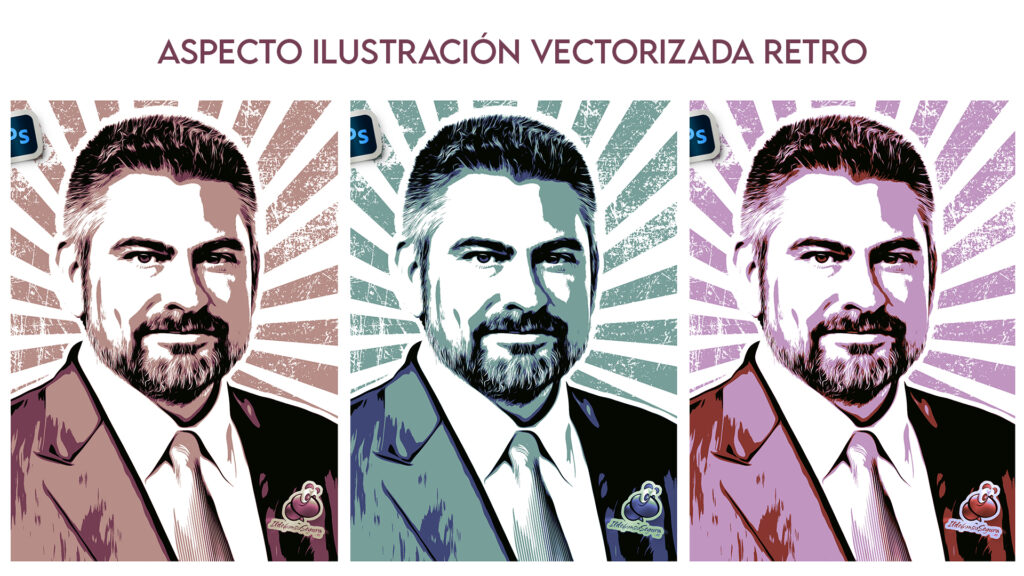
									<p align="justify">Como te anticipé antes, puedes cambiar las tonalidades simplemente a través de la edición de una capa de ajuste de tono o de color:</p>								</div>
				</div>
					</div>
		</div>
					</div>
		</section>
				<section class="elementor-section elementor-top-section elementor-element elementor-element-2ca6aa6 elementor-section-boxed elementor-section-height-default elementor-section-height-default" data-id="2ca6aa6" data-element_type="section" data-e-type="section">
						<div class="elementor-container elementor-column-gap-default">
					<div class="elementor-column elementor-col-100 elementor-top-column elementor-element elementor-element-e61067e" data-id="e61067e" data-element_type="column" data-e-type="column">
			<div class="elementor-widget-wrap elementor-element-populated">
						<div class="elementor-element elementor-element-456da51 elementor-widget elementor-widget-image" data-id="456da51" data-element_type="widget" data-e-type="widget" data-widget_type="image.default">
				<div class="elementor-widget-container">
															<img decoding="async" width="1024" height="576" src="https://ildefonsosegura.es/wp-content/uploads/3-ilustraciones-1024x576.jpg" class="attachment-large size-large wp-image-116002" alt="" srcset="https://ildefonsosegura.es/wp-content/uploads/3-ilustraciones-1024x576.jpg 1024w, https://ildefonsosegura.es/wp-content/uploads/3-ilustraciones-300x169.jpg 300w, https://ildefonsosegura.es/wp-content/uploads/3-ilustraciones-768x432.jpg 768w, https://ildefonsosegura.es/wp-content/uploads/3-ilustraciones-1536x864.jpg 1536w, https://ildefonsosegura.es/wp-content/uploads/3-ilustraciones.jpg 1920w" sizes="(max-width: 1024px) 100vw, 1024px" />															</div>
				</div>
					</div>
		</div>
					</div>
		</section>
				<section class="elementor-section elementor-top-section elementor-element elementor-element-4aa58d5 elementor-section-boxed elementor-section-height-default elementor-section-height-default" data-id="4aa58d5" data-element_type="section" data-e-type="section">
						<div class="elementor-container elementor-column-gap-default">
					<div class="elementor-column elementor-col-100 elementor-top-column elementor-element elementor-element-dc1088e" data-id="dc1088e" data-element_type="column" data-e-type="column">
			<div class="elementor-widget-wrap elementor-element-populated">
						<div class="elementor-element elementor-element-97c6f20 elementor-widget elementor-widget-text-editor" data-id="97c6f20" data-element_type="widget" data-e-type="widget" data-widget_type="text-editor.default">
				<div class="elementor-widget-container">
									<p align="justify">Durante el tutorial aplicaremos un filtro muy potente que no usamos muchas veces. Se trata del filtro de «pintura al óleo». Su aplicación repetitiva y tratada de forma localizada, produce resultados increíbles.</p>								</div>
				</div>
					</div>
		</div>
					</div>
		</section>
				<section class="elementor-section elementor-top-section elementor-element elementor-element-fa2ff6d elementor-section-boxed elementor-section-height-default elementor-section-height-default" data-id="fa2ff6d" data-element_type="section" data-e-type="section">
						<div class="elementor-container elementor-column-gap-default">
					<div class="elementor-column elementor-col-100 elementor-top-column elementor-element elementor-element-73ea8e0" data-id="73ea8e0" data-element_type="column" data-e-type="column">
			<div class="elementor-widget-wrap elementor-element-populated">
						<div class="elementor-element elementor-element-9524e23 elementor-widget elementor-widget-text-editor" data-id="9524e23" data-element_type="widget" data-e-type="widget" data-widget_type="text-editor.default">
				<div class="elementor-widget-container">
									<p align="justify">Te aconsejo suscribirte al canal de <span style="color: #800000;"><strong>TEXTURELABS</strong></span>. Mi ilustración está realizada con la inspiración del tutorial en inglés cuyo link te dejo a continuación <a title="Tutorial en inglés TextuerLabs" href="https://youtu.be/CGdGqcAQdMU" target="_blank" rel="noopener"><span style="color: #0000ff;"><strong>HACIENDO CLIC AQUI</strong></span>. </a></p>								</div>
				</div>
					</div>
		</div>
					</div>
		</section>
				<section class="elementor-section elementor-top-section elementor-element elementor-element-65f8937 elementor-section-boxed elementor-section-height-default elementor-section-height-default" data-id="65f8937" data-element_type="section" data-e-type="section">
						<div class="elementor-container elementor-column-gap-default">
					<div class="elementor-column elementor-col-100 elementor-top-column elementor-element elementor-element-06442b8" data-id="06442b8" data-element_type="column" data-e-type="column">
			<div class="elementor-widget-wrap elementor-element-populated">
						<div class="elementor-element elementor-element-8f5fb7d elementor-widget elementor-widget-text-editor" data-id="8f5fb7d" data-element_type="widget" data-e-type="widget" data-widget_type="text-editor.default">
				<div class="elementor-widget-container">
									<p>Espero que el tutorial de Photoshop sea funcional para ti y puedas aprender algo que a la vez puedas aplicar en otras composiciones.</p><p align="justify">Después de todo esta introducción, aquí puedes ver el tutorial y no dejes de compartir el post y darle «like» / «dedo arriba» al vídeo.</p><p align="justify"> </p><p align="justify"> </p><h6 class="single-post-title entry-title">«Tutorial Photoshop // Tu retrato con aspecto vectorizado retro»</h6><p align="justify"> </p>								</div>
				</div>
					</div>
		</div>
					</div>
		</section>
				<section class="elementor-section elementor-top-section elementor-element elementor-element-4d24a2e elementor-section-boxed elementor-section-height-default elementor-section-height-default" data-id="4d24a2e" data-element_type="section" data-e-type="section">
						<div class="elementor-container elementor-column-gap-default">
					<div class="elementor-column elementor-col-100 elementor-top-column elementor-element elementor-element-1cd2633" data-id="1cd2633" data-element_type="column" data-e-type="column">
			<div class="elementor-widget-wrap elementor-element-populated">
						<div class="elementor-element elementor-element-f6de5d4 elementor-widget elementor-widget-video" data-id="f6de5d4" data-element_type="widget" data-e-type="widget" data-settings="{&quot;youtube_url&quot;:&quot;https:\/\/youtu.be\/h1oBNmQEn7g&quot;,&quot;video_type&quot;:&quot;youtube&quot;,&quot;controls&quot;:&quot;yes&quot;}" data-widget_type="video.default">
				<div class="elementor-widget-container">
							<div class="elementor-wrapper elementor-open-inline">
			<div class="elementor-video"></div>		</div>
						</div>
				</div>
					</div>
		</div>
					</div>
		</section>
				<section class="elementor-section elementor-top-section elementor-element elementor-element-b82598e elementor-section-boxed elementor-section-height-default elementor-section-height-default" data-id="b82598e" data-element_type="section" data-e-type="section">
						<div class="elementor-container elementor-column-gap-default">
					<div class="elementor-column elementor-col-100 elementor-top-column elementor-element elementor-element-56153d8" data-id="56153d8" data-element_type="column" data-e-type="column">
			<div class="elementor-widget-wrap elementor-element-populated">
						<div class="elementor-element elementor-element-5927092 elementor-widget elementor-widget-text-editor" data-id="5927092" data-element_type="widget" data-e-type="widget" data-widget_type="text-editor.default">
				<div class="elementor-widget-container">
									<p>Recuerda también que posteo trabajos e información en  <a href="https://www.facebook.com/IldefonsoSeguraPage" target="_blank" rel="noopener"><strong><span style="color: #800000;">Facebook</span> </strong></a></p><p>Igualmente, si quieres ver mis tutoriales de <strong><span style="color: #800000;">wallpapers</span></strong>, puedes verlos haciendo <span style="color: #800000;"><a style="color: #800000;" href="https://ildefonsosegura.es/category/wallpaper/"><strong>CLIC</strong></a></span> pero no olvides comentar este post antes de irte. Gracias</p>								</div>
				</div>
					</div>
		</div>
					</div>
		</section>
				<section class="elementor-section elementor-top-section elementor-element elementor-element-742276ff elementor-section-full_width elementor-section-height-default elementor-section-height-default" data-id="742276ff" data-element_type="section" data-e-type="section">
						<div class="elementor-container elementor-column-gap-default">
					<div class="elementor-column elementor-col-100 elementor-top-column elementor-element elementor-element-261106a3" data-id="261106a3" data-element_type="column" data-e-type="column">
			<div class="elementor-widget-wrap elementor-element-populated">
						<div class="elementor-element elementor-element-37781cfc elementor-widget elementor-widget-text-editor" data-id="37781cfc" data-element_type="widget" data-e-type="widget" data-widget_type="text-editor.default">
				<div class="elementor-widget-container">
									<div><div align="center"><center><strong style="color: #ff0000;">Suscríbete a mi canal de Youtube:</strong></center><div><div><div align="center"><p><script src="https://apis.google.com/js/platform.js"></script></p><div class="g-ytsubscribe" data-channel="ildefonsosegura" data-layout="full" data-count="default"> </div></div></div><p> </p><p style="text-align: center;">No te lo pierdas y comparte tus trabajos en mi página de facebook (<span style="color: #0000ff;"><strong><a style="color: #0000ff;" href="http://www.facebook.com/IldefonsoSeguraPage" target="_blank" rel="noopener noreferrer">IldefonsoSeguraPage</a></strong></span>)<br />Espero que te guste y compartas el vídeo. No dejes de compartir este post.</p><p style="text-align: center;">Así es como me puedes ayudar 🙂 Gracias</p></div></div></div>								</div>
				</div>
					</div>
		</div>
					</div>
		</section>
				</div>La entrada <a href="https://ildefonsosegura.es/tutorial-photoshop-tu-retrato-con-aspecto-vectorizado-retro/">Tutorial Photoshop // Tu retrato con aspecto vectorizado retro</a> apareció primero en <a href="https://ildefonsosegura.es">Ildefonso Segura</a>.]]></content:encoded>
					
					<wfw:commentRss>https://ildefonsosegura.es/tutorial-photoshop-tu-retrato-con-aspecto-vectorizado-retro/feed/</wfw:commentRss>
			<slash:comments>0</slash:comments>
		
		
			</item>
		<item>
		<title>Póster estilo papercut (the Batman) con Photoshop</title>
		<link>https://ildefonsosegura.es/poster-estilo-papercut-the-batman-con-photoshop/</link>
					<comments>https://ildefonsosegura.es/poster-estilo-papercut-the-batman-con-photoshop/#respond</comments>
		
		<dc:creator><![CDATA[Ildefonso Segura]]></dc:creator>
		<pubDate>Sun, 12 Sep 2021 15:01:27 +0000</pubDate>
				<category><![CDATA[3D]]></category>
		<category><![CDATA[Editable]]></category>
		<category><![CDATA[Efectos]]></category>
		<category><![CDATA[Películas]]></category>
		<category><![CDATA[Photoshop]]></category>
		<category><![CDATA[Tutoriales]]></category>
		<category><![CDATA[Video]]></category>
		<category><![CDATA[Wallpaper]]></category>
		<category><![CDATA[adobe]]></category>
		<category><![CDATA[batman]]></category>
		<category><![CDATA[creatividad]]></category>
		<category><![CDATA[dark knight]]></category>
		<category><![CDATA[diseño]]></category>
		<category><![CDATA[efecto]]></category>
		<category><![CDATA[estilo]]></category>
		<category><![CDATA[ildefonsosegura]]></category>
		<category><![CDATA[layers style]]></category>
		<category><![CDATA[movie]]></category>
		<category><![CDATA[papercut]]></category>
		<category><![CDATA[photoshop]]></category>
		<category><![CDATA[ps]]></category>
		<category><![CDATA[tecnicas]]></category>
		<category><![CDATA[texto realista]]></category>
		<category><![CDATA[the batman]]></category>
		<category><![CDATA[tuto]]></category>
		<category><![CDATA[tutorial]]></category>
		<category><![CDATA[VIDEOTUTORIAL]]></category>
		<category><![CDATA[wallpaper]]></category>
		<category><![CDATA[wallpaper layers]]></category>
		<category><![CDATA[youtube]]></category>
		<guid isPermaLink="false">https://ildefonsosegura.es/?p=113810</guid>

					<description><![CDATA[<p>En este tutorial de Photoshop veremos como hacer un póster de la película The Batman con un estilo #PaperCut. Es decir, el aspecto del wallpaper es la superposición de capas que dan un aspecto 3D a la composición al conseguir una profundidad simulada alejando cada capa del objetivo de la cámara. Te dejo el post [&#8230;]</p>
La entrada <a href="https://ildefonsosegura.es/poster-estilo-papercut-the-batman-con-photoshop/">Póster estilo papercut (the Batman) con Photoshop</a> apareció primero en <a href="https://ildefonsosegura.es">Ildefonso Segura</a>.]]></description>
										<content:encoded><![CDATA[<div data-elementor-type="wp-post" data-elementor-id="113810" class="elementor elementor-113810">
						<section class="elementor-section elementor-top-section elementor-element elementor-element-b7471a2 elementor-section-boxed elementor-section-height-default elementor-section-height-default" data-id="b7471a2" data-element_type="section" data-e-type="section">
						<div class="elementor-container elementor-column-gap-default">
					<div class="elementor-column elementor-col-100 elementor-top-column elementor-element elementor-element-5e938f2" data-id="5e938f2" data-element_type="column" data-e-type="column">
			<div class="elementor-widget-wrap elementor-element-populated">
						<div class="elementor-element elementor-element-7cf2e12 elementor-widget elementor-widget-text-editor" data-id="7cf2e12" data-element_type="widget" data-e-type="widget" data-widget_type="text-editor.default">
				<div class="elementor-widget-container">
									<p align="justify">En este tutorial de Photoshop veremos como hacer un póster de la película The Batman con un estilo #PaperCut. Es decir, el aspecto del wallpaper es la superposición de capas que dan un aspecto 3D a la composición al conseguir una profundidad simulada alejando cada capa del objetivo de la cámara.</p><p align="justify">Te dejo el post que hice en mi instagram para que veas el proceso de confección por capas:</p>								</div>
				</div>
					</div>
		</div>
					</div>
		</section>
				<section class="elementor-section elementor-top-section elementor-element elementor-element-d394546 elementor-section-boxed elementor-section-height-default elementor-section-height-default" data-id="d394546" data-element_type="section" data-e-type="section">
						<div class="elementor-container elementor-column-gap-default">
					<div class="elementor-column elementor-col-100 elementor-top-column elementor-element elementor-element-c43ac8a" data-id="c43ac8a" data-element_type="column" data-e-type="column">
			<div class="elementor-widget-wrap elementor-element-populated">
						<div class="elementor-element elementor-element-ef5a51f elementor-widget elementor-widget-html" data-id="ef5a51f" data-element_type="widget" data-e-type="widget" data-widget_type="html.default">
				<div class="elementor-widget-container">
					<blockquote class="instagram-media" data-instgrm-captioned data-instgrm-permalink="https://www.instagram.com/p/CTrXLB0I7wj/?utm_source=ig_embed&amp;utm_campaign=loading" data-instgrm-version="13" style=" background:#FFF; border:0; border-radius:3px; box-shadow:0 0 1px 0 rgba(0,0,0,0.5),0 1px 10px 0 rgba(0,0,0,0.15); margin: 1px; max-width:540px; min-width:326px; padding:0; width:99.375%; width:-webkit-calc(100% - 2px); width:calc(100% - 2px);"><div style="padding:16px;"> <a href="https://www.instagram.com/p/CTrXLB0I7wj/?utm_source=ig_embed&amp;utm_campaign=loading" style=" background:#FFFFFF; line-height:0; padding:0 0; text-align:center; text-decoration:none; width:100%;" target="_blank"> <div style=" display: flex; flex-direction: row; align-items: center;"> <div style="background-color: #F4F4F4; border-radius: 50%; flex-grow: 0; height: 40px; margin-right: 14px; width: 40px;"></div> <div style="display: flex; flex-direction: column; flex-grow: 1; justify-content: center;"> <div style=" background-color: #F4F4F4; border-radius: 4px; flex-grow: 0; height: 14px; margin-bottom: 6px; width: 100px;"></div> <div style=" background-color: #F4F4F4; border-radius: 4px; flex-grow: 0; height: 14px; width: 60px;"></div></div></div><div style="padding: 19% 0;"></div> <div style="display:block; height:50px; margin:0 auto 12px; width:50px;"><svg width="50px" height="50px" viewBox="0 0 60 60" version="1.1" xmlns="https://www.w3.org/2000/svg" xmlns:xlink="https://www.w3.org/1999/xlink"><g stroke="none" stroke-width="1" fill="none" fill-rule="evenodd"><g transform="translate(-511.000000, -20.000000)" fill="#000000"><g><path d="M556.869,30.41 C554.814,30.41 553.148,32.076 553.148,34.131 C553.148,36.186 554.814,37.852 556.869,37.852 C558.924,37.852 560.59,36.186 560.59,34.131 C560.59,32.076 558.924,30.41 556.869,30.41 M541,60.657 C535.114,60.657 530.342,55.887 530.342,50 C530.342,44.114 535.114,39.342 541,39.342 C546.887,39.342 551.658,44.114 551.658,50 C551.658,55.887 546.887,60.657 541,60.657 M541,33.886 C532.1,33.886 524.886,41.1 524.886,50 C524.886,58.899 532.1,66.113 541,66.113 C549.9,66.113 557.115,58.899 557.115,50 C557.115,41.1 549.9,33.886 541,33.886 M565.378,62.101 C565.244,65.022 564.756,66.606 564.346,67.663 C563.803,69.06 563.154,70.057 562.106,71.106 C561.058,72.155 560.06,72.803 558.662,73.347 C557.607,73.757 556.021,74.244 553.102,74.378 C549.944,74.521 548.997,74.552 541,74.552 C533.003,74.552 532.056,74.521 528.898,74.378 C525.979,74.244 524.393,73.757 523.338,73.347 C521.94,72.803 520.942,72.155 519.894,71.106 C518.846,70.057 518.197,69.06 517.654,67.663 C517.244,66.606 516.755,65.022 516.623,62.101 C516.479,58.943 516.448,57.996 516.448,50 C516.448,42.003 516.479,41.056 516.623,37.899 C516.755,34.978 517.244,33.391 517.654,32.338 C518.197,30.938 518.846,29.942 519.894,28.894 C520.942,27.846 521.94,27.196 523.338,26.654 C524.393,26.244 525.979,25.756 528.898,25.623 C532.057,25.479 533.004,25.448 541,25.448 C548.997,25.448 549.943,25.479 553.102,25.623 C556.021,25.756 557.607,26.244 558.662,26.654 C560.06,27.196 561.058,27.846 562.106,28.894 C563.154,29.942 563.803,30.938 564.346,32.338 C564.756,33.391 565.244,34.978 565.378,37.899 C565.522,41.056 565.552,42.003 565.552,50 C565.552,57.996 565.522,58.943 565.378,62.101 M570.82,37.631 C570.674,34.438 570.167,32.258 569.425,30.349 C568.659,28.377 567.633,26.702 565.965,25.035 C564.297,23.368 562.623,22.342 560.652,21.575 C558.743,20.834 556.562,20.326 553.369,20.18 C550.169,20.033 549.148,20 541,20 C532.853,20 531.831,20.033 528.631,20.18 C525.438,20.326 523.257,20.834 521.349,21.575 C519.376,22.342 517.703,23.368 516.035,25.035 C514.368,26.702 513.342,28.377 512.574,30.349 C511.834,32.258 511.326,34.438 511.181,37.631 C511.035,40.831 511,41.851 511,50 C511,58.147 511.035,59.17 511.181,62.369 C511.326,65.562 511.834,67.743 512.574,69.651 C513.342,71.625 514.368,73.296 516.035,74.965 C517.703,76.634 519.376,77.658 521.349,78.425 C523.257,79.167 525.438,79.673 528.631,79.82 C531.831,79.965 532.853,80.001 541,80.001 C549.148,80.001 550.169,79.965 553.369,79.82 C556.562,79.673 558.743,79.167 560.652,78.425 C562.623,77.658 564.297,76.634 565.965,74.965 C567.633,73.296 568.659,71.625 569.425,69.651 C570.167,67.743 570.674,65.562 570.82,62.369 C570.966,59.17 571,58.147 571,50 C571,41.851 570.966,40.831 570.82,37.631"></path></g></g></g></svg></div><div style="padding-top: 8px;"> <div style=" color:#3897f0; font-family:Arial,sans-serif; font-size:14px; font-style:normal; font-weight:550; line-height:18px;"> Ver esta publicación en Instagram</div></div><div style="padding: 12.5% 0;"></div> <div style="display: flex; flex-direction: row; margin-bottom: 14px; align-items: center;"><div> <div style="background-color: #F4F4F4; border-radius: 50%; height: 12.5px; width: 12.5px; transform: translateX(0px) translateY(7px);"></div> <div style="background-color: #F4F4F4; height: 12.5px; transform: rotate(-45deg) translateX(3px) translateY(1px); width: 12.5px; flex-grow: 0; margin-right: 14px; margin-left: 2px;"></div> <div style="background-color: #F4F4F4; border-radius: 50%; height: 12.5px; width: 12.5px; transform: translateX(9px) translateY(-18px);"></div></div><div style="margin-left: 8px;"> <div style=" background-color: #F4F4F4; border-radius: 50%; flex-grow: 0; height: 20px; width: 20px;"></div> <div style=" width: 0; height: 0; border-top: 2px solid transparent; border-left: 6px solid #f4f4f4; border-bottom: 2px solid transparent; transform: translateX(16px) translateY(-4px) rotate(30deg)"></div></div><div style="margin-left: auto;"> <div style=" width: 0px; border-top: 8px solid #F4F4F4; border-right: 8px solid transparent; transform: translateY(16px);"></div> <div style=" background-color: #F4F4F4; flex-grow: 0; height: 12px; width: 16px; transform: translateY(-4px);"></div> <div style=" width: 0; height: 0; border-top: 8px solid #F4F4F4; border-left: 8px solid transparent; transform: translateY(-4px) translateX(8px);"></div></div></div> <div style="display: flex; flex-direction: column; flex-grow: 1; justify-content: center; margin-bottom: 24px;"> <div style=" background-color: #F4F4F4; border-radius: 4px; flex-grow: 0; height: 14px; margin-bottom: 6px; width: 224px;"></div> <div style=" background-color: #F4F4F4; border-radius: 4px; flex-grow: 0; height: 14px; width: 144px;"></div></div></a><p style=" color:#c9c8cd; font-family:Arial,sans-serif; font-size:14px; line-height:17px; margin-bottom:0; margin-top:8px; overflow:hidden; padding:8px 0 7px; text-align:center; text-overflow:ellipsis; white-space:nowrap;"><a href="https://www.instagram.com/p/CTrXLB0I7wj/?utm_source=ig_embed&amp;utm_campaign=loading" style=" color:#c9c8cd; font-family:Arial,sans-serif; font-size:14px; font-style:normal; font-weight:normal; line-height:17px; text-decoration:none;" target="_blank">Una publicación compartida de Ildefonso Segura (@ildefonsosegura)</a></p></div></blockquote> <script async src="//www.instagram.com/embed.js"></script>				</div>
				</div>
					</div>
		</div>
					</div>
		</section>
				<section class="elementor-section elementor-top-section elementor-element elementor-element-acfc913 elementor-section-boxed elementor-section-height-default elementor-section-height-default" data-id="acfc913" data-element_type="section" data-e-type="section">
						<div class="elementor-container elementor-column-gap-default">
					<div class="elementor-column elementor-col-100 elementor-top-column elementor-element elementor-element-03b0344" data-id="03b0344" data-element_type="column" data-e-type="column">
			<div class="elementor-widget-wrap elementor-element-populated">
						<div class="elementor-element elementor-element-af4e04c elementor-widget elementor-widget-text-editor" data-id="af4e04c" data-element_type="widget" data-e-type="widget" data-widget_type="text-editor.default">
				<div class="elementor-widget-container">
									<p align="justify">Te dejo mi referencia en Instagram para que chequees este post y otros que te pueden interesar <a href="http://instagram.com/ildefonsosegura" target="_blank" rel="noopener"><span style="color: #800000;"><strong>INSTAGRAM DE @IldefonsoSegura</strong></span></a></p>								</div>
				</div>
				<div class="elementor-element elementor-element-e35cdaf elementor-widget-divider--view-line_icon elementor-view-default elementor-widget-divider--element-align-center elementor-widget elementor-widget-divider" data-id="e35cdaf" data-element_type="widget" data-e-type="widget" data-widget_type="divider.default">
				<div class="elementor-widget-container">
							<div class="elementor-divider">
			<span class="elementor-divider-separator">
							<div class="elementor-icon elementor-divider__element">
					<i aria-hidden="true" class="fas fa-star"></i></div>
						</span>
		</div>
						</div>
				</div>
					</div>
		</div>
					</div>
		</section>
				<section class="elementor-section elementor-top-section elementor-element elementor-element-8b3b319 elementor-section-boxed elementor-section-height-default elementor-section-height-default" data-id="8b3b319" data-element_type="section" data-e-type="section">
						<div class="elementor-container elementor-column-gap-default">
					<div class="elementor-column elementor-col-100 elementor-top-column elementor-element elementor-element-903e236" data-id="903e236" data-element_type="column" data-e-type="column">
			<div class="elementor-widget-wrap elementor-element-populated">
						<div class="elementor-element elementor-element-52d8d69 elementor-widget elementor-widget-text-editor" data-id="52d8d69" data-element_type="widget" data-e-type="widget" data-widget_type="text-editor.default">
				<div class="elementor-widget-container">
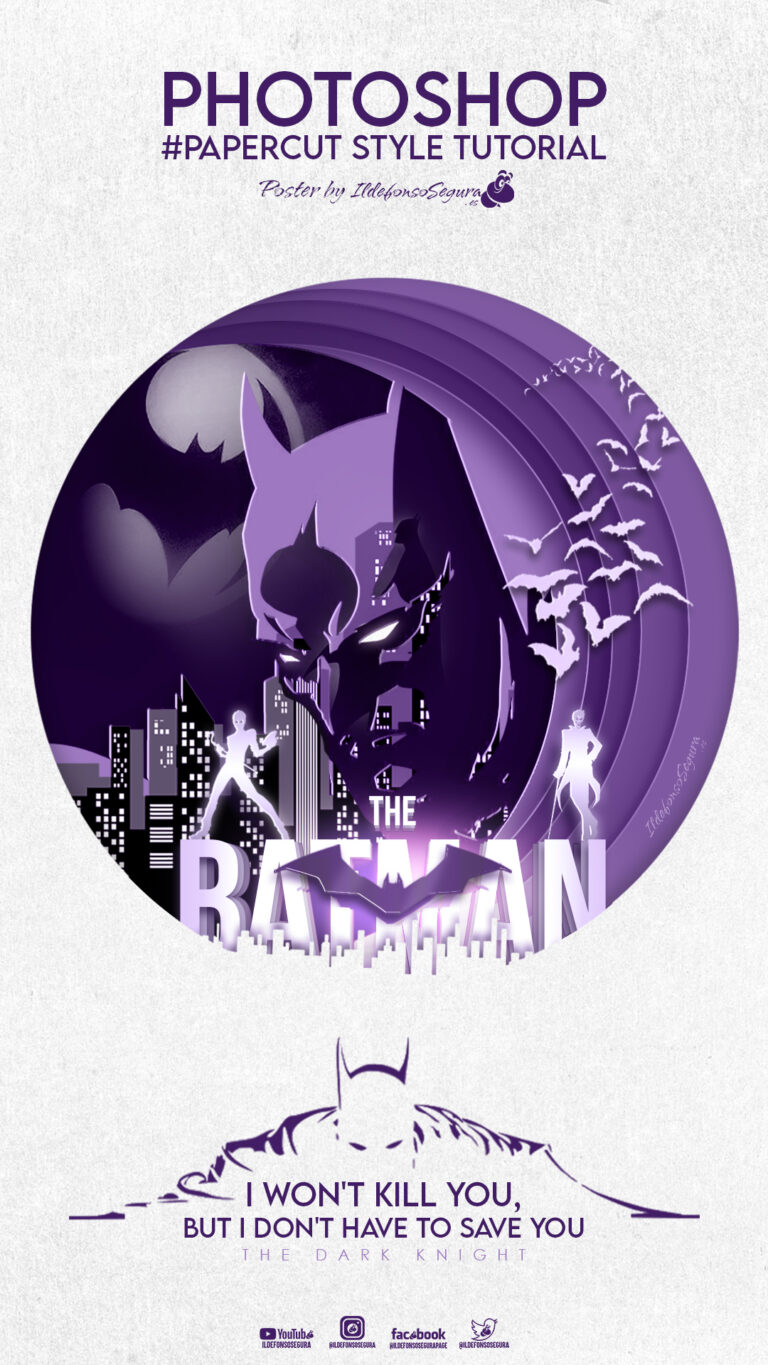
									<p align="justify">El resultado del póster o wallpaper es alucinante dado que se obtiene con la composición de imágenes simples de texto y personajes de la película:</p>								</div>
				</div>
					</div>
		</div>
					</div>
		</section>
				<section class="elementor-section elementor-top-section elementor-element elementor-element-1f0d10c elementor-section-boxed elementor-section-height-default elementor-section-height-default" data-id="1f0d10c" data-element_type="section" data-e-type="section">
						<div class="elementor-container elementor-column-gap-default">
					<div class="elementor-column elementor-col-100 elementor-top-column elementor-element elementor-element-6007654" data-id="6007654" data-element_type="column" data-e-type="column">
			<div class="elementor-widget-wrap elementor-element-populated">
						<div class="elementor-element elementor-element-1b72fee elementor-widget elementor-widget-image" data-id="1b72fee" data-element_type="widget" data-e-type="widget" data-widget_type="image.default">
				<div class="elementor-widget-container">
															<img decoding="async" width="768" height="1365" src="https://ildefonsosegura.es/wp-content/uploads/PaperCut-style-Stories-Instagram-768x1365.jpg" class="attachment-medium_large size-medium_large wp-image-113820" alt="" srcset="https://ildefonsosegura.es/wp-content/uploads/PaperCut-style-Stories-Instagram-768x1365.jpg 768w, https://ildefonsosegura.es/wp-content/uploads/PaperCut-style-Stories-Instagram-169x300.jpg 169w, https://ildefonsosegura.es/wp-content/uploads/PaperCut-style-Stories-Instagram-576x1024.jpg 576w, https://ildefonsosegura.es/wp-content/uploads/PaperCut-style-Stories-Instagram-864x1536.jpg 864w, https://ildefonsosegura.es/wp-content/uploads/PaperCut-style-Stories-Instagram.jpg 1080w" sizes="(max-width: 768px) 100vw, 768px" />															</div>
				</div>
					</div>
		</div>
					</div>
		</section>
				<section class="elementor-section elementor-top-section elementor-element elementor-element-4ecb01f elementor-section-boxed elementor-section-height-default elementor-section-height-default" data-id="4ecb01f" data-element_type="section" data-e-type="section">
						<div class="elementor-container elementor-column-gap-default">
					<div class="elementor-column elementor-col-100 elementor-top-column elementor-element elementor-element-00dfe98" data-id="00dfe98" data-element_type="column" data-e-type="column">
			<div class="elementor-widget-wrap elementor-element-populated">
						<div class="elementor-element elementor-element-a2d52fd elementor-widget elementor-widget-text-editor" data-id="a2d52fd" data-element_type="widget" data-e-type="widget" data-widget_type="text-editor.default">
				<div class="elementor-widget-container">
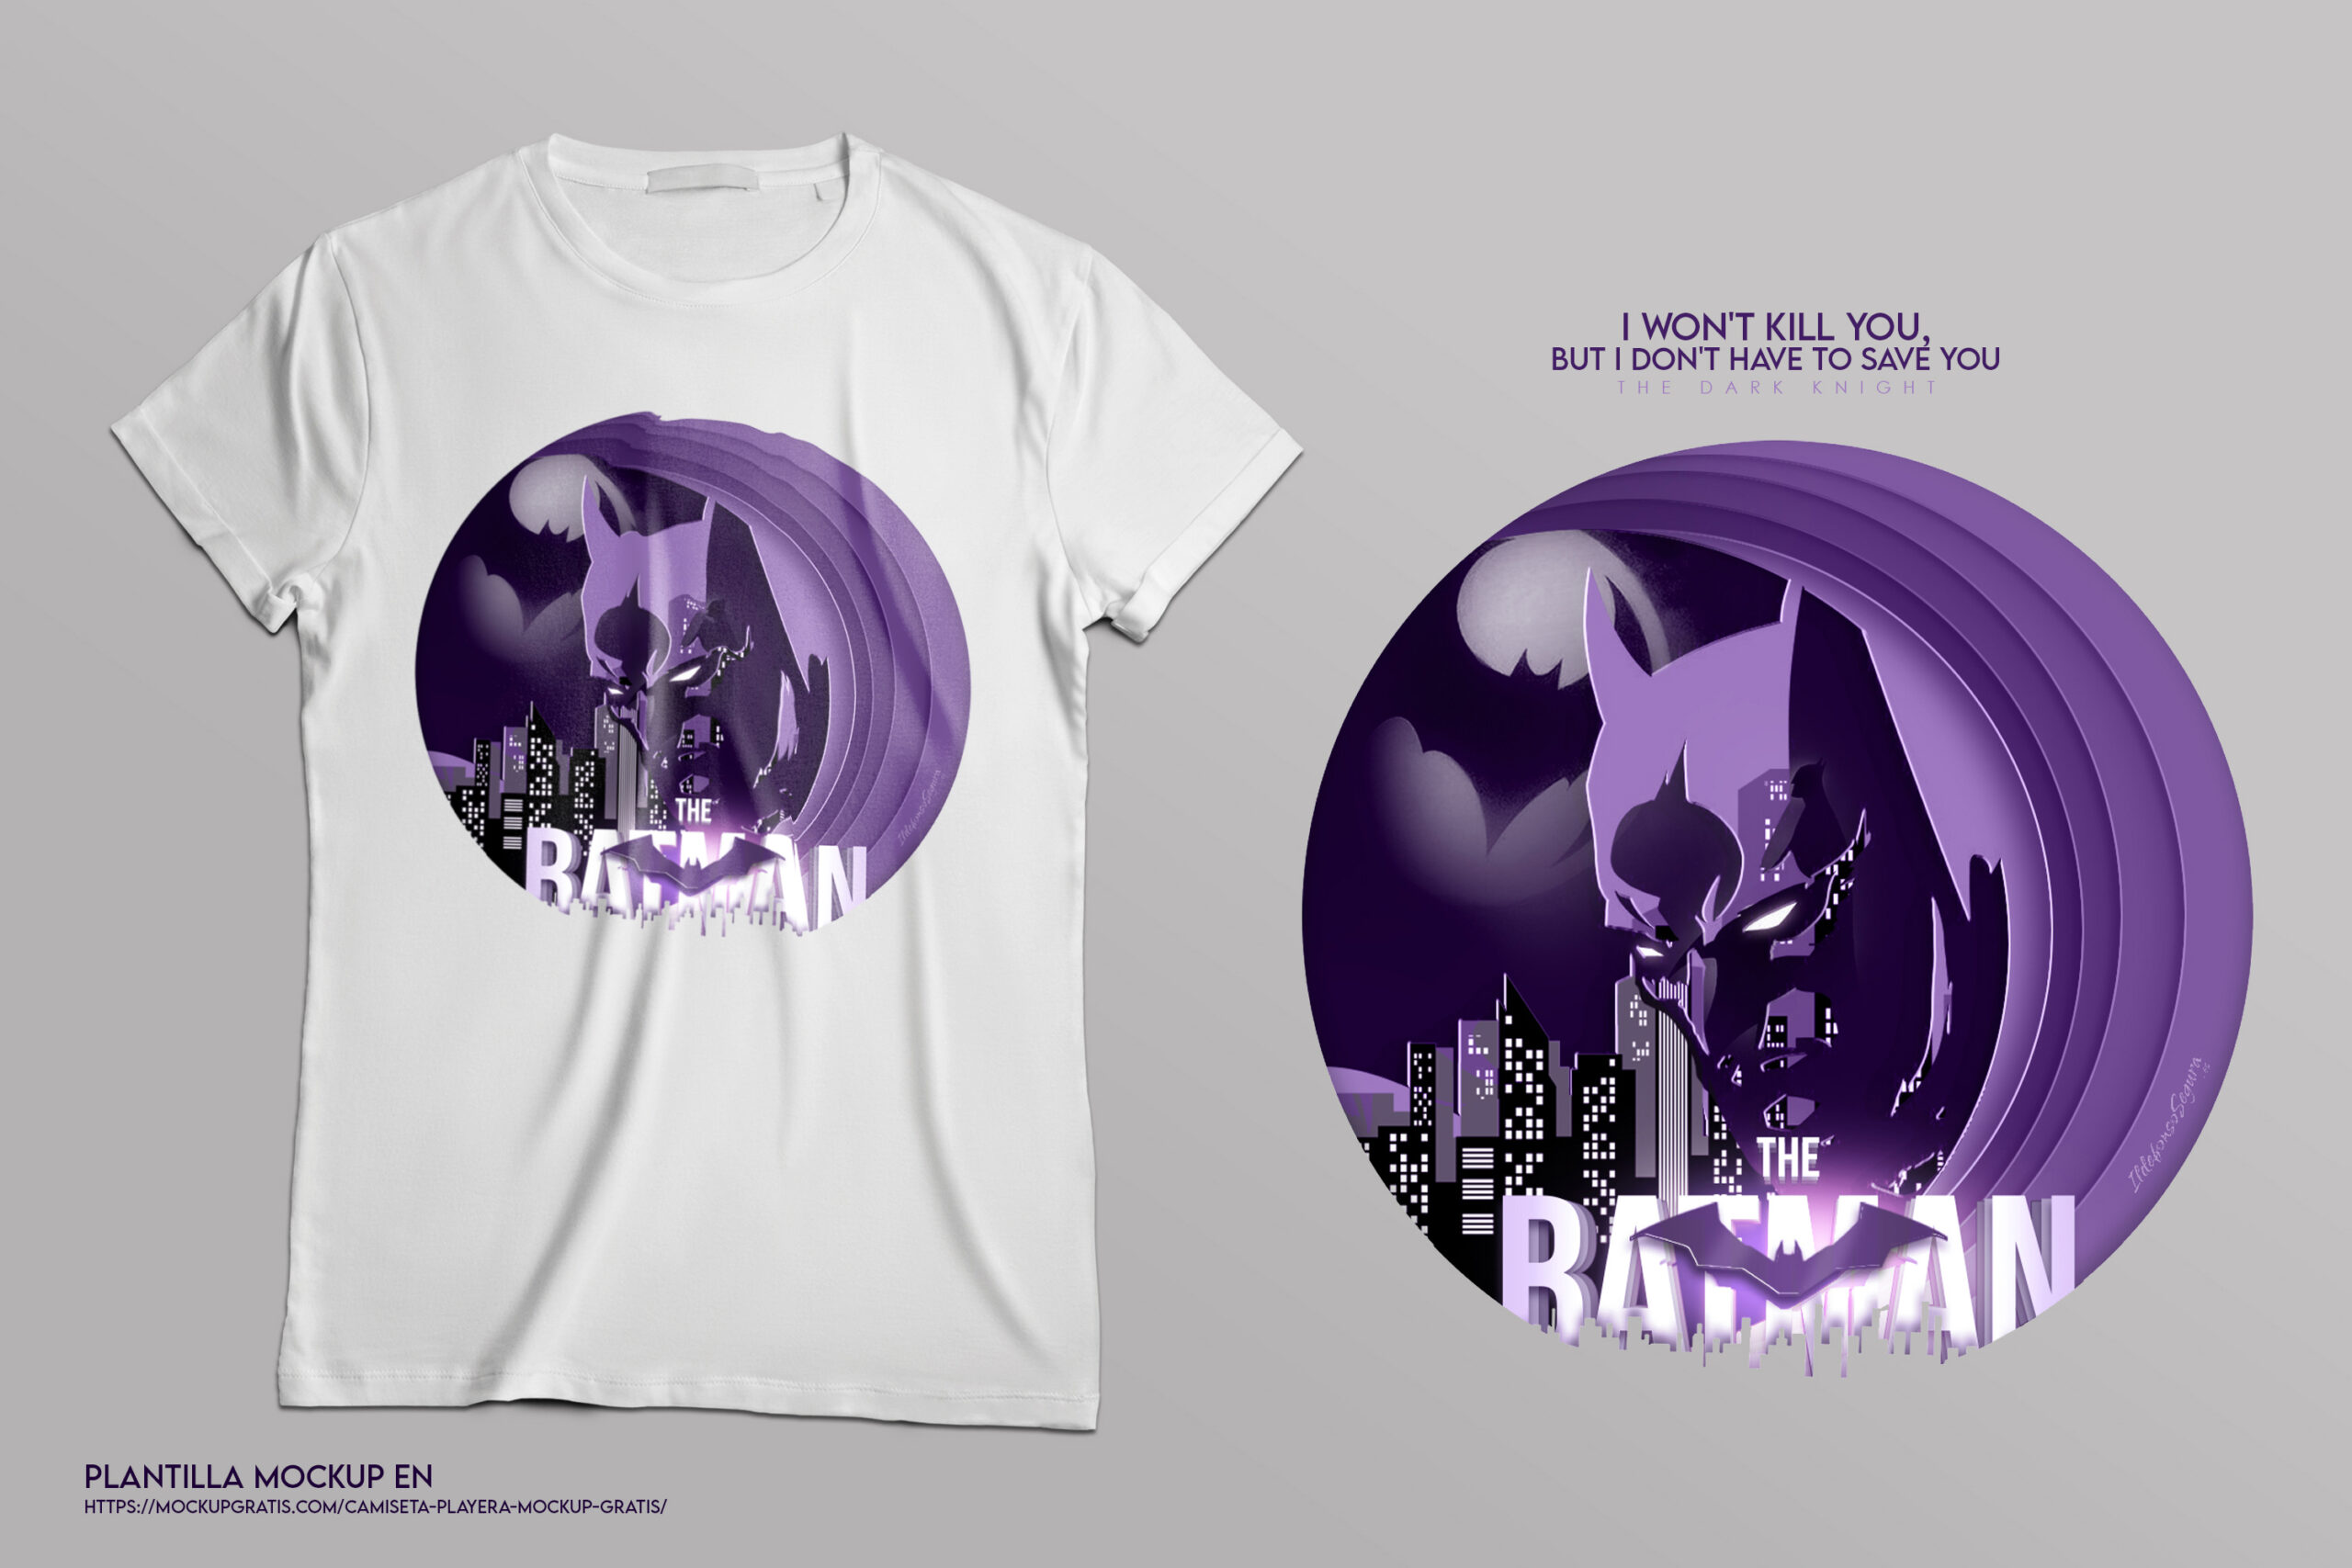
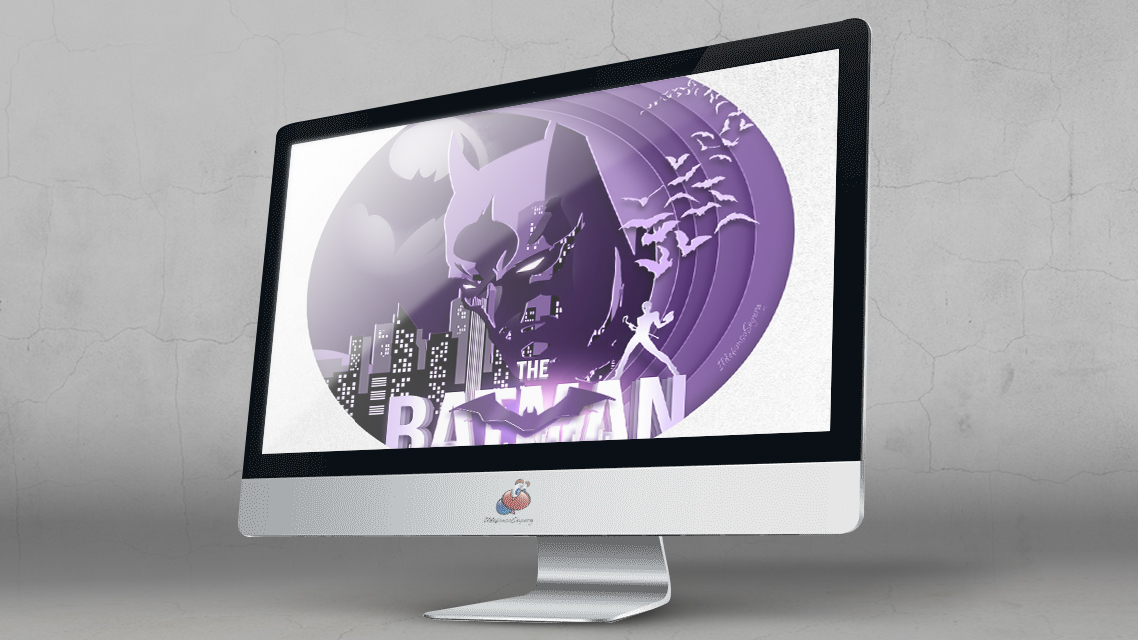
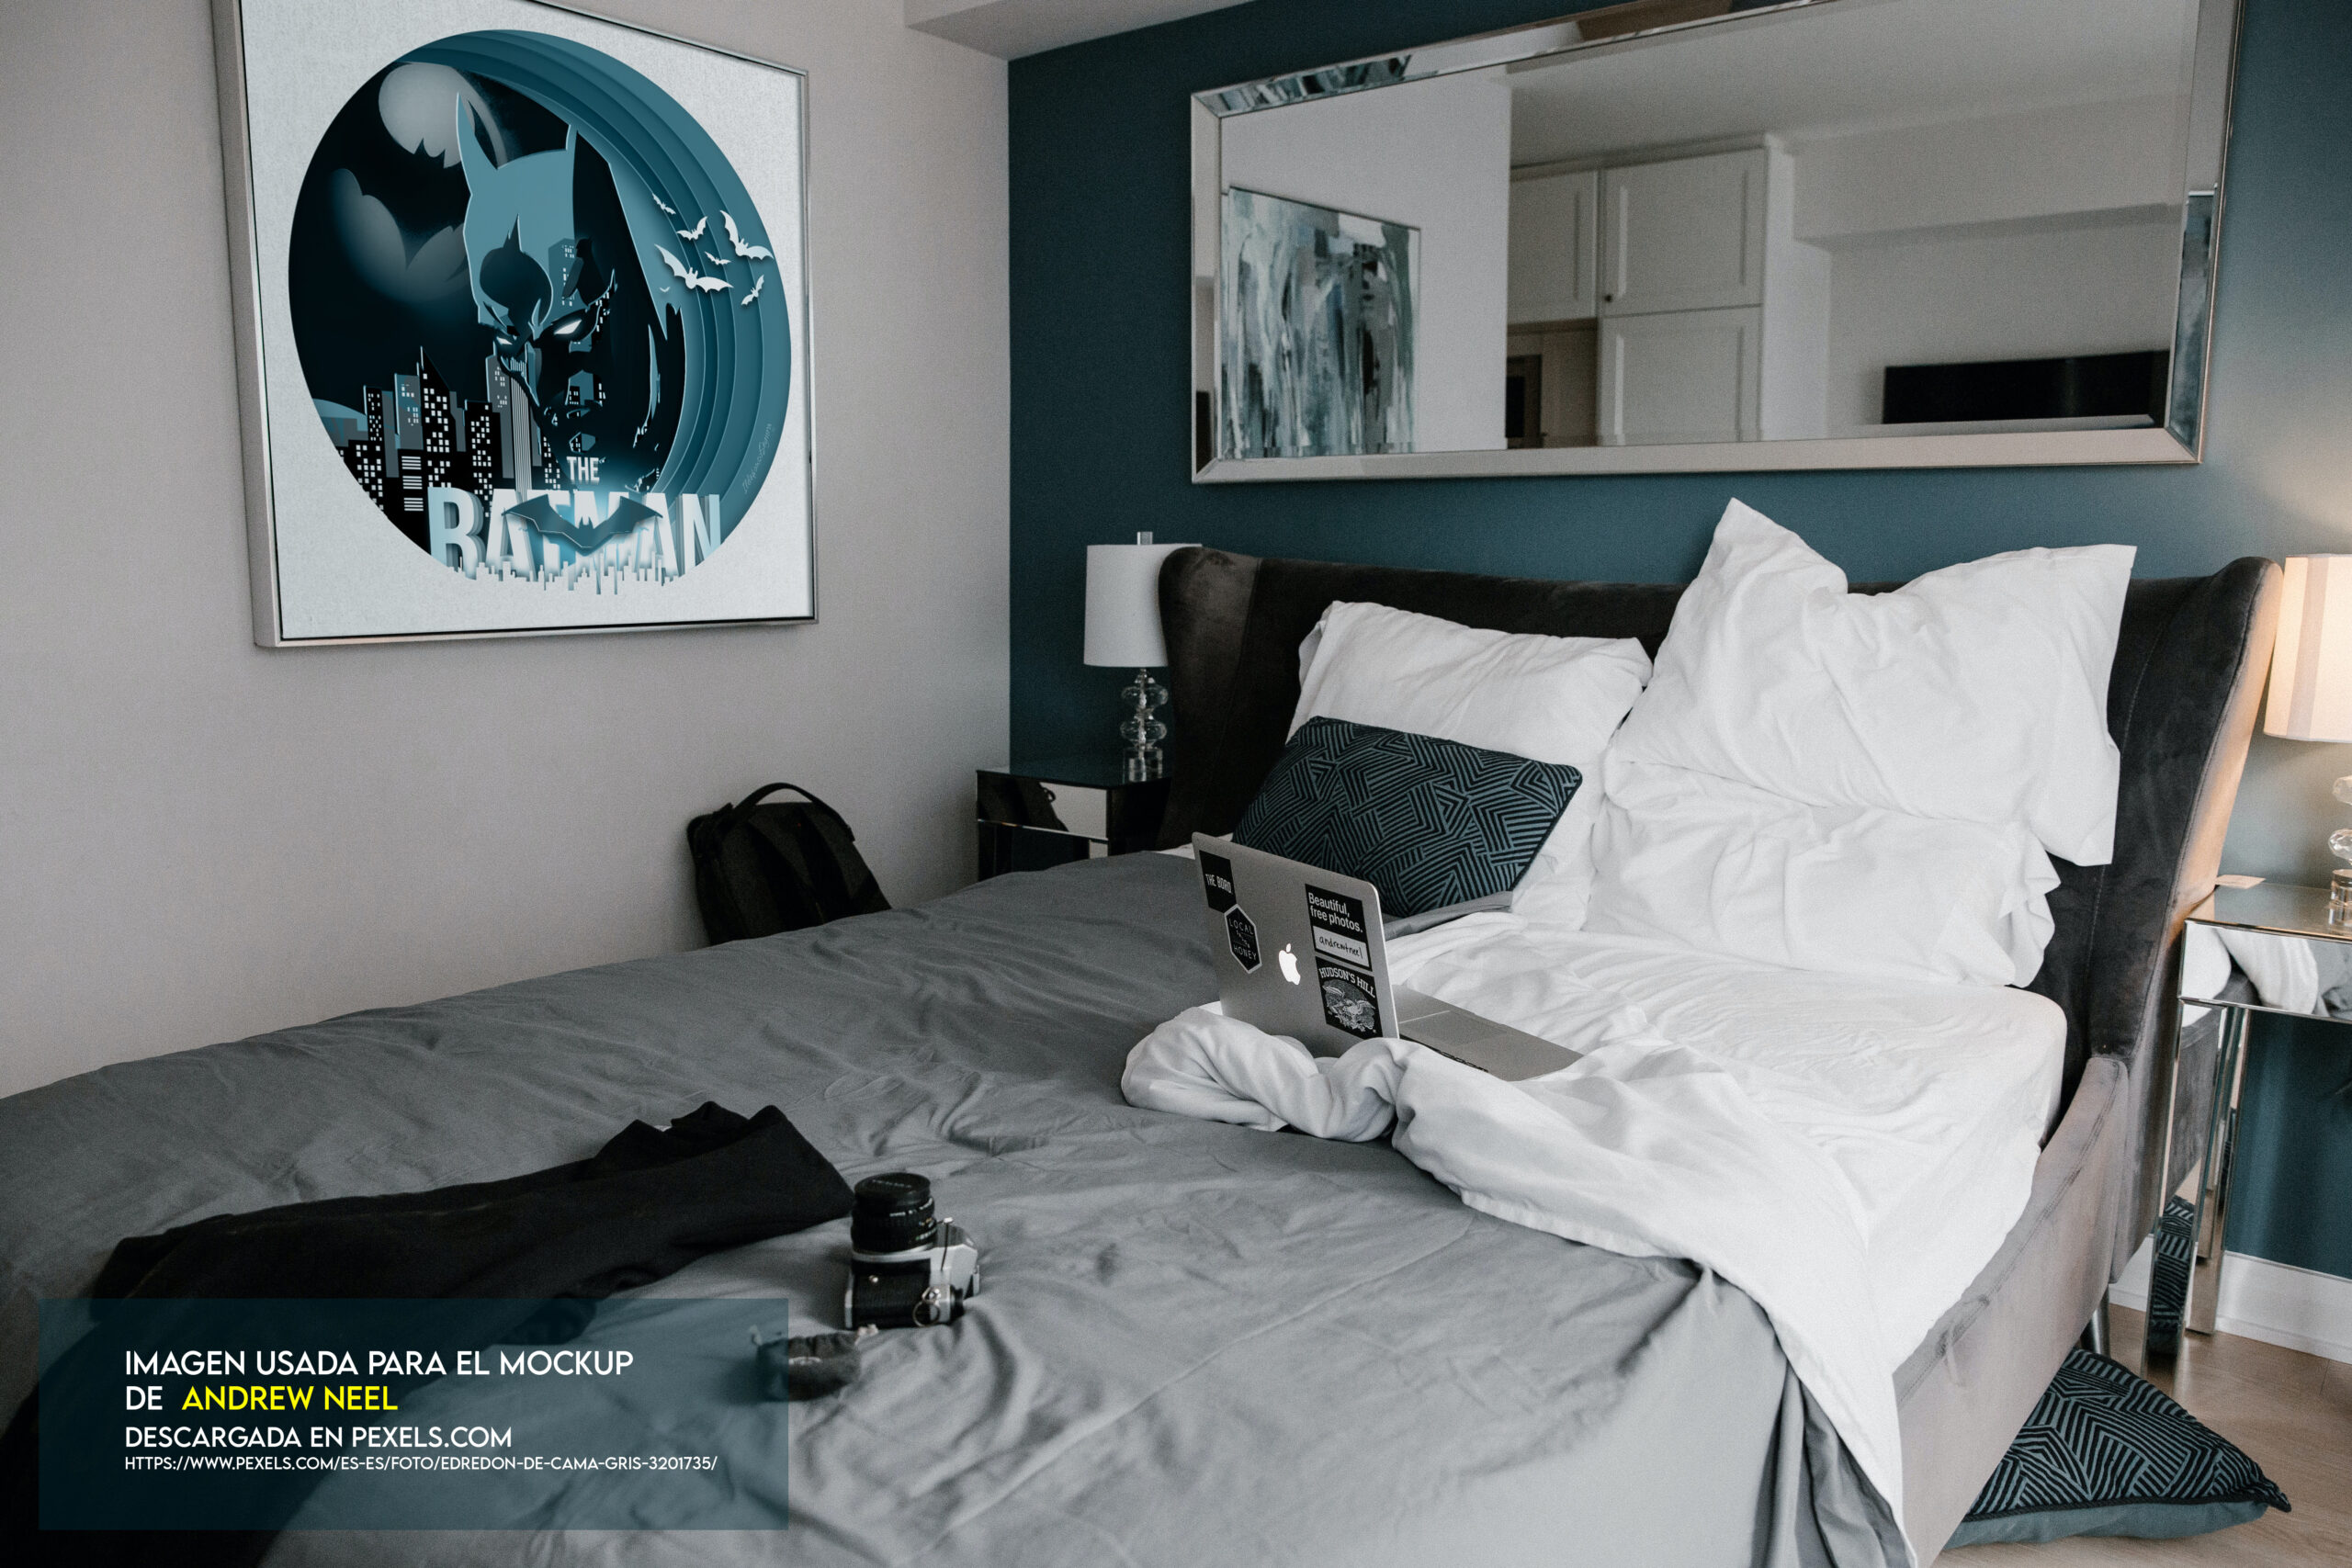
									<p align="justify">Puedes usar el resultado para aplicarlo a diferentes. Por todo esto, aquí te muestro unos ejemplos (Mockups) para que veas el alcance de la aplicación en decoración, camisetas, uso digital, &#8230; </p><p align="justify">Haz clic en una imagen y podrás ver todas con un tamaño mayor. Así podrás apreciar los detalles:</p>								</div>
				</div>
					</div>
		</div>
					</div>
		</section>
				<section class="elementor-section elementor-top-section elementor-element elementor-element-2ca6aa6 elementor-section-boxed elementor-section-height-default elementor-section-height-default" data-id="2ca6aa6" data-element_type="section" data-e-type="section">
						<div class="elementor-container elementor-column-gap-default">
					<div class="elementor-column elementor-col-100 elementor-top-column elementor-element elementor-element-e61067e" data-id="e61067e" data-element_type="column" data-e-type="column">
			<div class="elementor-widget-wrap elementor-element-populated">
						<div class="elementor-element elementor-element-f303bb3 elementor-arrows-position-inside elementor-pagination-position-outside elementor-widget elementor-widget-image-carousel" data-id="f303bb3" data-element_type="widget" data-e-type="widget" data-settings="{&quot;slides_to_show&quot;:&quot;5&quot;,&quot;image_spacing_custom&quot;:{&quot;unit&quot;:&quot;px&quot;,&quot;size&quot;:10,&quot;sizes&quot;:[]},&quot;navigation&quot;:&quot;both&quot;,&quot;autoplay&quot;:&quot;yes&quot;,&quot;pause_on_hover&quot;:&quot;yes&quot;,&quot;pause_on_interaction&quot;:&quot;yes&quot;,&quot;autoplay_speed&quot;:5000,&quot;infinite&quot;:&quot;yes&quot;,&quot;speed&quot;:500,&quot;image_spacing_custom_tablet&quot;:{&quot;unit&quot;:&quot;px&quot;,&quot;size&quot;:&quot;&quot;,&quot;sizes&quot;:[]},&quot;image_spacing_custom_mobile&quot;:{&quot;unit&quot;:&quot;px&quot;,&quot;size&quot;:&quot;&quot;,&quot;sizes&quot;:[]}}" data-widget_type="image-carousel.default">
				<div class="elementor-widget-container">
							<div class="elementor-image-carousel-wrapper swiper" role="region" aria-roledescription="carousel" aria-label="Carrusel de imágenes" dir="ltr">
			<div class="elementor-image-carousel swiper-wrapper" aria-live="off">
								<div class="swiper-slide" role="group" aria-roledescription="slide" aria-label="1 de 6"><a data-elementor-open-lightbox="yes" data-elementor-lightbox-slideshow="f303bb3" data-elementor-lightbox-title="Aplicacion camiseta batman 1" data-e-action-hash="#elementor-action%3Aaction%3Dlightbox%26settings%3DeyJpZCI6MTEzODE0LCJ1cmwiOiJodHRwczpcL1wvaWxkZWZvbnNvc2VndXJhLmVzXC93cC1jb250ZW50XC91cGxvYWRzXC9BcGxpY2FjaW9uLWNhbWlzZXRhLWJhdG1hbi0xLXNjYWxlZC5qcGciLCJzbGlkZXNob3ciOiJmMzAzYmIzIn0%3D" href="https://ildefonsosegura.es/wp-content/uploads/Aplicacion-camiseta-batman-1-scaled.jpg"><figure class="swiper-slide-inner"><img decoding="async" class="swiper-slide-image" src="https://ildefonsosegura.es/wp-content/uploads/Aplicacion-camiseta-batman-1-150x150.jpg" alt="Aplicacion camiseta batman 1" /></figure></a></div><div class="swiper-slide" role="group" aria-roledescription="slide" aria-label="2 de 6"><a data-elementor-open-lightbox="yes" data-elementor-lightbox-slideshow="f303bb3" data-elementor-lightbox-title="Aplicacion PC batman" data-e-action-hash="#elementor-action%3Aaction%3Dlightbox%26settings%3DeyJpZCI6MTEzODE1LCJ1cmwiOiJodHRwczpcL1wvaWxkZWZvbnNvc2VndXJhLmVzXC93cC1jb250ZW50XC91cGxvYWRzXC9BcGxpY2FjaW9uLVBDLWJhdG1hbi5qcGciLCJzbGlkZXNob3ciOiJmMzAzYmIzIn0%3D" href="https://ildefonsosegura.es/wp-content/uploads/Aplicacion-PC-batman.jpg"><figure class="swiper-slide-inner"><img decoding="async" class="swiper-slide-image" src="https://ildefonsosegura.es/wp-content/uploads/Aplicacion-PC-batman-150x150.jpg" alt="Aplicacion PC batman" /></figure></a></div><div class="swiper-slide" role="group" aria-roledescription="slide" aria-label="3 de 6"><a data-elementor-open-lightbox="yes" data-elementor-lightbox-slideshow="f303bb3" data-elementor-lightbox-title="Habitacion 3" data-e-action-hash="#elementor-action%3Aaction%3Dlightbox%26settings%3DeyJpZCI6MTEzODE2LCJ1cmwiOiJodHRwczpcL1wvaWxkZWZvbnNvc2VndXJhLmVzXC93cC1jb250ZW50XC91cGxvYWRzXC9IYWJpdGFjaW9uLTMuanBnIiwic2xpZGVzaG93IjoiZjMwM2JiMyJ9" href="https://ildefonsosegura.es/wp-content/uploads/Habitacion-3.jpg"><figure class="swiper-slide-inner"><img decoding="async" class="swiper-slide-image" src="https://ildefonsosegura.es/wp-content/uploads/Habitacion-3-150x150.jpg" alt="Habitacion 3" /></figure></a></div><div class="swiper-slide" role="group" aria-roledescription="slide" aria-label="4 de 6"><a data-elementor-open-lightbox="yes" data-elementor-lightbox-slideshow="f303bb3" data-elementor-lightbox-title="Habitacion 6" data-e-action-hash="#elementor-action%3Aaction%3Dlightbox%26settings%3DeyJpZCI6MTEzODE3LCJ1cmwiOiJodHRwczpcL1wvaWxkZWZvbnNvc2VndXJhLmVzXC93cC1jb250ZW50XC91cGxvYWRzXC9IYWJpdGFjaW9uLTYuanBnIiwic2xpZGVzaG93IjoiZjMwM2JiMyJ9" href="https://ildefonsosegura.es/wp-content/uploads/Habitacion-6.jpg"><figure class="swiper-slide-inner"><img decoding="async" class="swiper-slide-image" src="https://ildefonsosegura.es/wp-content/uploads/Habitacion-6-150x150.jpg" alt="Habitacion 6" /></figure></a></div><div class="swiper-slide" role="group" aria-roledescription="slide" aria-label="5 de 6"><a data-elementor-open-lightbox="yes" data-elementor-lightbox-slideshow="f303bb3" data-elementor-lightbox-title="Habitacion 7" data-e-action-hash="#elementor-action%3Aaction%3Dlightbox%26settings%3DeyJpZCI6MTEzODE4LCJ1cmwiOiJodHRwczpcL1wvaWxkZWZvbnNvc2VndXJhLmVzXC93cC1jb250ZW50XC91cGxvYWRzXC9IYWJpdGFjaW9uLTctc2NhbGVkLmpwZyIsInNsaWRlc2hvdyI6ImYzMDNiYjMifQ%3D%3D" href="https://ildefonsosegura.es/wp-content/uploads/Habitacion-7-scaled.jpg"><figure class="swiper-slide-inner"><img decoding="async" class="swiper-slide-image" src="https://ildefonsosegura.es/wp-content/uploads/Habitacion-7-150x150.jpg" alt="Habitacion 7" /></figure></a></div><div class="swiper-slide" role="group" aria-roledescription="slide" aria-label="6 de 6"><a data-elementor-open-lightbox="yes" data-elementor-lightbox-slideshow="f303bb3" data-elementor-lightbox-title="Iphone mockup Batman" data-e-action-hash="#elementor-action%3Aaction%3Dlightbox%26settings%3DeyJpZCI6MTEzODE5LCJ1cmwiOiJodHRwczpcL1wvaWxkZWZvbnNvc2VndXJhLmVzXC93cC1jb250ZW50XC91cGxvYWRzXC9JcGhvbmUtbW9ja3VwLUJhdG1hbi1zY2FsZWQuanBnIiwic2xpZGVzaG93IjoiZjMwM2JiMyJ9" href="https://ildefonsosegura.es/wp-content/uploads/Iphone-mockup-Batman-scaled.jpg"><figure class="swiper-slide-inner"><img decoding="async" class="swiper-slide-image" src="https://ildefonsosegura.es/wp-content/uploads/Iphone-mockup-Batman-150x150.jpg" alt="Iphone mockup Batman" /></figure></a></div>			</div>
												<div class="elementor-swiper-button elementor-swiper-button-prev" role="button" tabindex="0">
						<i aria-hidden="true" class="eicon-chevron-left"></i>					</div>
					<div class="elementor-swiper-button elementor-swiper-button-next" role="button" tabindex="0">
						<i aria-hidden="true" class="eicon-chevron-right"></i>					</div>
				
									<div class="swiper-pagination"></div>
									</div>
						</div>
				</div>
					</div>
		</div>
					</div>
		</section>
				<section class="elementor-section elementor-top-section elementor-element elementor-element-2c7c284 elementor-section-boxed elementor-section-height-default elementor-section-height-default" data-id="2c7c284" data-element_type="section" data-e-type="section">
						<div class="elementor-container elementor-column-gap-default">
					<div class="elementor-column elementor-col-100 elementor-top-column elementor-element elementor-element-4960e8a" data-id="4960e8a" data-element_type="column" data-e-type="column">
			<div class="elementor-widget-wrap elementor-element-populated">
						<div class="elementor-element elementor-element-f9f5533 elementor-widget-divider--view-line_icon elementor-view-default elementor-widget-divider--element-align-center elementor-widget elementor-widget-divider" data-id="f9f5533" data-element_type="widget" data-e-type="widget" data-widget_type="divider.default">
				<div class="elementor-widget-container">
							<div class="elementor-divider">
			<span class="elementor-divider-separator">
							<div class="elementor-icon elementor-divider__element">
					<i aria-hidden="true" class="fas fa-star"></i></div>
						</span>
		</div>
						</div>
				</div>
					</div>
		</div>
					</div>
		</section>
				<section class="elementor-section elementor-top-section elementor-element elementor-element-4aa58d5 elementor-section-boxed elementor-section-height-default elementor-section-height-default" data-id="4aa58d5" data-element_type="section" data-e-type="section">
						<div class="elementor-container elementor-column-gap-default">
					<div class="elementor-column elementor-col-100 elementor-top-column elementor-element elementor-element-dc1088e" data-id="dc1088e" data-element_type="column" data-e-type="column">
			<div class="elementor-widget-wrap elementor-element-populated">
						<div class="elementor-element elementor-element-97c6f20 elementor-widget elementor-widget-text-editor" data-id="97c6f20" data-element_type="widget" data-e-type="widget" data-widget_type="text-editor.default">
				<div class="elementor-widget-container">
									<p align="justify">Me motivó realizar el tutorial de Photoshop el hecho de que se estrenará en breve la película <strong><span style="color: #800000;">THE BATMAN (<a style="color: #800000;" title="Warner Bros website" href="https://www.warnerbros.es/" target="_blank" rel="noopener">Warner Bros</a>)</span></strong> y también en un ilustrador monegasco <strong><span style="color: #800000;"><a style="color: #800000;" title="Instagram Jérémie Pistre" href="https://www.instagram.com/jeremiepistre/" target="_blank" rel="noopener">JÉRÉMIE PISTRE</a> </span></strong>cuya obra puedes encontrar en su Instagram.</p>								</div>
				</div>
					</div>
		</div>
					</div>
		</section>
				<section class="elementor-section elementor-top-section elementor-element elementor-element-65f8937 elementor-section-boxed elementor-section-height-default elementor-section-height-default" data-id="65f8937" data-element_type="section" data-e-type="section">
						<div class="elementor-container elementor-column-gap-default">
					<div class="elementor-column elementor-col-100 elementor-top-column elementor-element elementor-element-06442b8" data-id="06442b8" data-element_type="column" data-e-type="column">
			<div class="elementor-widget-wrap elementor-element-populated">
						<div class="elementor-element elementor-element-8f5fb7d elementor-widget elementor-widget-text-editor" data-id="8f5fb7d" data-element_type="widget" data-e-type="widget" data-widget_type="text-editor.default">
				<div class="elementor-widget-container">
									<p>Espero que el tutorial Póster estilo papercut (the Batman) con Photoshop sea funcional para ti y puedas aprender algo que a la vez puedas aplicar en otras composiciones.</p><p align="justify">Después de todo esta introducción, aquí puedes ver el tutorial y no dejes de compartir el post y darle «like» / «dedo arriba» al vídeo.</p><h3 align="justify"><strong><span style="color: #800000;">TABLA DE CONTENIDOS:</span></strong></h3><ul><li>00:00 Presentación del tutorial</li><li>00:10 Making of del póster</li><li>00:43 Inspiración</li><li>01:09 Aplicación del wallpaper</li><li>01:35 Creación círculos con profundidad</li><li>05:44 Añadimos ciudad del fondo</li><li>06:21 Añadimos Batman</li><li>08:36 Efecto en ojos</li><li>09:31 Añadimos ciudad del frente</li><li>10:44 Añadimos bat llamada</li><li>12:22 Añadimos el texto con capas</li><li>16:49 Añadimos el murciélago frontal</li><li>17:52 Efectos de iluminación</li><li>19:28 Añadimos bats y enigma</li><li>19:40 Limitación de elementos a la circunferencia</li><li>20:17 Añadimos textos</li><li>21:00 Making of 2do wallpaper papercut</li><li>21:30 Despedida</li></ul><p> </p><h6 class="single-post-title entry-title">«Póster estilo papercut (the Batman) con Photoshop»</h6><p align="justify"> </p>								</div>
				</div>
					</div>
		</div>
					</div>
		</section>
				<section class="elementor-section elementor-top-section elementor-element elementor-element-4d24a2e elementor-section-boxed elementor-section-height-default elementor-section-height-default" data-id="4d24a2e" data-element_type="section" data-e-type="section">
						<div class="elementor-container elementor-column-gap-default">
					<div class="elementor-column elementor-col-100 elementor-top-column elementor-element elementor-element-1cd2633" data-id="1cd2633" data-element_type="column" data-e-type="column">
			<div class="elementor-widget-wrap elementor-element-populated">
						<div class="elementor-element elementor-element-f6de5d4 elementor-widget elementor-widget-video" data-id="f6de5d4" data-element_type="widget" data-e-type="widget" data-settings="{&quot;youtube_url&quot;:&quot;https:\/\/youtu.be\/4ggbP037oUw&quot;,&quot;video_type&quot;:&quot;youtube&quot;,&quot;controls&quot;:&quot;yes&quot;}" data-widget_type="video.default">
				<div class="elementor-widget-container">
							<div class="elementor-wrapper elementor-open-inline">
			<div class="elementor-video"></div>		</div>
						</div>
				</div>
					</div>
		</div>
					</div>
		</section>
				<section class="elementor-section elementor-top-section elementor-element elementor-element-d99fc3a elementor-section-boxed elementor-section-height-default elementor-section-height-default" data-id="d99fc3a" data-element_type="section" data-e-type="section">
						<div class="elementor-container elementor-column-gap-default">
					<div class="elementor-column elementor-col-50 elementor-top-column elementor-element elementor-element-806be6a" data-id="806be6a" data-element_type="column" data-e-type="column">
			<div class="elementor-widget-wrap">
							</div>
		</div>
				<div class="elementor-column elementor-col-50 elementor-top-column elementor-element elementor-element-de98a7c" data-id="de98a7c" data-element_type="column" data-e-type="column">
			<div class="elementor-widget-wrap">
							</div>
		</div>
					</div>
		</section>
				<section class="elementor-section elementor-top-section elementor-element elementor-element-fb28f3b elementor-section-boxed elementor-section-height-default elementor-section-height-default" data-id="fb28f3b" data-element_type="section" data-e-type="section">
						<div class="elementor-container elementor-column-gap-default">
					<div class="elementor-column elementor-col-50 elementor-top-column elementor-element elementor-element-324f879" data-id="324f879" data-element_type="column" data-e-type="column">
			<div class="elementor-widget-wrap elementor-element-populated">
						<div class="elementor-element elementor-element-ea3b0ee elementor-widget elementor-widget-image" data-id="ea3b0ee" data-element_type="widget" data-e-type="widget" data-widget_type="image.default">
				<div class="elementor-widget-container">
															<img loading="lazy" decoding="async" width="300" height="205" src="https://ildefonsosegura.es/wp-content/uploads/regalos-300x205.png" class="attachment-medium size-medium wp-image-4460" alt="" srcset="https://ildefonsosegura.es/wp-content/uploads/regalos-300x205.png 300w, https://ildefonsosegura.es/wp-content/uploads/regalos-e1535194274619.png 350w" sizes="(max-width: 300px) 100vw, 300px" />															</div>
				</div>
					</div>
		</div>
				<div class="elementor-column elementor-col-50 elementor-top-column elementor-element elementor-element-8132854" data-id="8132854" data-element_type="column" data-e-type="column">
			<div class="elementor-widget-wrap elementor-element-populated">
						<div class="elementor-element elementor-element-31fe259 elementor-widget elementor-widget-text-editor" data-id="31fe259" data-element_type="widget" data-e-type="widget" data-widget_type="text-editor.default">
				<div class="elementor-widget-container">
									<p align="justify">Si quieres ir a tu ritmo, puedes ir chequeando el vídeo en cámara lenta y comprobando en el editable que te regalo, los pasos seguidos</p>								</div>
				</div>
				<div class="elementor-element elementor-element-b52ca5d elementor-align-center elementor-widget elementor-widget-button" data-id="b52ca5d" data-element_type="widget" data-e-type="widget" data-widget_type="button.default">
				<div class="elementor-widget-container">
									<div class="elementor-button-wrapper">
					<a class="elementor-button elementor-button-link elementor-size-sm" href="https://ildefonsosegura.es/regalos/">
						<span class="elementor-button-content-wrapper">
						<span class="elementor-button-icon">
				<i aria-hidden="true" class="fas fa-atlas"></i>			</span>
									<span class="elementor-button-text">ARCHIVO PSD THE BATMAN</span>
					</span>
					</a>
				</div>
								</div>
				</div>
					</div>
		</div>
					</div>
		</section>
				<section class="elementor-section elementor-top-section elementor-element elementor-element-b82598e elementor-section-boxed elementor-section-height-default elementor-section-height-default" data-id="b82598e" data-element_type="section" data-e-type="section">
						<div class="elementor-container elementor-column-gap-default">
					<div class="elementor-column elementor-col-100 elementor-top-column elementor-element elementor-element-56153d8" data-id="56153d8" data-element_type="column" data-e-type="column">
			<div class="elementor-widget-wrap elementor-element-populated">
						<div class="elementor-element elementor-element-5927092 elementor-widget elementor-widget-text-editor" data-id="5927092" data-element_type="widget" data-e-type="widget" data-widget_type="text-editor.default">
				<div class="elementor-widget-container">
									<p>Recuerda también que posteo trabajos e información en  <a href="https://www.facebook.com/IldefonsoSeguraPage" target="_blank" rel="noopener"><strong><span style="color: #800000;">Facebook</span> </strong></a></p><p>Igualmente, si quieres ver mis tutoriales de <strong><span style="color: #800000;">wallpapers</span></strong>, puedes verlos haciendo <span style="color: #800000;"><a style="color: #800000;" href="https://ildefonsosegura.es/category/wallpaper/"><strong>CLIC</strong></a></span> pero no olvides comentar este post antes de irte. Gracias</p>								</div>
				</div>
					</div>
		</div>
					</div>
		</section>
				<section class="elementor-section elementor-top-section elementor-element elementor-element-742276ff elementor-section-full_width elementor-section-height-default elementor-section-height-default" data-id="742276ff" data-element_type="section" data-e-type="section">
						<div class="elementor-container elementor-column-gap-default">
					<div class="elementor-column elementor-col-100 elementor-top-column elementor-element elementor-element-261106a3" data-id="261106a3" data-element_type="column" data-e-type="column">
			<div class="elementor-widget-wrap elementor-element-populated">
						<div class="elementor-element elementor-element-37781cfc elementor-widget elementor-widget-text-editor" data-id="37781cfc" data-element_type="widget" data-e-type="widget" data-widget_type="text-editor.default">
				<div class="elementor-widget-container">
									<div><div align="center"><center><strong style="color: #ff0000;">Suscríbete a mi canal de Youtube:</strong></center><div><div><div align="center"><p><script src="https://apis.google.com/js/platform.js"></script></p><div class="g-ytsubscribe" data-channel="ildefonsosegura" data-layout="full" data-count="default"> </div></div></div><p> </p><p style="text-align: center;">No te lo pierdas y comparte tus trabajos en mi página de facebook (<span style="color: #0000ff;"><strong><a style="color: #0000ff;" href="http://www.facebook.com/IldefonsoSeguraPage" target="_blank" rel="noopener noreferrer">IldefonsoSeguraPage</a></strong></span>)<br />Espero que te guste y compartas el vídeo. No dejes de compartir este post.</p><p style="text-align: center;">Así es como me puedes ayudar 🙂 Gracias</p></div></div></div>								</div>
				</div>
					</div>
		</div>
					</div>
		</section>
				</div>La entrada <a href="https://ildefonsosegura.es/poster-estilo-papercut-the-batman-con-photoshop/">Póster estilo papercut (the Batman) con Photoshop</a> apareció primero en <a href="https://ildefonsosegura.es">Ildefonso Segura</a>.]]></content:encoded>
					
					<wfw:commentRss>https://ildefonsosegura.es/poster-estilo-papercut-the-batman-con-photoshop/feed/</wfw:commentRss>
			<slash:comments>0</slash:comments>
		
		
			</item>
		<item>
		<title>Como hacer un texto estilo roca realista con Photoshop</title>
		<link>https://ildefonsosegura.es/como-hacer-un-texto-estilo-roca-realista-con-photoshop/</link>
					<comments>https://ildefonsosegura.es/como-hacer-un-texto-estilo-roca-realista-con-photoshop/#comments</comments>
		
		<dc:creator><![CDATA[Ildefonso Segura]]></dc:creator>
		<pubDate>Mon, 06 Sep 2021 15:01:55 +0000</pubDate>
				<category><![CDATA[Editable]]></category>
		<category><![CDATA[Efectos]]></category>
		<category><![CDATA[Photoshop]]></category>
		<category><![CDATA[Textos]]></category>
		<category><![CDATA[Textura]]></category>
		<category><![CDATA[Tutoriales]]></category>
		<category><![CDATA[Video]]></category>
		<category><![CDATA[Wallpaper]]></category>
		<category><![CDATA[adobe]]></category>
		<category><![CDATA[cc2021]]></category>
		<category><![CDATA[creatividad]]></category>
		<category><![CDATA[diseño]]></category>
		<category><![CDATA[efecto]]></category>
		<category><![CDATA[estilo]]></category>
		<category><![CDATA[ildefonsosegura]]></category>
		<category><![CDATA[photoshop]]></category>
		<category><![CDATA[ps]]></category>
		<category><![CDATA[stone]]></category>
		<category><![CDATA[tecnicas]]></category>
		<category><![CDATA[texto]]></category>
		<category><![CDATA[texto realista]]></category>
		<category><![CDATA[textura]]></category>
		<category><![CDATA[textura texto]]></category>
		<category><![CDATA[tuto]]></category>
		<category><![CDATA[tutorial]]></category>
		<category><![CDATA[VIDEOTUTORIAL]]></category>
		<category><![CDATA[wallpaper]]></category>
		<category><![CDATA[youtube]]></category>
		<guid isPermaLink="false">https://ildefonsosegura.es/?p=113777</guid>

					<description><![CDATA[<p>En este tutorial de Photoshop veremos como conseguir una textura de roca realista en un texto. El tutorial está inspirado en un tutorial en inglés que puedes encontrar en el canal TEXTURELABS.ORG de YouTube. En mi caso, he usado texturas diferentes y al final le he dado una aplicación interesante sumergiendo el texto y animándolo [&#8230;]</p>
La entrada <a href="https://ildefonsosegura.es/como-hacer-un-texto-estilo-roca-realista-con-photoshop/">Como hacer un texto estilo roca realista con Photoshop</a> apareció primero en <a href="https://ildefonsosegura.es">Ildefonso Segura</a>.]]></description>
										<content:encoded><![CDATA[<div data-elementor-type="wp-post" data-elementor-id="113777" class="elementor elementor-113777">
						<section class="elementor-section elementor-top-section elementor-element elementor-element-b7471a2 elementor-section-boxed elementor-section-height-default elementor-section-height-default" data-id="b7471a2" data-element_type="section" data-e-type="section">
						<div class="elementor-container elementor-column-gap-default">
					<div class="elementor-column elementor-col-100 elementor-top-column elementor-element elementor-element-5e938f2" data-id="5e938f2" data-element_type="column" data-e-type="column">
			<div class="elementor-widget-wrap elementor-element-populated">
						<div class="elementor-element elementor-element-7cf2e12 elementor-widget elementor-widget-text-editor" data-id="7cf2e12" data-element_type="widget" data-e-type="widget" data-widget_type="text-editor.default">
				<div class="elementor-widget-container">
									<p align="justify">En este tutorial de Photoshop veremos como conseguir una textura de roca realista en un texto.</p>
<p align="justify">El tutorial está inspirado en un <a href="https://texturelabs.org/tutorials/3d-stone-concrete-text-effect/" target="_blank" rel="noopener"><strong><span style="color: #800000;">tutorial en inglés</span></strong></a> que puedes encontrar en el canal <strong><a href="https://www.youtube.com/channel/UCBxd0ZwoptXc676LSaxCP5Q" target="_blank" rel="noopener">TEXTURELABS.ORG</a></strong> de YouTube.

</p><p align="justify">En mi caso, he usado texturas diferentes y al final le he dado una aplicación interesante sumergiendo el texto y animándolo una escena en el fondo del mar.  Te dejo la animación por aquí:

</p>								</div>
				</div>
					</div>
		</div>
					</div>
		</section>
				<section class="elementor-section elementor-top-section elementor-element elementor-element-52bc9d1 elementor-section-boxed elementor-section-height-default elementor-section-height-default" data-id="52bc9d1" data-element_type="section" data-e-type="section">
						<div class="elementor-container elementor-column-gap-default">
					<div class="elementor-column elementor-col-100 elementor-top-column elementor-element elementor-element-5023aa6" data-id="5023aa6" data-element_type="column" data-e-type="column">
			<div class="elementor-widget-wrap elementor-element-populated">
						<div class="elementor-element elementor-element-b3b61d6 elementor-widget elementor-widget-video" data-id="b3b61d6" data-element_type="widget" data-e-type="widget" data-settings="{&quot;youtube_url&quot;:&quot;https:\/\/youtu.be\/Oc1UXuJkm5U&quot;,&quot;video_type&quot;:&quot;youtube&quot;,&quot;controls&quot;:&quot;yes&quot;}" data-widget_type="video.default">
				<div class="elementor-widget-container">
							<div class="elementor-wrapper elementor-open-inline">
			<div class="elementor-video"></div>		</div>
						</div>
				</div>
					</div>
		</div>
					</div>
		</section>
				<section class="elementor-section elementor-top-section elementor-element elementor-element-8eec0a1 elementor-section-boxed elementor-section-height-default elementor-section-height-default" data-id="8eec0a1" data-element_type="section" data-e-type="section">
						<div class="elementor-container elementor-column-gap-default">
					<div class="elementor-column elementor-col-100 elementor-top-column elementor-element elementor-element-761f29f" data-id="761f29f" data-element_type="column" data-e-type="column">
			<div class="elementor-widget-wrap elementor-element-populated">
						<div class="elementor-element elementor-element-11a3fbd elementor-widget elementor-widget-text-editor" data-id="11a3fbd" data-element_type="widget" data-e-type="widget" data-widget_type="text-editor.default">
				<div class="elementor-widget-container">
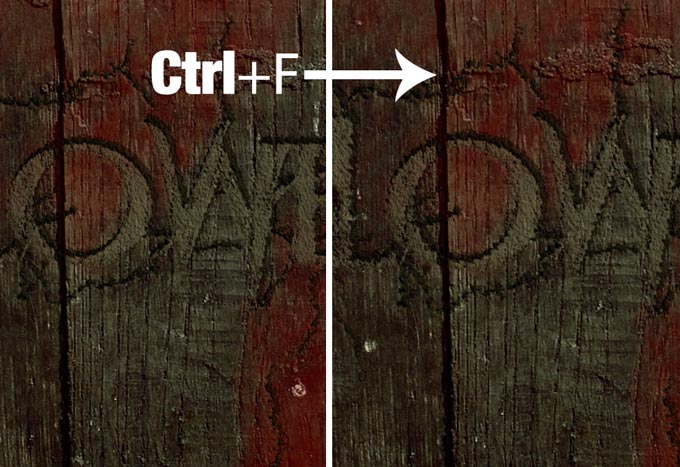
									<p align="justify"> También puedes ver el antes y el después de la edición del texto en este comparador de imágenes.</p>
								</div>
				</div>
					</div>
		</div>
					</div>
		</section>
				<section class="elementor-section elementor-top-section elementor-element elementor-element-acfc913 elementor-section-boxed elementor-section-height-default elementor-section-height-default" data-id="acfc913" data-element_type="section" data-e-type="section">
						<div class="elementor-container elementor-column-gap-default">
					<div class="elementor-column elementor-col-100 elementor-top-column elementor-element elementor-element-03b0344" data-id="03b0344" data-element_type="column" data-e-type="column">
			<div class="elementor-widget-wrap elementor-element-populated">
						<div class="elementor-element elementor-element-e35cdaf elementor-widget-divider--view-line_icon elementor-view-default elementor-widget-divider--element-align-center elementor-widget elementor-widget-divider" data-id="e35cdaf" data-element_type="widget" data-e-type="widget" data-widget_type="divider.default">
				<div class="elementor-widget-container">
							<div class="elementor-divider">
			<span class="elementor-divider-separator">
							<div class="elementor-icon elementor-divider__element">
					<i aria-hidden="true" class="fas fa-star"></i></div>
						</span>
		</div>
						</div>
				</div>
					</div>
		</div>
					</div>
		</section>
				<section class="elementor-section elementor-top-section elementor-element elementor-element-2c7c284 elementor-section-boxed elementor-section-height-default elementor-section-height-default" data-id="2c7c284" data-element_type="section" data-e-type="section">
						<div class="elementor-container elementor-column-gap-default">
					<div class="elementor-column elementor-col-100 elementor-top-column elementor-element elementor-element-4960e8a" data-id="4960e8a" data-element_type="column" data-e-type="column">
			<div class="elementor-widget-wrap elementor-element-populated">
						<div class="elementor-element elementor-element-f9f5533 elementor-widget-divider--view-line_icon elementor-view-default elementor-widget-divider--element-align-center elementor-widget elementor-widget-divider" data-id="f9f5533" data-element_type="widget" data-e-type="widget" data-widget_type="divider.default">
				<div class="elementor-widget-container">
							<div class="elementor-divider">
			<span class="elementor-divider-separator">
							<div class="elementor-icon elementor-divider__element">
					<i aria-hidden="true" class="fas fa-star"></i></div>
						</span>
		</div>
						</div>
				</div>
					</div>
		</div>
					</div>
		</section>
				<section class="elementor-section elementor-top-section elementor-element elementor-element-2ca6aa6 elementor-section-boxed elementor-section-height-default elementor-section-height-default" data-id="2ca6aa6" data-element_type="section" data-e-type="section">
						<div class="elementor-container elementor-column-gap-default">
					<div class="elementor-column elementor-col-100 elementor-top-column elementor-element elementor-element-e61067e" data-id="e61067e" data-element_type="column" data-e-type="column">
			<div class="elementor-widget-wrap elementor-element-populated">
						<div class="elementor-element elementor-element-ce763dd elementor-widget-divider--view-line_icon elementor-view-default elementor-widget-divider--element-align-center elementor-widget elementor-widget-divider" data-id="ce763dd" data-element_type="widget" data-e-type="widget" data-widget_type="divider.default">
				<div class="elementor-widget-container">
							<div class="elementor-divider">
			<span class="elementor-divider-separator">
							<div class="elementor-icon elementor-divider__element">
					<i aria-hidden="true" class="fas fa-star"></i></div>
						</span>
		</div>
						</div>
				</div>
					</div>
		</div>
					</div>
		</section>
				<section class="elementor-section elementor-top-section elementor-element elementor-element-4ecb01f elementor-section-boxed elementor-section-height-default elementor-section-height-default" data-id="4ecb01f" data-element_type="section" data-e-type="section">
						<div class="elementor-container elementor-column-gap-default">
					<div class="elementor-column elementor-col-100 elementor-top-column elementor-element elementor-element-00dfe98" data-id="00dfe98" data-element_type="column" data-e-type="column">
			<div class="elementor-widget-wrap elementor-element-populated">
						<div class="elementor-element elementor-element-af4e04c elementor-widget elementor-widget-text-editor" data-id="af4e04c" data-element_type="widget" data-e-type="widget" data-widget_type="text-editor.default">
				<div class="elementor-widget-container">
									<p align="justify">Te dejo mi referencia en Instagram para que chequees este post y otros que te pueden interesar <a href="http://instagram.com/ildefonsosegura" target="_blank" rel="noopener"><span style="color: #800000;"><strong>INSTAGRAM DE @IldefonsoSegura</strong></span></a></p>								</div>
				</div>
				<div class="elementor-element elementor-element-a2d52fd elementor-widget elementor-widget-text-editor" data-id="a2d52fd" data-element_type="widget" data-e-type="widget" data-widget_type="text-editor.default">
				<div class="elementor-widget-container">
									<p align="justify">Lo impactante de este tutorial, o por lo menos a mí me lo parece, es el efecto de rotura que conseguirnos en la parte más frontal  del texto tan sólo aplicando un filtro de «cristalizar» y después un estilo de capa con relleno del 0%.</p><p align="justify">Luego daremos más profundidad al texto y para ello mostraremos como se hace una ACCIÓN en Photoshop para automatizar tareas que hacen más eficientes el trabajo de manipulación y composición.</p><p align="justify">Posteriormente superpondremos texturas a la extrusión creada y aplicaremos sombras e iluminaciones que conseguirán este realismo de parecido a roca en texto.</p>								</div>
				</div>
					</div>
		</div>
					</div>
		</section>
				<section class="elementor-section elementor-top-section elementor-element elementor-element-65f8937 elementor-section-boxed elementor-section-height-default elementor-section-height-default" data-id="65f8937" data-element_type="section" data-e-type="section">
						<div class="elementor-container elementor-column-gap-default">
					<div class="elementor-column elementor-col-100 elementor-top-column elementor-element elementor-element-06442b8" data-id="06442b8" data-element_type="column" data-e-type="column">
			<div class="elementor-widget-wrap elementor-element-populated">
						<div class="elementor-element elementor-element-8f5fb7d elementor-widget elementor-widget-text-editor" data-id="8f5fb7d" data-element_type="widget" data-e-type="widget" data-widget_type="text-editor.default">
				<div class="elementor-widget-container">
									<p align="justify">Espero que el tutorial texto estilo roca realista con Photoshop sea funcional para ti y puedas aprender algo que a la vez puedas aplicar en otras composiciones.</p>
<p align="justify">Muchas gracias al canal TextureLabs.org por su aporte en inglés sobre estas técnicas y por tanto no dejéis de visitarlo y suscribiros si os gusta. Gracias <a href="https://texturelabs.org/about/" target="_blank" rel="noopener">Brady</a></p>
<p align="justify">Después de todo esta introducción, aquí puedes ver el tutorial y no dejes de compartir el post y darle «like» / «dedo arriba» al vídeo.</p>

<h3 align="justify"><strong><span style="color: #800000;">TABLA DE CONTENIDOS:</span></strong></h3>
<ul>
 	<li>0:00 Presentación del tutorial</li>
 	<li>0:25 Animación del resultado</li>
 	<li>0:45 Referencia al tutorial en inglés</li>
 	<li>0:56 Textura al texto principal</li>
 	<li>3:26 Roturas en superficie</li>
 	<li>6:30 Extrusión del texto</li>
 	<li>8:21 Textura en extrusión</li>
 	<li>9:37 Técnicas para incluir contraste</li>
 	<li>12:12 Inclusión de Background</li>
 	<li>12:41 Luces y Sombras</li>
 	<li>15:45 Añadimos detalles adicionales</li>
 	<li>16:57 Despedida</li>
</ul>
<h6 class="single-post-title entry-title">«Cómo hacer texto estilo roca realista con Photoshop»</h6>
<p align="justify"></p>								</div>
				</div>
					</div>
		</div>
					</div>
		</section>
				<section class="elementor-section elementor-top-section elementor-element elementor-element-4d24a2e elementor-section-boxed elementor-section-height-default elementor-section-height-default" data-id="4d24a2e" data-element_type="section" data-e-type="section">
						<div class="elementor-container elementor-column-gap-default">
					<div class="elementor-column elementor-col-100 elementor-top-column elementor-element elementor-element-1cd2633" data-id="1cd2633" data-element_type="column" data-e-type="column">
			<div class="elementor-widget-wrap elementor-element-populated">
						<div class="elementor-element elementor-element-f6de5d4 elementor-widget elementor-widget-video" data-id="f6de5d4" data-element_type="widget" data-e-type="widget" data-settings="{&quot;youtube_url&quot;:&quot;https:\/\/youtu.be\/e78oY5EnaGs&quot;,&quot;video_type&quot;:&quot;youtube&quot;,&quot;controls&quot;:&quot;yes&quot;}" data-widget_type="video.default">
				<div class="elementor-widget-container">
							<div class="elementor-wrapper elementor-open-inline">
			<div class="elementor-video"></div>		</div>
						</div>
				</div>
					</div>
		</div>
					</div>
		</section>
				<section class="elementor-section elementor-top-section elementor-element elementor-element-d99fc3a elementor-section-boxed elementor-section-height-default elementor-section-height-default" data-id="d99fc3a" data-element_type="section" data-e-type="section">
						<div class="elementor-container elementor-column-gap-default">
					<div class="elementor-column elementor-col-50 elementor-top-column elementor-element elementor-element-806be6a" data-id="806be6a" data-element_type="column" data-e-type="column">
			<div class="elementor-widget-wrap">
							</div>
		</div>
				<div class="elementor-column elementor-col-50 elementor-top-column elementor-element elementor-element-de98a7c" data-id="de98a7c" data-element_type="column" data-e-type="column">
			<div class="elementor-widget-wrap">
							</div>
		</div>
					</div>
		</section>
				<section class="elementor-section elementor-top-section elementor-element elementor-element-fb28f3b elementor-section-boxed elementor-section-height-default elementor-section-height-default" data-id="fb28f3b" data-element_type="section" data-e-type="section">
						<div class="elementor-container elementor-column-gap-default">
					<div class="elementor-column elementor-col-50 elementor-top-column elementor-element elementor-element-324f879" data-id="324f879" data-element_type="column" data-e-type="column">
			<div class="elementor-widget-wrap elementor-element-populated">
						<div class="elementor-element elementor-element-ea3b0ee elementor-widget elementor-widget-image" data-id="ea3b0ee" data-element_type="widget" data-e-type="widget" data-widget_type="image.default">
				<div class="elementor-widget-container">
															<img loading="lazy" decoding="async" width="300" height="205" src="https://ildefonsosegura.es/wp-content/uploads/regalos-300x205.png" class="attachment-medium size-medium wp-image-4460" alt="" srcset="https://ildefonsosegura.es/wp-content/uploads/regalos-300x205.png 300w, https://ildefonsosegura.es/wp-content/uploads/regalos-e1535194274619.png 350w" sizes="(max-width: 300px) 100vw, 300px" />															</div>
				</div>
					</div>
		</div>
				<div class="elementor-column elementor-col-50 elementor-top-column elementor-element elementor-element-8132854" data-id="8132854" data-element_type="column" data-e-type="column">
			<div class="elementor-widget-wrap elementor-element-populated">
						<div class="elementor-element elementor-element-31fe259 elementor-widget elementor-widget-text-editor" data-id="31fe259" data-element_type="widget" data-e-type="widget" data-widget_type="text-editor.default">
				<div class="elementor-widget-container">
									<p align="justify">Si quieres ir a tu ritmo, puedes ir chequeando el vídeo en cámara lenta y comprobando en el editable que te regalo, los pasos seguidos</p>								</div>
				</div>
				<div class="elementor-element elementor-element-b52ca5d elementor-align-center elementor-widget elementor-widget-button" data-id="b52ca5d" data-element_type="widget" data-e-type="widget" data-widget_type="button.default">
				<div class="elementor-widget-container">
									<div class="elementor-button-wrapper">
					<a class="elementor-button elementor-button-link elementor-size-sm" href="https://ildefonsosegura.es/regalos/">
						<span class="elementor-button-content-wrapper">
						<span class="elementor-button-icon">
				<i aria-hidden="true" class="fas fa-atlas"></i>			</span>
									<span class="elementor-button-text">ARCHIVO PSD TEXTO ROCA</span>
					</span>
					</a>
				</div>
								</div>
				</div>
					</div>
		</div>
					</div>
		</section>
				<section class="elementor-section elementor-top-section elementor-element elementor-element-b82598e elementor-section-boxed elementor-section-height-default elementor-section-height-default" data-id="b82598e" data-element_type="section" data-e-type="section">
						<div class="elementor-container elementor-column-gap-default">
					<div class="elementor-column elementor-col-100 elementor-top-column elementor-element elementor-element-56153d8" data-id="56153d8" data-element_type="column" data-e-type="column">
			<div class="elementor-widget-wrap elementor-element-populated">
						<div class="elementor-element elementor-element-5927092 elementor-widget elementor-widget-text-editor" data-id="5927092" data-element_type="widget" data-e-type="widget" data-widget_type="text-editor.default">
				<div class="elementor-widget-container">
									<p>Recuerda también que posteo trabajos e información en  <a href="https://www.facebook.com/IldefonsoSeguraPage" target="_blank" rel="noopener"><strong><span style="color: #800000;">Facebook</span> </strong></a></p><p>Igualmente, si quieres ver mis tutoriales de <strong><span style="color: #800000;">wallpapers</span></strong>, puedes verlos haciendo <span style="color: #800000;"><a style="color: #800000;" href="https://ildefonsosegura.es/category/wallpaper/"><strong>CLIC</strong></a></span> pero no olvides comentar este post antes de irte. Gracias</p>								</div>
				</div>
					</div>
		</div>
					</div>
		</section>
				<section class="elementor-section elementor-top-section elementor-element elementor-element-742276ff elementor-section-full_width elementor-section-height-default elementor-section-height-default" data-id="742276ff" data-element_type="section" data-e-type="section">
						<div class="elementor-container elementor-column-gap-default">
					<div class="elementor-column elementor-col-100 elementor-top-column elementor-element elementor-element-261106a3" data-id="261106a3" data-element_type="column" data-e-type="column">
			<div class="elementor-widget-wrap elementor-element-populated">
						<div class="elementor-element elementor-element-37781cfc elementor-widget elementor-widget-text-editor" data-id="37781cfc" data-element_type="widget" data-e-type="widget" data-widget_type="text-editor.default">
				<div class="elementor-widget-container">
									<div><div align="center"><center><strong style="color: #ff0000;">Suscríbete a mi canal de Youtube:</strong></center><div><div><div align="center"><p><script src="https://apis.google.com/js/platform.js"></script></p><div class="g-ytsubscribe" data-channel="ildefonsosegura" data-layout="full" data-count="default"> </div></div></div><p> </p><p style="text-align: center;">No te lo pierdas y comparte tus trabajos en mi página de facebook (<span style="color: #0000ff;"><strong><a style="color: #0000ff;" href="http://www.facebook.com/IldefonsoSeguraPage" target="_blank" rel="noopener noreferrer">IldefonsoSeguraPage</a></strong></span>)<br />Espero que te guste y compartas el vídeo. No dejes de compartir este post.</p><p style="text-align: center;">Así es como me puedes ayudar 🙂 Gracias</p></div></div></div>								</div>
				</div>
					</div>
		</div>
					</div>
		</section>
				</div>La entrada <a href="https://ildefonsosegura.es/como-hacer-un-texto-estilo-roca-realista-con-photoshop/">Como hacer un texto estilo roca realista con Photoshop</a> apareció primero en <a href="https://ildefonsosegura.es">Ildefonso Segura</a>.]]></content:encoded>
					
					<wfw:commentRss>https://ildefonsosegura.es/como-hacer-un-texto-estilo-roca-realista-con-photoshop/feed/</wfw:commentRss>
			<slash:comments>2</slash:comments>
		
		
			</item>
		<item>
		<title>Aplicando técnicas de colorgrading JL 2021 con Photoshop</title>
		<link>https://ildefonsosegura.es/aplicando-tecnicas-de-colorgrading-jl-2021-con-photoshop/</link>
					<comments>https://ildefonsosegura.es/aplicando-tecnicas-de-colorgrading-jl-2021-con-photoshop/#respond</comments>
		
		<dc:creator><![CDATA[Ildefonso Segura]]></dc:creator>
		<pubDate>Mon, 30 Aug 2021 02:02:01 +0000</pubDate>
				<category><![CDATA[Efectos]]></category>
		<category><![CDATA[Photoshop]]></category>
		<category><![CDATA[Tecnicas]]></category>
		<category><![CDATA[Tutoriales]]></category>
		<category><![CDATA[Video]]></category>
		<category><![CDATA[Wallpaper]]></category>
		<category><![CDATA[adobe]]></category>
		<category><![CDATA[cambio tono]]></category>
		<category><![CDATA[cc2021]]></category>
		<category><![CDATA[colorgrading]]></category>
		<category><![CDATA[comic]]></category>
		<category><![CDATA[creatividad]]></category>
		<category><![CDATA[diseño]]></category>
		<category><![CDATA[efecto]]></category>
		<category><![CDATA[estilo]]></category>
		<category><![CDATA[gradación de color]]></category>
		<category><![CDATA[ildefonsosegura]]></category>
		<category><![CDATA[ilustracion]]></category>
		<category><![CDATA[liga de la justicia]]></category>
		<category><![CDATA[mapa degradado]]></category>
		<category><![CDATA[photoshop]]></category>
		<category><![CDATA[ps]]></category>
		<category><![CDATA[tecnicas]]></category>
		<category><![CDATA[tono]]></category>
		<category><![CDATA[tuto]]></category>
		<category><![CDATA[tutorial]]></category>
		<category><![CDATA[VIDEOTUTORIAL]]></category>
		<category><![CDATA[wonder woman]]></category>
		<category><![CDATA[youtube]]></category>
		<guid isPermaLink="false">https://ildefonsosegura.es/?p=113739</guid>

					<description><![CDATA[<p>Como sabéis, en el año 2017 se estrenó la película La Liga de la Justicia, dirigida por Joss Whedon. Él utiliza unos tonos de color muy vibrantes y saturados. Básicamente tiene preferencias por un estilo colorido que ya aplicó en películas que dirigió en MARVEL. Zack Snyder los cambió en su versión de la película [&#8230;]</p>
La entrada <a href="https://ildefonsosegura.es/aplicando-tecnicas-de-colorgrading-jl-2021-con-photoshop/">Aplicando técnicas de colorgrading JL 2021 con Photoshop</a> apareció primero en <a href="https://ildefonsosegura.es">Ildefonso Segura</a>.]]></description>
										<content:encoded><![CDATA[<div data-elementor-type="wp-post" data-elementor-id="113739" class="elementor elementor-113739">
						<section class="elementor-section elementor-top-section elementor-element elementor-element-b7471a2 elementor-section-boxed elementor-section-height-default elementor-section-height-default" data-id="b7471a2" data-element_type="section" data-e-type="section">
						<div class="elementor-container elementor-column-gap-default">
					<div class="elementor-column elementor-col-100 elementor-top-column elementor-element elementor-element-5e938f2" data-id="5e938f2" data-element_type="column" data-e-type="column">
			<div class="elementor-widget-wrap elementor-element-populated">
						<div class="elementor-element elementor-element-7cf2e12 elementor-widget elementor-widget-text-editor" data-id="7cf2e12" data-element_type="widget" data-e-type="widget" data-widget_type="text-editor.default">
				<div class="elementor-widget-container">
									<p align="justify">Como sabéis, en el año 2017 se estrenó la película La Liga de la Justicia, dirigida por <a title="Joss Whedon Wikipedia" href="https://es.wikipedia.org/wiki/Joss_Whedon" target="_blank" rel="noopener"><span style="color: #800000;">Joss Whedon</span></a>. Él utiliza unos tonos de color muy vibrantes y saturados. Básicamente tiene preferencias por un estilo colorido que ya aplicó en películas que dirigió en <a title="Página Oficial de MARVEL" href="https://www.marvel.com/" target="_blank" rel="noopener"><strong><span style="color: #800000;">MARVEL</span></strong></a>.</p>
<p align="justify"><a title="Zack Snyder Wikipedia" href="https://es.wikipedia.org/wiki/Zack_Snyder" target="_blank" rel="noopener"><span style="color: #800000;">Zack Snyder</span></a> los cambió en su versión de la película de 2021.</p>
<p align="justify">Vamos a ver cómo podemos hacer esto con Photoshop.</p>								</div>
				</div>
				<div class="elementor-element elementor-element-e35cdaf elementor-widget-divider--view-line_icon elementor-view-default elementor-widget-divider--element-align-center elementor-widget elementor-widget-divider" data-id="e35cdaf" data-element_type="widget" data-e-type="widget" data-widget_type="divider.default">
				<div class="elementor-widget-container">
							<div class="elementor-divider">
			<span class="elementor-divider-separator">
							<div class="elementor-icon elementor-divider__element">
					<i aria-hidden="true" class="fas fa-star"></i></div>
						</span>
		</div>
						</div>
				</div>
					</div>
		</div>
					</div>
		</section>
				<section class="elementor-section elementor-top-section elementor-element elementor-element-acfc913 elementor-section-boxed elementor-section-height-default elementor-section-height-default" data-id="acfc913" data-element_type="section" data-e-type="section">
						<div class="elementor-container elementor-column-gap-default">
					<div class="elementor-column elementor-col-100 elementor-top-column elementor-element elementor-element-03b0344" data-id="03b0344" data-element_type="column" data-e-type="column">
			<div class="elementor-widget-wrap">
							</div>
		</div>
					</div>
		</section>
				<section class="elementor-section elementor-top-section elementor-element elementor-element-2ca6aa6 elementor-section-boxed elementor-section-height-default elementor-section-height-default" data-id="2ca6aa6" data-element_type="section" data-e-type="section">
						<div class="elementor-container elementor-column-gap-default">
					<div class="elementor-column elementor-col-100 elementor-top-column elementor-element elementor-element-e61067e" data-id="e61067e" data-element_type="column" data-e-type="column">
			<div class="elementor-widget-wrap elementor-element-populated">
						<div class="elementor-element elementor-element-ce763dd elementor-widget-divider--view-line_icon elementor-view-default elementor-widget-divider--element-align-center elementor-widget elementor-widget-divider" data-id="ce763dd" data-element_type="widget" data-e-type="widget" data-widget_type="divider.default">
				<div class="elementor-widget-container">
							<div class="elementor-divider">
			<span class="elementor-divider-separator">
							<div class="elementor-icon elementor-divider__element">
					<i aria-hidden="true" class="fas fa-star"></i></div>
						</span>
		</div>
						</div>
				</div>
					</div>
		</div>
					</div>
		</section>
				<section class="elementor-section elementor-top-section elementor-element elementor-element-4ecb01f elementor-section-boxed elementor-section-height-default elementor-section-height-default" data-id="4ecb01f" data-element_type="section" data-e-type="section">
						<div class="elementor-container elementor-column-gap-default">
					<div class="elementor-column elementor-col-100 elementor-top-column elementor-element elementor-element-00dfe98" data-id="00dfe98" data-element_type="column" data-e-type="column">
			<div class="elementor-widget-wrap elementor-element-populated">
						<div class="elementor-element elementor-element-af4e04c elementor-widget elementor-widget-text-editor" data-id="af4e04c" data-element_type="widget" data-e-type="widget" data-widget_type="text-editor.default">
				<div class="elementor-widget-container">
									<p align="justify">Te dejo mi referencia en Instagram para que chequees este post y otros que te pueden interesar <a href="http://instagram.com/ildefonsosegura" target="_blank" rel="noopener"><span style="color: #800000;"><strong>INSTAGRAM DE @IldefonsoSegura</strong></span></a></p>								</div>
				</div>
				<div class="elementor-element elementor-element-a2d52fd elementor-widget elementor-widget-text-editor" data-id="a2d52fd" data-element_type="widget" data-e-type="widget" data-widget_type="text-editor.default">
				<div class="elementor-widget-container">
									<p align="justify">Durante todo el tutorial verás como desarrollo técnicas que nos son complicadas. Es por eso que el objetivo es conseguir que el resultado final se acerque al parecido con la tonalidad que Mr. Snyder consiguió en su película.

</p><p align="justify">El objetivo finalmente no es llegar al mismos tono que en <a href="https://es.wikipedia.org/wiki/Liga_de_la_Justicia_de_Zack_Snyder" target="_blank" rel="noopener">La Liga de la Justicia de ZS</a> sino que quiero hacerte ver cómo podemos cambiar de una forma muy precisa, los tonos de una imagen para conseguir transmitir diferentes emociones.

</p><p align="justify">No es casualidad que en la versión de 2021 se cambien tonos dado que el director busca unas sensaciones en la audiencia que están estudiadas en las teorías del color y muchos psicólogos analizan </p>								</div>
				</div>
					</div>
		</div>
					</div>
		</section>
				<section class="elementor-section elementor-top-section elementor-element elementor-element-65f8937 elementor-section-boxed elementor-section-height-default elementor-section-height-default" data-id="65f8937" data-element_type="section" data-e-type="section">
						<div class="elementor-container elementor-column-gap-default">
					<div class="elementor-column elementor-col-100 elementor-top-column elementor-element elementor-element-06442b8" data-id="06442b8" data-element_type="column" data-e-type="column">
			<div class="elementor-widget-wrap elementor-element-populated">
						<div class="elementor-element elementor-element-8f5fb7d elementor-widget elementor-widget-text-editor" data-id="8f5fb7d" data-element_type="widget" data-e-type="widget" data-widget_type="text-editor.default">
				<div class="elementor-widget-container">
									<p align="justify">Espero que el tutorial sobre el cambio de color sea funcional para ti y puedas aprender algo que a la vez puedas aplicar en otras composiciones.</p><p align="justify">Después de todo esta introducción, aquí puedes ver el tutorial y no dejes de compartir el post y darle «like» / «dedo arriba» al vídeo. </p><h3 align="justify"><strong><span style="color: #800000;">TABLA DE CONTENIDOS:</span></strong></h3><ul><li>0:00 ¿Qué vamos a hacer?</li><li>0:35 Extracción del sujeto principal</li><li>1:42 Limpieza y desenfoque del fondo</li><li>2:43 Cambios de tonalidades y colores del fondo</li><li>3:27 Introducimos elementos de ambiente</li><li>4:30 Cambios de tonalidades y colores del sujeto</li><li>6:10 Reducción selectiva de tonos con Fusionar Si</li><li>6:37 Recuperación de tonos relevantes</li><li>6:58 Artefinalizando colorgrading</li><li>8:26 Resultado final y despedida</li></ul><h6 class="single-post-title entry-title">«Aplicando técnicas de colorgrading JL 2021 con Photoshop»</h6><p align="justify"> </p>								</div>
				</div>
					</div>
		</div>
					</div>
		</section>
				<section class="elementor-section elementor-top-section elementor-element elementor-element-4d24a2e elementor-section-boxed elementor-section-height-default elementor-section-height-default" data-id="4d24a2e" data-element_type="section" data-e-type="section">
						<div class="elementor-container elementor-column-gap-default">
					<div class="elementor-column elementor-col-100 elementor-top-column elementor-element elementor-element-1cd2633" data-id="1cd2633" data-element_type="column" data-e-type="column">
			<div class="elementor-widget-wrap elementor-element-populated">
						<div class="elementor-element elementor-element-f6de5d4 elementor-widget elementor-widget-video" data-id="f6de5d4" data-element_type="widget" data-e-type="widget" data-settings="{&quot;youtube_url&quot;:&quot;https:\/\/youtu.be\/ZkMR8mfIUM4&quot;,&quot;video_type&quot;:&quot;youtube&quot;,&quot;controls&quot;:&quot;yes&quot;}" data-widget_type="video.default">
				<div class="elementor-widget-container">
							<div class="elementor-wrapper elementor-open-inline">
			<div class="elementor-video"></div>		</div>
						</div>
				</div>
					</div>
		</div>
					</div>
		</section>
				<section class="elementor-section elementor-top-section elementor-element elementor-element-d99fc3a elementor-section-boxed elementor-section-height-default elementor-section-height-default" data-id="d99fc3a" data-element_type="section" data-e-type="section">
						<div class="elementor-container elementor-column-gap-default">
					<div class="elementor-column elementor-col-50 elementor-top-column elementor-element elementor-element-806be6a" data-id="806be6a" data-element_type="column" data-e-type="column">
			<div class="elementor-widget-wrap elementor-element-populated">
						<div class="elementor-element elementor-element-31fe259 elementor-widget elementor-widget-text-editor" data-id="31fe259" data-element_type="widget" data-e-type="widget" data-widget_type="text-editor.default">
				<div class="elementor-widget-container">
									<p>Puedes conseguir la imagen de Wonder Woman desde este link</p>								</div>
				</div>
					</div>
		</div>
				<div class="elementor-column elementor-col-50 elementor-top-column elementor-element elementor-element-de98a7c" data-id="de98a7c" data-element_type="column" data-e-type="column">
			<div class="elementor-widget-wrap elementor-element-populated">
						<div class="elementor-element elementor-element-b52ca5d elementor-align-center elementor-widget elementor-widget-button" data-id="b52ca5d" data-element_type="widget" data-e-type="widget" data-widget_type="button.default">
				<div class="elementor-widget-container">
									<div class="elementor-button-wrapper">
					<a class="elementor-button elementor-button-link elementor-size-sm" href="https://bit.ly/3kBsWxA" target="_blank">
						<span class="elementor-button-content-wrapper">
						<span class="elementor-button-icon">
				<i aria-hidden="true" class="fas fa-atlas"></i>			</span>
									<span class="elementor-button-text">IMAGEN DE WONDER WOMAN</span>
					</span>
					</a>
				</div>
								</div>
				</div>
					</div>
		</div>
					</div>
		</section>
				<section class="elementor-section elementor-top-section elementor-element elementor-element-fb28f3b elementor-section-boxed elementor-section-height-default elementor-section-height-default" data-id="fb28f3b" data-element_type="section" data-e-type="section">
						<div class="elementor-container elementor-column-gap-default">
					<div class="elementor-column elementor-col-100 elementor-top-column elementor-element elementor-element-324f879" data-id="324f879" data-element_type="column" data-e-type="column">
			<div class="elementor-widget-wrap elementor-element-populated">
						<div class="elementor-element elementor-element-5927092 elementor-widget elementor-widget-text-editor" data-id="5927092" data-element_type="widget" data-e-type="widget" data-widget_type="text-editor.default">
				<div class="elementor-widget-container">
									<p>Recuerda también que posteo trabajos e información en  <a href="https://www.facebook.com/IldefonsoSeguraPage" target="_blank" rel="noopener"><strong><span style="color: #800000;">Facebook</span> </strong></a></p><p>Igualmente, si quieres ver mis tutoriales de <strong><span style="color: #800000;">wallpapers</span></strong>, puedes verlos haciendo <span style="color: #800000;"><a style="color: #800000;" href="https://ildefonsosegura.es/category/wallpaper/"><strong>CLIC</strong></a></span> pero no olvides comentar este post antes de irte. Gracias</p>								</div>
				</div>
					</div>
		</div>
					</div>
		</section>
				<section class="elementor-section elementor-top-section elementor-element elementor-element-742276ff elementor-section-full_width elementor-section-height-default elementor-section-height-default" data-id="742276ff" data-element_type="section" data-e-type="section">
						<div class="elementor-container elementor-column-gap-default">
					<div class="elementor-column elementor-col-100 elementor-top-column elementor-element elementor-element-261106a3" data-id="261106a3" data-element_type="column" data-e-type="column">
			<div class="elementor-widget-wrap elementor-element-populated">
						<div class="elementor-element elementor-element-37781cfc elementor-widget elementor-widget-text-editor" data-id="37781cfc" data-element_type="widget" data-e-type="widget" data-widget_type="text-editor.default">
				<div class="elementor-widget-container">
									<div><div align="center"><center><strong style="color: #ff0000;">Suscríbete a mi canal de Youtube:</strong></center><div><div><div align="center"><p><script src="https://apis.google.com/js/platform.js"></script></p><div class="g-ytsubscribe" data-channel="ildefonsosegura" data-layout="full" data-count="default"> </div></div></div><p> </p><p style="text-align: center;">No te lo pierdas y comparte tus trabajos en mi página de facebook (<span style="color: #0000ff;"><strong><a style="color: #0000ff;" href="http://www.facebook.com/IldefonsoSeguraPage" target="_blank" rel="noopener noreferrer">IldefonsoSeguraPage</a></strong></span>)<br />Espero que te guste y compartas el vídeo. No dejes de compartir este post.</p><p style="text-align: center;">Así es como me puedes ayudar 🙂 Gracias</p></div></div></div>								</div>
				</div>
					</div>
		</div>
					</div>
		</section>
				</div>La entrada <a href="https://ildefonsosegura.es/aplicando-tecnicas-de-colorgrading-jl-2021-con-photoshop/">Aplicando técnicas de colorgrading JL 2021 con Photoshop</a> apareció primero en <a href="https://ildefonsosegura.es">Ildefonso Segura</a>.]]></content:encoded>
					
					<wfw:commentRss>https://ildefonsosegura.es/aplicando-tecnicas-de-colorgrading-jl-2021-con-photoshop/feed/</wfw:commentRss>
			<slash:comments>0</slash:comments>
		
		
			</item>
		<item>
		<title>Dale un estilo de pegatina (sticker) a tus fotos e ilustraciones con Photoshop</title>
		<link>https://ildefonsosegura.es/dale-un-estilo-de-pegatina-sticker-a-tus-fotos-e-ilustraciones-con-photoshop/</link>
					<comments>https://ildefonsosegura.es/dale-un-estilo-de-pegatina-sticker-a-tus-fotos-e-ilustraciones-con-photoshop/#respond</comments>
		
		<dc:creator><![CDATA[Ildefonso Segura]]></dc:creator>
		<pubDate>Mon, 23 Aug 2021 21:10:12 +0000</pubDate>
				<category><![CDATA[Efectos]]></category>
		<category><![CDATA[Estilos]]></category>
		<category><![CDATA[Photoshop]]></category>
		<category><![CDATA[Tecnicas]]></category>
		<category><![CDATA[Textura]]></category>
		<category><![CDATA[Tutoriales]]></category>
		<category><![CDATA[Video]]></category>
		<category><![CDATA[adobe]]></category>
		<category><![CDATA[cc2021]]></category>
		<category><![CDATA[comic]]></category>
		<category><![CDATA[creatividad]]></category>
		<category><![CDATA[cromo]]></category>
		<category><![CDATA[diseño]]></category>
		<category><![CDATA[efecto]]></category>
		<category><![CDATA[estilo]]></category>
		<category><![CDATA[etiqueta]]></category>
		<category><![CDATA[ildefonsosegura]]></category>
		<category><![CDATA[ilustracion]]></category>
		<category><![CDATA[oleo]]></category>
		<category><![CDATA[pegatina]]></category>
		<category><![CDATA[photoshop]]></category>
		<category><![CDATA[pintura]]></category>
		<category><![CDATA[ps]]></category>
		<category><![CDATA[simulacion]]></category>
		<category><![CDATA[sticker]]></category>
		<category><![CDATA[tecnicas]]></category>
		<category><![CDATA[tuto]]></category>
		<category><![CDATA[tutorial]]></category>
		<category><![CDATA[VIDEOTUTORIAL]]></category>
		<category><![CDATA[youtube]]></category>
		<guid isPermaLink="false">https://ildefonsosegura.es/?p=113670</guid>

					<description><![CDATA[<p>En el tutorial que hoy te traigo verás que podemos conseguir de una forma sencilla, un estilo de pegatina de tus fotos e ilustraciones. En el caso de fotos, te recomiendo que la edites para darle un aspecto mucho más de ilustración (cómic por ejemplo). Yo tengo un tutorial para convertir una foto en cómic [&#8230;]</p>
La entrada <a href="https://ildefonsosegura.es/dale-un-estilo-de-pegatina-sticker-a-tus-fotos-e-ilustraciones-con-photoshop/">Dale un estilo de pegatina (sticker) a tus fotos e ilustraciones con Photoshop</a> apareció primero en <a href="https://ildefonsosegura.es">Ildefonso Segura</a>.]]></description>
										<content:encoded><![CDATA[<div data-elementor-type="wp-post" data-elementor-id="113670" class="elementor elementor-113670">
						<section class="elementor-section elementor-top-section elementor-element elementor-element-b7471a2 elementor-section-boxed elementor-section-height-default elementor-section-height-default" data-id="b7471a2" data-element_type="section" data-e-type="section">
						<div class="elementor-container elementor-column-gap-default">
					<div class="elementor-column elementor-col-100 elementor-top-column elementor-element elementor-element-5e938f2" data-id="5e938f2" data-element_type="column" data-e-type="column">
			<div class="elementor-widget-wrap elementor-element-populated">
						<div class="elementor-element elementor-element-7cf2e12 elementor-widget elementor-widget-text-editor" data-id="7cf2e12" data-element_type="widget" data-e-type="widget" data-widget_type="text-editor.default">
				<div class="elementor-widget-container">
									<p align="justify">En el tutorial que hoy te traigo verás que podemos conseguir de una forma sencilla, un estilo de pegatina de tus fotos e ilustraciones.</p><p align="justify">En el caso de fotos, te recomiendo que la edites para darle un aspecto mucho más de ilustración (cómic por ejemplo). Yo tengo un tutorial para convertir una foto en cómic que te puede ayudar&#8230;<a title="Tutorial Photoshop // Convierte una Foto en Comic al estilo @ildefonsosegura" href="https://ildefonsosegura.es/convierte-una-foto-en-comic-con-photoshop-cs6-al-estilo-ildefonsosegura/" target="_blank" rel="noopener"><span style="color: #800000;"><strong>TUTORIAL CONVERTIR FOTO EN COMIC</strong></span></a><span style="color: #800000;"><strong>.</strong></span></p>								</div>
				</div>
					</div>
		</div>
					</div>
		</section>
				<section class="elementor-section elementor-top-section elementor-element elementor-element-40872f2 elementor-section-boxed elementor-section-height-default elementor-section-height-default" data-id="40872f2" data-element_type="section" data-e-type="section">
						<div class="elementor-container elementor-column-gap-default">
					<div class="elementor-column elementor-col-100 elementor-top-column elementor-element elementor-element-0b48922" data-id="0b48922" data-element_type="column" data-e-type="column">
			<div class="elementor-widget-wrap elementor-element-populated">
						<div class="elementor-element elementor-element-e599d07 elementor-widget elementor-widget-video" data-id="e599d07" data-element_type="widget" data-e-type="widget" data-settings="{&quot;youtube_url&quot;:&quot;https:\/\/youtu.be\/CTIGeGgKrKY&quot;,&quot;video_type&quot;:&quot;youtube&quot;,&quot;controls&quot;:&quot;yes&quot;}" data-widget_type="video.default">
				<div class="elementor-widget-container">
							<div class="elementor-wrapper elementor-open-inline">
			<div class="elementor-video"></div>		</div>
						</div>
				</div>
					</div>
		</div>
					</div>
		</section>
				<section class="elementor-section elementor-top-section elementor-element elementor-element-2ca6aa6 elementor-section-boxed elementor-section-height-default elementor-section-height-default" data-id="2ca6aa6" data-element_type="section" data-e-type="section">
						<div class="elementor-container elementor-column-gap-default">
					<div class="elementor-column elementor-col-100 elementor-top-column elementor-element elementor-element-e61067e" data-id="e61067e" data-element_type="column" data-e-type="column">
			<div class="elementor-widget-wrap elementor-element-populated">
						<div class="elementor-element elementor-element-af4e04c elementor-widget elementor-widget-text-editor" data-id="af4e04c" data-element_type="widget" data-e-type="widget" data-widget_type="text-editor.default">
				<div class="elementor-widget-container">
									<p align="justify">En mi <span style="color: #000000;"><strong>instagram</strong> </span>podrás ver alguna composición realizada con el aspecto de pegatina.</p>
<p align="justify">Te dejo aquí la referencia a mi Instagram para que chequees este post y otros que te pueden interesar <a href="http://instagram.com/ildefonsosegura" target="_blank" rel="noopener"><span style="color: #800000;"><strong>INSTAGRAM DE @IldefonsoSegura</strong></span></a></p>

<p align="justify">En primer lugar te muestro mi foto para que veas cómo puede quedar dándole el aspecto de ilustración y luego aplicando mi tutorial.</p>								</div>
				</div>
					</div>
		</div>
					</div>
		</section>
				<section class="elementor-section elementor-top-section elementor-element elementor-element-acfc913 elementor-section-boxed elementor-section-height-default elementor-section-height-default" data-id="acfc913" data-element_type="section" data-e-type="section">
						<div class="elementor-container elementor-column-gap-default">
					<div class="elementor-column elementor-col-100 elementor-top-column elementor-element elementor-element-03b0344" data-id="03b0344" data-element_type="column" data-e-type="column">
			<div class="elementor-widget-wrap">
							</div>
		</div>
					</div>
		</section>
				<section class="elementor-section elementor-top-section elementor-element elementor-element-4ecb01f elementor-section-boxed elementor-section-height-default elementor-section-height-default" data-id="4ecb01f" data-element_type="section" data-e-type="section">
						<div class="elementor-container elementor-column-gap-default">
					<div class="elementor-column elementor-col-100 elementor-top-column elementor-element elementor-element-00dfe98" data-id="00dfe98" data-element_type="column" data-e-type="column">
			<div class="elementor-widget-wrap elementor-element-populated">
						<div class="elementor-element elementor-element-a2d52fd elementor-widget elementor-widget-text-editor" data-id="a2d52fd" data-element_type="widget" data-e-type="widget" data-widget_type="text-editor.default">
				<div class="elementor-widget-container">
									<p>Como puedes suponer, el tutorial desarrolla una secuencia de técnicas que nos son complicadas. Es por eso que el objetivo es conseguir que el resultado final se acerque al parecido con una pegatina. Por eso analizamos qué queremos conseguir:</p><ul><li>Una pegatina doblada</li><li>Cuando algo se dobla, hay un degradado natural por las sobras del doblez</li><li>El punto de atención visual está normalmente en el centro por lo que los lados se verán un poco desenfocados</li><li>La sombra es esencial. El aspecto doblado debe reforzarse con la sombra. Será más intensa y más cercana al objeto que la proyecta cuanto más cerca de la superficie esté la pegatina. Cuanto más levantada esté de la superficie, la sombra será mayor, más difuminada y con menor opacidad.</li><li>Las pegatinas tienen una pequeña extrusión que nosotros conseguimos con un bisel y relieve</li></ul>								</div>
				</div>
				<div class="elementor-element elementor-element-e35cdaf elementor-widget-divider--view-line_icon elementor-view-default elementor-widget-divider--element-align-center elementor-widget elementor-widget-divider" data-id="e35cdaf" data-element_type="widget" data-e-type="widget" data-widget_type="divider.default">
				<div class="elementor-widget-container">
							<div class="elementor-divider">
			<span class="elementor-divider-separator">
							<div class="elementor-icon elementor-divider__element">
					<i aria-hidden="true" class="fas fa-star"></i></div>
						</span>
		</div>
						</div>
				</div>
					</div>
		</div>
					</div>
		</section>
				<section class="elementor-section elementor-top-section elementor-element elementor-element-fb28f3b elementor-section-boxed elementor-section-height-default elementor-section-height-default" data-id="fb28f3b" data-element_type="section" data-e-type="section">
						<div class="elementor-container elementor-column-gap-default">
					<div class="elementor-column elementor-col-100 elementor-top-column elementor-element elementor-element-324f879" data-id="324f879" data-element_type="column" data-e-type="column">
			<div class="elementor-widget-wrap elementor-element-populated">
						<div class="elementor-element elementor-element-5927092 elementor-widget elementor-widget-text-editor" data-id="5927092" data-element_type="widget" data-e-type="widget" data-widget_type="text-editor.default">
				<div class="elementor-widget-container">
									<p>Otros resultados puedes verlos aquí. Haz clic en las imágenes para verlas más grandes. recuerda también que las tienes en Instagram y <a href="https://www.facebook.com/IldefonsoSeguraPage" target="_blank" rel="noopener"><strong><span style="color: #800000;">Facebook</span> </strong></a>:</p>								</div>
				</div>
					</div>
		</div>
					</div>
		</section>
				<section class="elementor-section elementor-top-section elementor-element elementor-element-850c13c elementor-section-boxed elementor-section-height-default elementor-section-height-default" data-id="850c13c" data-element_type="section" data-e-type="section">
						<div class="elementor-container elementor-column-gap-default">
					<div class="elementor-column elementor-col-100 elementor-top-column elementor-element elementor-element-6720d5b" data-id="6720d5b" data-element_type="column" data-e-type="column">
			<div class="elementor-widget-wrap elementor-element-populated">
						<div class="elementor-element elementor-element-af58649 elementor-arrows-position-inside elementor-pagination-position-outside elementor-widget elementor-widget-image-carousel" data-id="af58649" data-element_type="widget" data-e-type="widget" data-settings="{&quot;speed&quot;:350,&quot;slides_to_show&quot;:&quot;2&quot;,&quot;navigation&quot;:&quot;both&quot;,&quot;autoplay&quot;:&quot;yes&quot;,&quot;pause_on_hover&quot;:&quot;yes&quot;,&quot;pause_on_interaction&quot;:&quot;yes&quot;,&quot;autoplay_speed&quot;:5000,&quot;infinite&quot;:&quot;yes&quot;}" data-widget_type="image-carousel.default">
				<div class="elementor-widget-container">
							<div class="elementor-image-carousel-wrapper swiper" role="region" aria-roledescription="carousel" aria-label="Carrusel de imágenes" dir="ltr">
			<div class="elementor-image-carousel swiper-wrapper" aria-live="off">
								<div class="swiper-slide" role="group" aria-roledescription="slide" aria-label="1 de 4"><a data-elementor-open-lightbox="yes" data-elementor-lightbox-slideshow="af58649" data-elementor-lightbox-title="mario-pegatina" data-e-action-hash="#elementor-action%3Aaction%3Dlightbox%26settings%3DeyJpZCI6MTEzNjc4LCJ1cmwiOiJodHRwczpcL1wvaWxkZWZvbnNvc2VndXJhLmVzXC93cC1jb250ZW50XC91cGxvYWRzXC9tYXJpby1wZWdhdGluYS5qcGciLCJzbGlkZXNob3ciOiJhZjU4NjQ5In0%3D" href="https://ildefonsosegura.es/wp-content/uploads/mario-pegatina.jpg"><figure class="swiper-slide-inner"><img decoding="async" class="swiper-slide-image" src="https://ildefonsosegura.es/wp-content/uploads/mario-pegatina-768x432.jpg" alt="mario-pegatina" /></figure></a></div><div class="swiper-slide" role="group" aria-roledescription="slide" aria-label="2 de 4"><a data-elementor-open-lightbox="yes" data-elementor-lightbox-slideshow="af58649" data-elementor-lightbox-title="minion-pegatina" data-e-action-hash="#elementor-action%3Aaction%3Dlightbox%26settings%3DeyJpZCI6MTEzNjc5LCJ1cmwiOiJodHRwczpcL1wvaWxkZWZvbnNvc2VndXJhLmVzXC93cC1jb250ZW50XC91cGxvYWRzXC9taW5pb24tcGVnYXRpbmEuanBnIiwic2xpZGVzaG93IjoiYWY1ODY0OSJ9" href="https://ildefonsosegura.es/wp-content/uploads/minion-pegatina.jpg"><figure class="swiper-slide-inner"><img decoding="async" class="swiper-slide-image" src="https://ildefonsosegura.es/wp-content/uploads/minion-pegatina-768x432.jpg" alt="minion-pegatina" /></figure></a></div><div class="swiper-slide" role="group" aria-roledescription="slide" aria-label="3 de 4"><a data-elementor-open-lightbox="yes" data-elementor-lightbox-slideshow="af58649" data-elementor-lightbox-title="TUTORIAL-PRESENTACOIN" data-e-action-hash="#elementor-action%3Aaction%3Dlightbox%26settings%3DeyJpZCI6MTEzNjgwLCJ1cmwiOiJodHRwczpcL1wvaWxkZWZvbnNvc2VndXJhLmVzXC93cC1jb250ZW50XC91cGxvYWRzXC9UVVRPUklBTC1QUkVTRU5UQUNPSU4uanBnIiwic2xpZGVzaG93IjoiYWY1ODY0OSJ9" href="https://ildefonsosegura.es/wp-content/uploads/TUTORIAL-PRESENTACOIN.jpg"><figure class="swiper-slide-inner"><img decoding="async" class="swiper-slide-image" src="https://ildefonsosegura.es/wp-content/uploads/TUTORIAL-PRESENTACOIN-768x432.jpg" alt="TUTORIAL-PRESENTACOIN" /></figure></a></div><div class="swiper-slide" role="group" aria-roledescription="slide" aria-label="4 de 4"><a data-elementor-open-lightbox="yes" data-elementor-lightbox-slideshow="af58649" data-elementor-lightbox-title="Wallpaper ilde Pegatina" data-e-action-hash="#elementor-action%3Aaction%3Dlightbox%26settings%3DeyJpZCI6MTEzNjgxLCJ1cmwiOiJodHRwczpcL1wvaWxkZWZvbnNvc2VndXJhLmVzXC93cC1jb250ZW50XC91cGxvYWRzXC9XYWxscGFwZXItaWxkZS1QZWdhdGluYS5qcGciLCJzbGlkZXNob3ciOiJhZjU4NjQ5In0%3D" href="https://ildefonsosegura.es/wp-content/uploads/Wallpaper-ilde-Pegatina.jpg"><figure class="swiper-slide-inner"><img decoding="async" class="swiper-slide-image" src="https://ildefonsosegura.es/wp-content/uploads/Wallpaper-ilde-Pegatina-768x432.jpg" alt="Wallpaper ilde Pegatina" /></figure></a></div>			</div>
												<div class="elementor-swiper-button elementor-swiper-button-prev" role="button" tabindex="0">
						<i aria-hidden="true" class="eicon-chevron-left"></i>					</div>
					<div class="elementor-swiper-button elementor-swiper-button-next" role="button" tabindex="0">
						<i aria-hidden="true" class="eicon-chevron-right"></i>					</div>
				
									<div class="swiper-pagination"></div>
									</div>
						</div>
				</div>
				<div class="elementor-element elementor-element-22c5c13 elementor-widget-divider--view-line_icon elementor-view-default elementor-widget-divider--element-align-center elementor-widget elementor-widget-divider" data-id="22c5c13" data-element_type="widget" data-e-type="widget" data-widget_type="divider.default">
				<div class="elementor-widget-container">
							<div class="elementor-divider">
			<span class="elementor-divider-separator">
							<div class="elementor-icon elementor-divider__element">
					<i aria-hidden="true" class="fas fa-star"></i></div>
						</span>
		</div>
						</div>
				</div>
					</div>
		</div>
					</div>
		</section>
				<section class="elementor-section elementor-top-section elementor-element elementor-element-65f8937 elementor-section-boxed elementor-section-height-default elementor-section-height-default" data-id="65f8937" data-element_type="section" data-e-type="section">
						<div class="elementor-container elementor-column-gap-default">
					<div class="elementor-column elementor-col-100 elementor-top-column elementor-element elementor-element-06442b8" data-id="06442b8" data-element_type="column" data-e-type="column">
			<div class="elementor-widget-wrap elementor-element-populated">
						<div class="elementor-element elementor-element-8f5fb7d elementor-widget elementor-widget-text-editor" data-id="8f5fb7d" data-element_type="widget" data-e-type="widget" data-widget_type="text-editor.default">
				<div class="elementor-widget-container">
									<p align="justify">Espero que el tutorial para crear un aspecto de pegatina/sticker sea funcional para ti y puedas aprender algo que a la vez puedas aplicar en otras composiciones.</p><p align="justify">Después de todo esta introducción, aquí puedes ver el tutorial y no dejes de compartir el post y darle «like» / «dedo arriba» al vídeo. </p><h6 class="single-post-title entry-title">«Dale un estilo de pegatina (sticker) a tus fotos e ilustraciones con Photoshop»</h6><p align="justify"> </p>								</div>
				</div>
					</div>
		</div>
					</div>
		</section>
				<section class="elementor-section elementor-top-section elementor-element elementor-element-4d24a2e elementor-section-boxed elementor-section-height-default elementor-section-height-default" data-id="4d24a2e" data-element_type="section" data-e-type="section">
						<div class="elementor-container elementor-column-gap-default">
					<div class="elementor-column elementor-col-100 elementor-top-column elementor-element elementor-element-1cd2633" data-id="1cd2633" data-element_type="column" data-e-type="column">
			<div class="elementor-widget-wrap elementor-element-populated">
						<div class="elementor-element elementor-element-f6de5d4 elementor-widget elementor-widget-video" data-id="f6de5d4" data-element_type="widget" data-e-type="widget" data-settings="{&quot;youtube_url&quot;:&quot;https:\/\/youtu.be\/8xSGHUjug4k&quot;,&quot;video_type&quot;:&quot;youtube&quot;,&quot;controls&quot;:&quot;yes&quot;}" data-widget_type="video.default">
				<div class="elementor-widget-container">
							<div class="elementor-wrapper elementor-open-inline">
			<div class="elementor-video"></div>		</div>
						</div>
				</div>
					</div>
		</div>
					</div>
		</section>
				<section class="elementor-section elementor-top-section elementor-element elementor-element-742276ff elementor-section-full_width elementor-section-height-default elementor-section-height-default" data-id="742276ff" data-element_type="section" data-e-type="section">
						<div class="elementor-container elementor-column-gap-default">
					<div class="elementor-column elementor-col-100 elementor-top-column elementor-element elementor-element-261106a3" data-id="261106a3" data-element_type="column" data-e-type="column">
			<div class="elementor-widget-wrap elementor-element-populated">
						<div class="elementor-element elementor-element-37781cfc elementor-widget elementor-widget-text-editor" data-id="37781cfc" data-element_type="widget" data-e-type="widget" data-widget_type="text-editor.default">
				<div class="elementor-widget-container">
									<div><div align="center"><center><strong style="color: #ff0000;">Suscríbete a mi canal de Youtube:</strong></center><div><div><div align="center"><p><script src="https://apis.google.com/js/platform.js"></script></p><div class="g-ytsubscribe" data-channel="ildefonsosegura" data-layout="full" data-count="default"> </div></div></div><p> </p><p style="text-align: center;">No te lo pierdas y comparte tus trabajos en mi página de facebook (<span style="color: #0000ff;"><strong><a style="color: #0000ff;" href="http://www.facebook.com/IldefonsoSeguraPage" target="_blank" rel="noopener noreferrer">IldefonsoSeguraPage</a></strong></span>)<br />Espero que te guste y compartas el vídeo. No dejes de compartir este post.</p><p style="text-align: center;">Así es como me puedes ayudar 🙂 Gracias</p></div></div></div>								</div>
				</div>
					</div>
		</div>
					</div>
		</section>
				</div>La entrada <a href="https://ildefonsosegura.es/dale-un-estilo-de-pegatina-sticker-a-tus-fotos-e-ilustraciones-con-photoshop/">Dale un estilo de pegatina (sticker) a tus fotos e ilustraciones con Photoshop</a> apareció primero en <a href="https://ildefonsosegura.es">Ildefonso Segura</a>.]]></content:encoded>
					
					<wfw:commentRss>https://ildefonsosegura.es/dale-un-estilo-de-pegatina-sticker-a-tus-fotos-e-ilustraciones-con-photoshop/feed/</wfw:commentRss>
			<slash:comments>0</slash:comments>
		
		
			</item>
		<item>
		<title>Fade profesional en una intro con After Effects by @ildefonsosegura</title>
		<link>https://ildefonsosegura.es/fade-profesional-en-una-intro-con-after-effects-by-ildefonsosegura/</link>
		
		<dc:creator><![CDATA[Ildefonso Segura]]></dc:creator>
		<pubDate>Fri, 16 Apr 2021 17:27:00 +0000</pubDate>
				<category><![CDATA[3D]]></category>
		<category><![CDATA[After Effects]]></category>
		<category><![CDATA[Efectos]]></category>
		<category><![CDATA[Intro]]></category>
		<category><![CDATA[Películas]]></category>
		<category><![CDATA[Tecnicas]]></category>
		<category><![CDATA[Textura]]></category>
		<category><![CDATA[Tutoriales]]></category>
		<category><![CDATA[Video]]></category>
		<category><![CDATA[adobe]]></category>
		<category><![CDATA[after effects]]></category>
		<category><![CDATA[aftereffects]]></category>
		<category><![CDATA[cabecera]]></category>
		<category><![CDATA[fade]]></category>
		<category><![CDATA[ildefonsosegura]]></category>
		<category><![CDATA[intro]]></category>
		<category><![CDATA[metal]]></category>
		<category><![CDATA[opener]]></category>
		<category><![CDATA[opening]]></category>
		<category><![CDATA[películas]]></category>
		<category><![CDATA[texture]]></category>
		<category><![CDATA[tuto]]></category>
		<category><![CDATA[tutorial]]></category>
		<category><![CDATA[vídeo]]></category>
		<category><![CDATA[warner]]></category>
		<category><![CDATA[warnerbros]]></category>
		<category><![CDATA[wp]]></category>
		<category><![CDATA[youtube]]></category>
		<guid isPermaLink="false">http://ildefonsosegura.es/?p=61367</guid>

					<description><![CDATA[<p>En este tutorial de adobe After Effects distinguiremos una intro amateur de una intro con detalles que le darán un aspecto profesional. Un «fade» profesional puede distinguir la calidad de una intro. No tiene complicaciones dado que con un solo efecto conseguimos cambiar la calidad de la animación. Indagaremos en un simple efecto para conseguir [&#8230;]</p>
La entrada <a href="https://ildefonsosegura.es/fade-profesional-en-una-intro-con-after-effects-by-ildefonsosegura/">Fade profesional en una intro con After Effects by @ildefonsosegura</a> apareció primero en <a href="https://ildefonsosegura.es">Ildefonso Segura</a>.]]></description>
										<content:encoded><![CDATA[<div data-elementor-type="wp-post" data-elementor-id="61367" class="elementor elementor-61367">
						<section class="elementor-section elementor-top-section elementor-element elementor-element-521a4024 elementor-section-boxed elementor-section-height-default elementor-section-height-default" data-id="521a4024" data-element_type="section" data-e-type="section">
						<div class="elementor-container elementor-column-gap-default">
					<div class="elementor-column elementor-col-100 elementor-top-column elementor-element elementor-element-1ac6be77" data-id="1ac6be77" data-element_type="column" data-e-type="column">
			<div class="elementor-widget-wrap elementor-element-populated">
						<div class="elementor-element elementor-element-7a96de7 elementor-widget elementor-widget-text-editor" data-id="7a96de7" data-element_type="widget" data-e-type="widget" data-widget_type="text-editor.default">
				<div class="elementor-widget-container">
									<p style="text-align: justify;">En este tutorial de adobe After Effects distinguiremos una intro amateur de una intro con detalles que le darán un aspecto profesional.</p><p style="text-align: justify;">Un «<em>fade</em>» profesional puede distinguir la calidad de una intro. No tiene complicaciones dado que con un solo efecto conseguimos cambiar la calidad de la animación. Indagaremos en un simple efecto para conseguir un desvanecimiento («<em>fade»</em>) de un logotipo de una forma más orgánica de lo que estamos acostumbrados.</p><p style="text-align: justify;">Veremos cómo hacer una intro simple y otra más compleja para compararlas y ver como con poco se pueden conseguir resultados más profesionales y con un mejor acabado. A partir de ahí podréis incorporar vuestros propios efectos adicionales para mejorar, si cabe, vuestra intro. Animo y convierte tus intros en animaciones de calidad con con fade profesional y el efecto image wipe.</p><p style="text-align: justify;">Te mostraré como texturizar un logo 3D con contrastes de color y «<em>high ligths</em>» en sus bordes (es importante que busqueis o elaboreis logotipos de ese tipo para que el efecto se aplique en su máxima funcionalidad). El resultado es evidente. Tú puedes ver el antes y el después</p><p style="text-align: justify;">[twenty20 img1=»61370&#8243; img2=»61371&#8243; offset=»0.5&#8243;]</p><p style="text-align: justify;">Te dejo el tutorial para que puedas construir tu propia intro y me la muestres en mis redes sociales. Ánimo.</p><p><strong><span style="color: #800000;">TUTORIAL INTRO CON FADE PROFESIONAL</span></strong></p>								</div>
				</div>
				<div class="elementor-element elementor-element-9dcac73 elementor-widget elementor-widget-video" data-id="9dcac73" data-element_type="widget" data-e-type="widget" data-settings="{&quot;youtube_url&quot;:&quot;https:\/\/youtu.be\/flKK2inCYZc&quot;,&quot;video_type&quot;:&quot;youtube&quot;,&quot;controls&quot;:&quot;yes&quot;}" data-widget_type="video.default">
				<div class="elementor-widget-container">
							<div class="elementor-wrapper elementor-open-inline">
			<div class="elementor-video"></div>		</div>
						</div>
				</div>
				<div class="elementor-element elementor-element-37a8c0b elementor-align-center elementor-widget elementor-widget-button" data-id="37a8c0b" data-element_type="widget" data-e-type="widget" data-widget_type="button.default">
				<div class="elementor-widget-container">
									<div class="elementor-button-wrapper">
					<a class="elementor-button elementor-button-link elementor-size-md elementor-animation-grow" href="https://mega.nz/file/xkt0VZib#iIWNaFMSiEsI_0f_EGhTbLZ9CyVTimO7NCkjIzB3z6I" target="_blank">
						<span class="elementor-button-content-wrapper">
									<span class="elementor-button-text">BAJATE EL EDITABLE</span>
					</span>
					</a>
				</div>
								</div>
				</div>
				<div class="elementor-element elementor-element-7f6cb01b elementor-widget elementor-widget-text-editor" data-id="7f6cb01b" data-element_type="widget" data-e-type="widget" data-widget_type="text-editor.default">
				<div class="elementor-widget-container">
									<p style="text-align: center;"> </p><p>Aquí te dejo también el «making of» de la composición que puedes chequear también en mi <a href="https://www.instagram.com/ildefonsosegura/" target="_blank" rel="noopener noreferrer">instagram ildefonsosegura</a>:</p><div><div align="center"><blockquote class="instagram-media" style="background: #FFF; border: 0; border-radius: 3px; box-shadow: 0 0 1px 0 rgba(0,0,0,0.5),0 1px 10px 0 rgba(0,0,0,0.15); margin: 1px; max-width: 540px; min-width: 326px; padding: 0; width: calc(100% - 2px);" data-instgrm-captioned="" data-instgrm-permalink="https://www.instagram.com/p/B-4pHWDoLE_/?utm_source=ig_embed&amp;utm_campaign=loading" data-instgrm-version="12"><div style="padding: 16px;"><div style="display: flex; flex-direction: row; align-items: center;"><div style="background-color: #f4f4f4; border-radius: 50%; flex-grow: 0; height: 40px; margin-right: 14px; width: 40px;"> </div><div style="display: flex; flex-direction: column; flex-grow: 1; justify-content: center;"><div style="background-color: #f4f4f4; border-radius: 4px; flex-grow: 0; height: 14px; margin-bottom: 6px; width: 100px;"> </div><div style="background-color: #f4f4f4; border-radius: 4px; flex-grow: 0; height: 14px; width: 60px;"> </div></div></div><div style="padding: 19% 0;"> </div><div style="display: block; height: 50px; margin: 0 auto 12px; width: 50px;"> </div><div style="padding-top: 8px;"><div style="color: #3897f0; font-family: Arial,sans-serif; font-size: 14px; font-style: normal; font-weight: 550; line-height: 18px;">Ver esta publicación en Instagram</div></div><div style="padding: 12.5% 0;"> </div><div style="display: flex; flex-direction: row; margin-bottom: 14px; align-items: center;"><div><div style="background-color: #f4f4f4; border-radius: 50%; height: 12.5px; width: 12.5px; transform: translateX(0px) translateY(7px);"> </div><div style="background-color: #f4f4f4; height: 12.5px; transform: rotate(-45deg) translateX(3px) translateY(1px); width: 12.5px; flex-grow: 0; margin-right: 14px; margin-left: 2px;"> </div><div style="background-color: #f4f4f4; border-radius: 50%; height: 12.5px; width: 12.5px; transform: translateX(9px) translateY(-18px);"> </div></div><div style="margin-left: 8px;"><div style="background-color: #f4f4f4; border-radius: 50%; flex-grow: 0; height: 20px; width: 20px;"> </div><div style="width: 0; height: 0; border-top: 2px solid transparent; border-left: 6px solid #f4f4f4; border-bottom: 2px solid transparent; transform: translateX(16px) translateY(-4px) rotate(30deg);"> </div></div><div style="margin-left: auto;"><div style="width: 0px; border-top: 8px solid #F4F4F4; border-right: 8px solid transparent; transform: translateY(16px);"> </div><div style="background-color: #f4f4f4; flex-grow: 0; height: 12px; width: 16px; transform: translateY(-4px);"> </div><div style="width: 0; height: 0; border-top: 8px solid #F4F4F4; border-left: 8px solid transparent; transform: translateY(-4px) translateX(8px);"> </div></div></div><p style="margin: 8px 0 0 0; padding: 0 4px;"><a style="color: #000; font-family: Arial,sans-serif; font-size: 14px; font-style: normal; font-weight: normal; line-height: 17px; text-decoration: none; word-wrap: break-word;" href="https://www.instagram.com/p/B-4pHWDoLE_/?utm_source=ig_embed&amp;utm_campaign=loading" target="_blank" rel="noopener noreferrer">Making of del Próximo #tutorial #aftereffects // Professional Fade en una intro. Desde un simple logo crearemos una #intro #opener con efectos especiales muy profesionales. #motiongraphics #opening #fade #logo #desvanecer #adobeaftereffects #makingof</a></p><p style="color: #c9c8cd; font-family: Arial,sans-serif; font-size: 14px; line-height: 17px; margin-bottom: 0; margin-top: 8px; overflow: hidden; padding: 8px 0 7px; text-align: center; text-overflow: ellipsis; white-space: nowrap;">Una publicación compartida de <a style="color: #c9c8cd; font-family: Arial,sans-serif; font-size: 14px; font-style: normal; font-weight: normal; line-height: 17px;" href="https://www.instagram.com/ildefonsosegura/?utm_source=ig_embed&amp;utm_campaign=loading" target="_blank" rel="noopener noreferrer"> Ildefonso Segura</a> (@ildefonsosegura) el <time style="font-family: Arial,sans-serif; font-size: 14px; line-height: 17px;" datetime="2020-04-12T15:02:30+00:00">12 Abr, 2020 a las 8:02 PDT</time></p></div></blockquote><p><script async="" src="//www.instagram.com/embed.js"></script></p><p> </p><center><strong style="color: #ff0000;">Suscríbete a mi canal de Youtube:</strong></center><p> </p><div><div><div align="center"><p><script src="https://apis.google.com/js/platform.js" gapi_processed="true"></script><br /><script>// <![CDATA[ function onYtEvent(payload) { if (payload.eventType == 'subscribe') { // Add code to handle subscribe event. } else if (payload.eventType == 'unsubscribe') { // Add code to handle unsubscribe event. } if (window.console) { // for debugging only window.console.log('YT event: ', payload); } } // ]]&gt;</script></p><div class="g-ytsubscribe" data-channel="ildefonsosegura" data-layout="default" data-count="default" data-onytevent="onYtEvent"> </div></div></div><p style="text-align: left;">No te lo pierdas y comparte tus trabajos en mi página de facebook (<a href="http://www.facebook.com/IldefonsoSeguraPage" target="_blank" rel="noopener noreferrer">IldefonsoSeguraPage</a>)<br />Espero que te guste y compartas el vídeo. No dejes de compartir este post.</p><p style="text-align: left;">Así es como me puedes ayudar 🙂 Gracias</p></div></div></div>								</div>
				</div>
					</div>
		</div>
					</div>
		</section>
				<section class="elementor-section elementor-top-section elementor-element elementor-element-54d2334c elementor-section-full_width elementor-section-height-default elementor-section-height-default" data-id="54d2334c" data-element_type="section" data-e-type="section">
						<div class="elementor-container elementor-column-gap-default">
					<div class="elementor-column elementor-col-50 elementor-top-column elementor-element elementor-element-2911e956" data-id="2911e956" data-element_type="column" data-e-type="column">
			<div class="elementor-widget-wrap elementor-element-populated">
						<div class="elementor-element elementor-element-40578df5 elementor-align-center elementor-widget elementor-widget-button" data-id="40578df5" data-element_type="widget" data-e-type="widget" data-widget_type="button.default">
				<div class="elementor-widget-container">
									<div class="elementor-button-wrapper">
					<a class="elementor-button elementor-button-link elementor-size-sm" href="#">
						<span class="elementor-button-content-wrapper">
									<span class="elementor-button-text">BAJATE EL EDITABLE</span>
					</span>
					</a>
				</div>
								</div>
				</div>
					</div>
		</div>
				<div class="elementor-column elementor-col-50 elementor-top-column elementor-element elementor-element-54a0d290" data-id="54a0d290" data-element_type="column" data-e-type="column">
			<div class="elementor-widget-wrap elementor-element-populated">
						<div class="elementor-element elementor-element-5db335a7 elementor-widget elementor-widget-html" data-id="5db335a7" data-element_type="widget" data-e-type="widget" data-settings="{&quot;_animation&quot;:&quot;none&quot;}" data-widget_type="html.default">
				<div class="elementor-widget-container">
					<form action="https://www.paypal.com/cgi-bin/webscr" method="post" target="_blank">
<input type="hidden" name="cmd" value="_donations">
<input type="hidden" name="business" value="ildefonsosegura@gmail.com">
<input type="hidden" name="lc" value="ES">
<input type="hidden" name="item_name" value="MANTENIMIENTO DE LA PAGINA DE ILDEFONSOSEGURA">
<input type="hidden" name="no_note" value="0">
<input type="hidden" name="currency_code" value="EUR">
<input type="hidden" name="bn" value="PP-DonationsBF:paypal1.jpg:NonHostedGuest">
<input type="image" src="http://ildefonsosegura.es/wp-content/uploads/paypal-updated-1.png" border="0" name="submit" alt="PayPal. La forma rápida y segura de pagar en Internet.">
<img loading="lazy" decoding="async" alt="" border="0" src="https://www.paypalobjects.com/es_ES/i/scr/pixel.gif" width="1" height="1">
</form>				</div>
				</div>
					</div>
		</div>
					</div>
		</section>
				</div>La entrada <a href="https://ildefonsosegura.es/fade-profesional-en-una-intro-con-after-effects-by-ildefonsosegura/">Fade profesional en una intro con After Effects by @ildefonsosegura</a> apareció primero en <a href="https://ildefonsosegura.es">Ildefonso Segura</a>.]]></content:encoded>


			</item>
		<item>
		<title>Logo de Flash desde cero con Photoshop by @ildefonsosegura</title>
		<link>https://ildefonsosegura.es/logo-de-flash-desde-cero-con-photoshop-by-ildefonsosegura/</link>
		
		<dc:creator><![CDATA[Ildefonso Segura]]></dc:creator>
		<pubDate>Fri, 16 Apr 2021 17:26:00 +0000</pubDate>
				<category><![CDATA[Efectos]]></category>
		<category><![CDATA[Estilos]]></category>
		<category><![CDATA[Películas]]></category>
		<category><![CDATA[Photoshop]]></category>
		<category><![CDATA[Tecnicas]]></category>
		<category><![CDATA[Textura]]></category>
		<category><![CDATA[Tutoriales]]></category>
		<category><![CDATA[Video]]></category>
		<category><![CDATA[Wallpaper]]></category>
		<category><![CDATA[adobe]]></category>
		<category><![CDATA[cartel]]></category>
		<category><![CDATA[cc2019]]></category>
		<category><![CDATA[cc2020]]></category>
		<category><![CDATA[flash]]></category>
		<category><![CDATA[fotomontaje]]></category>
		<category><![CDATA[guias]]></category>
		<category><![CDATA[ildefonsosegura]]></category>
		<category><![CDATA[justicia]]></category>
		<category><![CDATA[liga justicia]]></category>
		<category><![CDATA[logo]]></category>
		<category><![CDATA[logo flash]]></category>
		<category><![CDATA[movie]]></category>
		<category><![CDATA[photoshop]]></category>
		<category><![CDATA[superheroe]]></category>
		<category><![CDATA[textura]]></category>
		<category><![CDATA[tuto]]></category>
		<category><![CDATA[tutorial]]></category>
		<category><![CDATA[video]]></category>
		<category><![CDATA[wallpaper]]></category>
		<category><![CDATA[youtube]]></category>
		<guid isPermaLink="false">http://ildefonsosegura.es/?p=61434</guid>

					<description><![CDATA[<p>En este tutorial de Photoshop te muestro como reconstruir el diseño del logo del fantástico superheroe Flash. En otros posts encontrarás más temática relacionada con superheroes: Avengers Wallpaper para smartphone Hulk IronMan Spiderman y otros&#8230; Nos adentraremos en el poder de las guías para poder tener referencias en la reconstrucción. Aplicaremos estilos de capa, efectos [&#8230;]</p>

La entrada <a href="https://ildefonsosegura.es/logo-de-flash-desde-cero-con-photoshop-by-ildefonsosegura/">Logo de Flash desde cero con Photoshop by @ildefonsosegura</a> apareció primero en <a href="https://ildefonsosegura.es">Ildefonso Segura</a>.]]></description>
										<content:encoded><![CDATA[<div data-elementor-type="wp-post" data-elementor-id="61434" class="elementor elementor-61434">
						<section class="elementor-section elementor-top-section elementor-element elementor-element-20d238ab elementor-section-boxed elementor-section-height-default elementor-section-height-default" data-id="20d238ab" data-element_type="section" data-e-type="section">
						<div class="elementor-container elementor-column-gap-default">
					<div class="elementor-column elementor-col-100 elementor-top-column elementor-element elementor-element-76efa643" data-id="76efa643" data-element_type="column" data-e-type="column">
			<div class="elementor-widget-wrap elementor-element-populated">
						<div class="elementor-element elementor-element-d6bbc15 elementor-widget elementor-widget-text-editor" data-id="d6bbc15" data-element_type="widget" data-e-type="widget" data-widget_type="text-editor.default">
				<div class="elementor-widget-container">
									<p style="text-align: justify;">En este tutorial de Photoshop te muestro como reconstruir el diseño del logo del fantástico superheroe Flash.</p><p style="text-align: center;"><img loading="lazy" decoding="async" class="aligncenter wp-image-61435 size-medium" src="http://ildefonsosegura.es/wp-content/uploads/flash-200x300.jpg" alt="" width="200" height="300" srcset="https://ildefonsosegura.es/wp-content/uploads/flash-200x300.jpg 200w, https://ildefonsosegura.es/wp-content/uploads/flash.jpg 400w" sizes="(max-width: 200px) 100vw, 200px" /></p><p style="text-align: justify;">En otros posts encontrarás más temática relacionada con superheroes:</p><ul><li style="text-align: justify;"><strong><a href="https://ildefonsosegura.es/intro-the-avengers-los-vengadores/"><span style="color: #800000;">Avengers</span></a></strong></li><li><strong><a href="https://ildefonsosegura.es/tutorial-photoshop-wallpaper-superheroe-para-smartphone/"><span style="color: #800000;">Wallpaper para smartphone</span></a></strong></li><li><strong><a href="https://ildefonsosegura.es/trucos-curiosos-de-iluminacion-con-photoshop-by-ildefonsosegura-wallpaper-hulk/"><span style="color: #800000;">Hulk</span></a></strong></li><li><strong><a href="https://ildefonsosegura.es/efectos-de-luz-en-el-corazon-de-iron-man-con-photoshop-by-ildefonsosegura/"><span style="color: #800000;">IronMan</span></a></strong></li><li><a href="https://ildefonsosegura.es/trucos-de-iluminacion-con-photoshop-crea-alucinantes-wallpapers-de-pelicula-by-ildefonsosegura/"><span style="color: #800000;"><strong>Spiderman</strong></span></a></li><li>y otros&#8230;</li></ul><p> </p><p style="text-align: justify;">Nos adentraremos en el poder de las guías para poder tener referencias en la reconstrucción.</p><p style="text-align: justify;">Aplicaremos estilos de capa, efectos de iluminación y recrearemos ese bisel tan particular del rayo del logo de Flash.</p><p style="text-align: justify;">Photoshop nos ayudará a crear un resultado brillante.</p><p style="text-align: justify;">El resultado es fantástico y lo mejor de todo es que puedes cambiar la iluminación y los colores para conseguir tu propio resultado. Si quieres ver el wallapaper final puedes ver al antes y después siguiente o ve a mi cuenta de <a href="https://flic.kr/p/2j5iN7f" target="_blank" rel="noopener noreferrer"><strong>FLICKr IldefonsoSegura</strong></a> haciendo click</p><p style="text-align: justify;">[twenty20 img1=»61439&#8243; img2=»61438&#8243; offset=»0.5&#8243;]</p><p><strong><span style="color: #800000;">TUTORIAL CREA EL LOGO DE FLASH DESDE CERO</span></strong></p><p><iframe title="YouTube video player" src="https://www.youtube.com/embed/RHtT5OZEV2A" width="560" height="490" frameborder="0" allowfullscreen="allowfullscreen"></iframe></p>								</div>
				</div>
				<div class="elementor-element elementor-element-6682adc elementor-align-center elementor-widget elementor-widget-button" data-id="6682adc" data-element_type="widget" data-e-type="widget" data-widget_type="button.default">
				<div class="elementor-widget-container">
									<div class="elementor-button-wrapper">
					<a class="elementor-button elementor-button-link elementor-size-md elementor-animation-grow" href="https://bit.ly/2TzdIfX" target="_blank">
						<span class="elementor-button-content-wrapper">
									<span class="elementor-button-text">DESCARGA LOS MATERIALES</span>
					</span>
					</a>
				</div>
								</div>
				</div>
					</div>
		</div>
					</div>
		</section>
				<section class="elementor-section elementor-top-section elementor-element elementor-element-2654a680 elementor-section-full_width elementor-section-height-default elementor-section-height-default" data-id="2654a680" data-element_type="section" data-e-type="section">
						<div class="elementor-container elementor-column-gap-default">
					<div class="elementor-column elementor-col-100 elementor-top-column elementor-element elementor-element-1a0a9ed8" data-id="1a0a9ed8" data-element_type="column" data-e-type="column">
			<div class="elementor-widget-wrap elementor-element-populated">
						<div class="elementor-element elementor-element-155afb46 elementor-widget elementor-widget-text-editor" data-id="155afb46" data-element_type="widget" data-e-type="widget" data-widget_type="text-editor.default">
				<div class="elementor-widget-container">
									<div><div align="center"><center><strong style="color: #ff0000;">Suscríbete a mi canal de Youtube:</strong></center><center></center><div><div><div align="center"><p><script src="https://apis.google.com/js/platform.js"></script></p><div class="g-ytsubscribe" data-channel="ildefonsosegura" data-layout="full" data-count="default"> </div></div></div><p> </p><p style="text-align: left;">No te lo pierdas y comparte tus trabajos en mi página de facebook (<span style="color: #0000ff;"><strong><a style="color: #0000ff;" href="http://www.facebook.com/IldefonsoSeguraPage" target="_blank" rel="noopener noreferrer">IldefonsoSeguraPage</a></strong></span>)<br />Espero que te guste y compartas el vídeo. No dejes de compartir este post.</p><p style="text-align: left;">Así es como me puedes ayudar 🙂 Gracias</p></div></div></div>								</div>
				</div>
					</div>
		</div>
					</div>
		</section>
				</div>La entrada <a href="https://ildefonsosegura.es/logo-de-flash-desde-cero-con-photoshop-by-ildefonsosegura/">Logo de Flash desde cero con Photoshop by @ildefonsosegura</a> apareció primero en <a href="https://ildefonsosegura.es">Ildefonso Segura</a>.]]></content:encoded>


			</item>
		<item>
		<title>Aparición de texto en llamas con After Effects by @ildefonsosegura</title>
		<link>https://ildefonsosegura.es/aparicion-de-texto-en-llamas-con-after-effects-by-ildefonsosegura/</link>
		
		<dc:creator><![CDATA[Ildefonso Segura]]></dc:creator>
		<pubDate>Mon, 09 Dec 2019 15:05:58 +0000</pubDate>
				<category><![CDATA[After Effects]]></category>
		<category><![CDATA[Editable]]></category>
		<category><![CDATA[Efectos]]></category>
		<category><![CDATA[Intro]]></category>
		<category><![CDATA[Tecnicas]]></category>
		<category><![CDATA[Tutoriales]]></category>
		<category><![CDATA[Video]]></category>
		<category><![CDATA[adobe]]></category>
		<category><![CDATA[after]]></category>
		<category><![CDATA[after effects]]></category>
		<category><![CDATA[aparición]]></category>
		<category><![CDATA[cabecera]]></category>
		<category><![CDATA[cc2019]]></category>
		<category><![CDATA[cc2020]]></category>
		<category><![CDATA[corazón]]></category>
		<category><![CDATA[editable]]></category>
		<category><![CDATA[efectos]]></category>
		<category><![CDATA[effects]]></category>
		<category><![CDATA[fire]]></category>
		<category><![CDATA[fire reveal]]></category>
		<category><![CDATA[fuego]]></category>
		<category><![CDATA[ildefonsosegura]]></category>
		<category><![CDATA[intro]]></category>
		<category><![CDATA[latido]]></category>
		<category><![CDATA[opener]]></category>
		<category><![CDATA[opening]]></category>
		<category><![CDATA[presentación]]></category>
		<category><![CDATA[regalo]]></category>
		<category><![CDATA[reveal]]></category>
		<category><![CDATA[text fire reveal]]></category>
		<category><![CDATA[texto]]></category>
		<category><![CDATA[texto de fuego]]></category>
		<category><![CDATA[tuto]]></category>
		<category><![CDATA[tutorial]]></category>
		<category><![CDATA[vfx]]></category>
		<category><![CDATA[vídeo]]></category>
		<category><![CDATA[VIDEOTUTORIAL]]></category>
		<category><![CDATA[youtube]]></category>
		<guid isPermaLink="false">http://ildefonsosegura.es/?p=61216</guid>

					<description><![CDATA[<p>Este tutorial es especial para mi porque cree la intro que muestro intentando poner una cabecera a un vídeo que realicé con Google Earth Studio y After Effects. Publiqué un vídeo promocionando la ciudad de Valencia (España) en el que mostraba vistas aéreas dinámicas de la ciudad usando esta herramienta. El vídeo es este&#8230; &#60;span [&#8230;]</p>
La entrada <a href="https://ildefonsosegura.es/aparicion-de-texto-en-llamas-con-after-effects-by-ildefonsosegura/">Aparición de texto en llamas con After Effects by @ildefonsosegura</a> apareció primero en <a href="https://ildefonsosegura.es">Ildefonso Segura</a>.]]></description>
										<content:encoded><![CDATA[<div data-elementor-type="wp-post" data-elementor-id="61216" class="elementor elementor-61216">
						<section class="elementor-section elementor-top-section elementor-element elementor-element-26346caf elementor-section-boxed elementor-section-height-default elementor-section-height-default" data-id="26346caf" data-element_type="section" data-e-type="section">
						<div class="elementor-container elementor-column-gap-default">
					<div class="elementor-column elementor-col-100 elementor-top-column elementor-element elementor-element-6d276e0e" data-id="6d276e0e" data-element_type="column" data-e-type="column">
			<div class="elementor-widget-wrap elementor-element-populated">
						<div class="elementor-element elementor-element-64234096 elementor-widget elementor-widget-text-editor" data-id="64234096" data-element_type="widget" data-e-type="widget" data-widget_type="text-editor.default">
				<div class="elementor-widget-container">
									<p style="text-align: justify;">Este tutorial es especial para mi porque cree la intro que muestro intentando poner una cabecera a un vídeo que realicé con <strong>Google Earth Studio</strong> y <strong>After Effects</strong>. Publiqué un vídeo promocionando la ciudad de Valencia (España) en el que mostraba vistas aéreas dinámicas de la ciudad usando esta herramienta. El vídeo es este&#8230;</p><center><iframe src="https://www.youtube.com/embed/h60K0FQxcEY" width="640" height="420" frameborder="0" allowfullscreen="allowfullscreen">&lt;span data-mce-type=»bookmark» style=»display: inline-block; width: 0px; overflow: hidden; line-height: 0;» class=»mce_SELRES_start»&gt;&lt;/span&gt;</iframe></center><p style="text-align: justify;">Veréis que la intro del vídeo es justamente el efecto que realizo con el texto apareciendo en llamas. Esta intro u opening que ilustro con un sonido de efectos increíble es este&#8230;</p><center><iframe src="https://www.youtube.com/embed/7S1LZTd5XFQ" width="640" height="420" frameborder="0" allowfullscreen="allowfullscreen">&lt;span data-mce-type=»bookmark» style=»display: inline-block; width: 0px; overflow: hidden; line-height: 0;» class=»mce_SELRES_start»&gt;&lt;/span&gt;</iframe></center><p style="text-align: justify;">En el tutorial te mostraré algunos trucos que te pueden ser útiles:</p><ul><li>Usar mates de seguimiento</li><li>Crear un efecto de aparición de objetos coordinado con la aparición de partículas (en este caso de chispas)</li><li>Crear dinámicas en las simulaciones de humo y llamas</li><li>Crear un efecto de latido de corazón</li></ul><p style="text-align: justify;">En definitiva podrás disfrutar de la creación de una intro/opening fácilmente. Si te es complicado seguir el tuto siempre tienes el <strong>EDITABLE</strong> que facilito (descárgalo desde el botón debajo del tutorial)</p><center><strong><span style="color: #800000;"><span style="color: #800000;">TUTORIAL APARICIÓN DE TEXTO EN LLAMAS</span></span></strong></center><center><iframe src="https://www.youtube.com/embed/j9ZcxthAme0" width="640" height="420" frameborder="0" allowfullscreen="allowfullscreen">&lt;span data-mce-type=»bookmark» style=»display: inline-block; width: 0px; overflow: hidden; line-height: 0;» class=»mce_SELRES_start»&gt;&lt;/span&gt;</iframe></center><div><div><div align="center"><div><p style="text-align: left;"> </p></div></div></div></div>								</div>
				</div>
					</div>
		</div>
					</div>
		</section>
				<section class="elementor-section elementor-top-section elementor-element elementor-element-9b27ea3 elementor-section-boxed elementor-section-height-default elementor-section-height-default" data-id="9b27ea3" data-element_type="section" data-e-type="section">
						<div class="elementor-container elementor-column-gap-default">
					<div class="elementor-column elementor-col-100 elementor-top-column elementor-element elementor-element-e09d58e" data-id="e09d58e" data-element_type="column" data-e-type="column">
			<div class="elementor-widget-wrap elementor-element-populated">
						<div class="elementor-element elementor-element-452d398 elementor-widget-divider--view-line elementor-widget elementor-widget-divider" data-id="452d398" data-element_type="widget" data-e-type="widget" data-widget_type="divider.default">
				<div class="elementor-widget-container">
							<div class="elementor-divider">
			<span class="elementor-divider-separator">
						</span>
		</div>
						</div>
				</div>
					</div>
		</div>
					</div>
		</section>
				<section class="elementor-section elementor-top-section elementor-element elementor-element-4bd76aff elementor-section-full_width elementor-section-height-default elementor-section-height-default" data-id="4bd76aff" data-element_type="section" data-e-type="section">
						<div class="elementor-container elementor-column-gap-default">
					<div class="elementor-column elementor-col-50 elementor-top-column elementor-element elementor-element-7ca1cf72" data-id="7ca1cf72" data-element_type="column" data-e-type="column">
			<div class="elementor-widget-wrap elementor-element-populated">
						<div class="elementor-element elementor-element-66846019 elementor-align-right elementor-invisible elementor-widget elementor-widget-button" data-id="66846019" data-element_type="widget" data-e-type="widget" data-settings="{&quot;_animation&quot;:&quot;shake&quot;}" data-widget_type="button.default">
				<div class="elementor-widget-container">
									<div class="elementor-button-wrapper">
					<a class="elementor-button elementor-button-link elementor-size-sm elementor-animation-grow" href="https://ildefonsosegura.es/regalos/">
						<span class="elementor-button-content-wrapper">
									<span class="elementor-button-text">BAJATE EL EDITABLE</span>
					</span>
					</a>
				</div>
								</div>
				</div>
					</div>
		</div>
				<div class="elementor-column elementor-col-50 elementor-top-column elementor-element elementor-element-30efeefe" data-id="30efeefe" data-element_type="column" data-e-type="column">
			<div class="elementor-widget-wrap elementor-element-populated">
						<div class="elementor-element elementor-element-35cb5ca2 elementor-widget elementor-widget-html" data-id="35cb5ca2" data-element_type="widget" data-e-type="widget" data-settings="{&quot;_animation&quot;:&quot;none&quot;}" data-widget_type="html.default">
				<div class="elementor-widget-container">
					<form action="https://www.paypal.com/cgi-bin/webscr" method="post" target="_blank">
<input type="hidden" name="cmd" value="_donations">
<input type="hidden" name="business" value="ildefonsosegura@gmail.com">
<input type="hidden" name="lc" value="ES">
<input type="hidden" name="item_name" value="MANTENIMIENTO DE LA PAGINA DE ILDEFONSOSEGURA">
<input type="hidden" name="no_note" value="0">
<input type="hidden" name="currency_code" value="EUR">
<input type="hidden" name="bn" value="PP-DonationsBF:paypal1.jpg:NonHostedGuest">
<input type="image" src="http://ildefonsosegura.es/wp-content/uploads/paypal-updated-1.png" border="0" name="submit" alt="PayPal. La forma rápida y segura de pagar en Internet.">
<img loading="lazy" decoding="async" alt="" border="0" src="https://www.paypalobjects.com/es_ES/i/scr/pixel.gif" width="1" height="1">
</form>				</div>
				</div>
					</div>
		</div>
					</div>
		</section>
				<section class="elementor-section elementor-top-section elementor-element elementor-element-686755a8 elementor-section-boxed elementor-section-height-default elementor-section-height-default" data-id="686755a8" data-element_type="section" data-e-type="section">
						<div class="elementor-container elementor-column-gap-default">
					<div class="elementor-column elementor-col-100 elementor-top-column elementor-element elementor-element-6bd14659" data-id="6bd14659" data-element_type="column" data-e-type="column">
			<div class="elementor-widget-wrap elementor-element-populated">
						<div class="elementor-element elementor-element-4893e40 elementor-widget-divider--view-line elementor-widget elementor-widget-divider" data-id="4893e40" data-element_type="widget" data-e-type="widget" data-widget_type="divider.default">
				<div class="elementor-widget-container">
							<div class="elementor-divider">
			<span class="elementor-divider-separator">
						</span>
		</div>
						</div>
				</div>
				<div class="elementor-element elementor-element-a13aeb3 elementor-widget elementor-widget-html" data-id="a13aeb3" data-element_type="widget" data-e-type="widget" data-widget_type="html.default">
				<div class="elementor-widget-container">
					&nbsp;
<center><span style="color: #333333;"><strong>SUSCRÍBETE A MI CANAL DE YouTube</strong></span></center>&nbsp;
<div>
<div>
<div align="center">


<script src="https://apis.google.com/js/platform.js"></script>

<div class="g-ytsubscribe" data-channel="ildefonsosegura" data-layout="full" data-count="default"></div>
</div>
</div>
&nbsp;<p style="text-align: left;">No te lo pierdas y comparte tus trabajos en mi página de facebook (<span style="color: #ff0000;"><strong><a style="color: #ff0000;" href="http://www.facebook.com/IldefonsoSeguraPage" target="_blank" rel="noopener noreferrer">IldefonsoSeguraPage</a></strong></span>)</p>
Espero que te guste y compartas el vídeo. No dejes de compartir este post.
<p style="text-align: left;">Así es como me puedes ayudar 🙂 Gracias</p>

</div>				</div>
				</div>
					</div>
		</div>
					</div>
		</section>
				</div>La entrada <a href="https://ildefonsosegura.es/aparicion-de-texto-en-llamas-con-after-effects-by-ildefonsosegura/">Aparición de texto en llamas con After Effects by @ildefonsosegura</a> apareció primero en <a href="https://ildefonsosegura.es">Ildefonso Segura</a>.]]></content:encoded>


			</item>
		<item>
		<title>#Tutorial #Photoshop texto estilo globo, plástico, látex by @ildefonsosegura (incluye editable psd con estilo)</title>
		<link>https://ildefonsosegura.es/tutorial-photoshop-texto-estilo-globo-by-ildefonsosegura-incluye-editable/</link>
					<comments>https://ildefonsosegura.es/tutorial-photoshop-texto-estilo-globo-by-ildefonsosegura-incluye-editable/#respond</comments>
		
		<dc:creator><![CDATA[Ildefonso Segura]]></dc:creator>
		<pubDate>Tue, 30 Jul 2019 10:00:06 +0000</pubDate>
				<category><![CDATA[Editable]]></category>
		<category><![CDATA[Estilos]]></category>
		<category><![CDATA[Photoshop]]></category>
		<category><![CDATA[Tecnicas]]></category>
		<category><![CDATA[Textos]]></category>
		<category><![CDATA[Tutorial Escrito]]></category>
		<category><![CDATA[Tutoriales]]></category>
		<category><![CDATA[capas]]></category>
		<category><![CDATA[descarga]]></category>
		<category><![CDATA[editable]]></category>
		<category><![CDATA[efecto]]></category>
		<category><![CDATA[efectos]]></category>
		<category><![CDATA[estilo]]></category>
		<category><![CDATA[estilos]]></category>
		<category><![CDATA[fondo]]></category>
		<category><![CDATA[fusion]]></category>
		<category><![CDATA[globo]]></category>
		<category><![CDATA[gloriasanis]]></category>
		<category><![CDATA[ildefonso]]></category>
		<category><![CDATA[ildefonsosegura]]></category>
		<category><![CDATA[latex]]></category>
		<category><![CDATA[material]]></category>
		<category><![CDATA[materiales]]></category>
		<category><![CDATA[photoshop]]></category>
		<category><![CDATA[plastico]]></category>
		<category><![CDATA[style]]></category>
		<category><![CDATA[text]]></category>
		<category><![CDATA[texto]]></category>
		<category><![CDATA[textura]]></category>
		<category><![CDATA[tuto]]></category>
		<category><![CDATA[tutorial]]></category>
		<category><![CDATA[youtube]]></category>
		<guid isPermaLink="false">http://ildefonsosegura.es/?p=2945</guid>

					<description><![CDATA[<p>Con este tutorial aprenderemos a usar los estilos de capa para emular un efecto de material de globo, plástico o latex. Si usas variaciones sencillas del ejemplo, puedes conseguir otros efectos que harán que el texto parezca otro material. En cualquier caso, abajo te dejo el editable, estilo y la fuente para que puedas tener [&#8230;]</p>
La entrada <a href="https://ildefonsosegura.es/tutorial-photoshop-texto-estilo-globo-by-ildefonsosegura-incluye-editable/">#Tutorial #Photoshop texto estilo globo, plástico, látex by @ildefonsosegura (incluye editable psd con estilo)</a> apareció primero en <a href="https://ildefonsosegura.es">Ildefonso Segura</a>.]]></description>
										<content:encoded><![CDATA[<div data-elementor-type="wp-post" data-elementor-id="2945" class="elementor elementor-2945">
						<section class="elementor-section elementor-top-section elementor-element elementor-element-70f89c23 elementor-section-boxed elementor-section-height-default elementor-section-height-default" data-id="70f89c23" data-element_type="section" data-e-type="section">
						<div class="elementor-container elementor-column-gap-default">
					<div class="elementor-column elementor-col-100 elementor-top-column elementor-element elementor-element-2387411d" data-id="2387411d" data-element_type="column" data-e-type="column">
			<div class="elementor-widget-wrap elementor-element-populated">
						<div class="elementor-element elementor-element-1905c002 elementor-widget elementor-widget-text-editor" data-id="1905c002" data-element_type="widget" data-e-type="widget" data-widget_type="text-editor.default">
				<div class="elementor-widget-container">
									<p><a href="https://ildefonsosegura.es/tutorial-photoshop-texto-estilo-globo-by-ildefonsosegura-incluye-editable/globo-15/" rel="attachment wp-att-2960"><img loading="lazy" decoding="async" class="aligncenter" src="https://ildefonsosegura.es/wp-content/uploads/globo-15.jpg" alt="globo-15" width="680" height="383" /></a></p><p>Con este tutorial aprenderemos a usar los estilos de capa para emular un efecto de material de globo, plástico o latex. Si usas variaciones sencillas del ejemplo, puedes conseguir otros efectos que harán que el texto parezca otro material. En cualquier caso, abajo te dejo el <strong>editable</strong>, estilo y la fuente para que puedas tener el efecto sin necesidad de crearlo.</p><p> </p><p>1.- Abre un nuevo canvas de trabajo con una resolución de 250 ppp. Yo usé un tamaño en cm de 16:9 (wide screen)</p><p><a href="https://ildefonsosegura.es/tutorial-photoshop-texto-estilo-globo-by-ildefonsosegura-incluye-editable/globo-1/" rel="attachment wp-att-2946"><img loading="lazy" decoding="async" class="size-full wp-image-2946 aligncenter" src="https://ildefonsosegura.es/wp-content/uploads/globo-1.jpg" alt="globo-1" width="680" height="383" srcset="https://ildefonsosegura.es/wp-content/uploads/globo-1.jpg 680w, https://ildefonsosegura.es/wp-content/uploads/globo-1-300x168.jpg 300w" sizes="(max-width: 680px) 100vw, 680px" /></a></p><p> </p><p>2.- Pon un fondo que tu elijas. Yo usé uno creado por mi sencillo</p><p><a href="https://ildefonsosegura.es/tutorial-photoshop-texto-estilo-globo-by-ildefonsosegura-incluye-editable/globo-2/" rel="attachment wp-att-2947"><img loading="lazy" decoding="async" class="size-full wp-image-2947 aligncenter" src="https://ildefonsosegura.es/wp-content/uploads/globo-2.jpg" alt="globo-2" width="680" height="383" srcset="https://ildefonsosegura.es/wp-content/uploads/globo-2.jpg 680w, https://ildefonsosegura.es/wp-content/uploads/globo-2-300x168.jpg 300w" sizes="(max-width: 680px) 100vw, 680px" /></a></p><p>3.- Selecciona la herramienta texto de la barra de herramientas. Usa la fuente Anja con color blanco ffffff y tamaño aproximadamente 90 px</p><p><a href="https://ildefonsosegura.es/tutorial-photoshop-texto-estilo-globo-by-ildefonsosegura-incluye-editable/globo-3/" rel="attachment wp-att-2948"><img loading="lazy" decoding="async" class="size-full wp-image-2948 aligncenter" src="https://ildefonsosegura.es/wp-content/uploads/globo-3.jpg" alt="globo-3" width="680" height="433" srcset="https://ildefonsosegura.es/wp-content/uploads/globo-3.jpg 680w, https://ildefonsosegura.es/wp-content/uploads/globo-3-300x191.jpg 300w" sizes="(max-width: 680px) 100vw, 680px" /></a></p><p>4.- Escribe tu texto</p><p><a href="https://ildefonsosegura.es/tutorial-photoshop-texto-estilo-globo-by-ildefonsosegura-incluye-editable/globo-4/" rel="attachment wp-att-2949"><img loading="lazy" decoding="async" class="size-full wp-image-2949 aligncenter" src="https://ildefonsosegura.es/wp-content/uploads/globo-4.jpg" alt="globo-4" width="680" height="383" srcset="https://ildefonsosegura.es/wp-content/uploads/globo-4.jpg 680w, https://ildefonsosegura.es/wp-content/uploads/globo-4-300x168.jpg 300w" sizes="(max-width: 680px) 100vw, 680px" /></a></p><p>5.- Haz clic derecho en la capa de texto y selecciona OPCIONES DE FUSION. Comienza seleccionando SOMBRA PARALELA</p><p><a href="https://ildefonsosegura.es/tutorial-photoshop-texto-estilo-globo-by-ildefonsosegura-incluye-editable/globo-5/" rel="attachment wp-att-2950"><img loading="lazy" decoding="async" class="size-full wp-image-2950 aligncenter" src="https://ildefonsosegura.es/wp-content/uploads/globo-5.jpg" alt="globo-5" width="680" height="388" srcset="https://ildefonsosegura.es/wp-content/uploads/globo-5.jpg 680w, https://ildefonsosegura.es/wp-content/uploads/globo-5-300x171.jpg 300w" sizes="(max-width: 680px) 100vw, 680px" /></a></p><p>6.- Continuamos con SUPERPOSICION DE COLORES buscando un tono azul</p><p><a href="https://ildefonsosegura.es/tutorial-photoshop-texto-estilo-globo-by-ildefonsosegura-incluye-editable/globo-6/" rel="attachment wp-att-2951"><img loading="lazy" decoding="async" class="size-full wp-image-2951 aligncenter" src="https://ildefonsosegura.es/wp-content/uploads/globo-6.jpg" alt="globo-6" width="680" height="432" srcset="https://ildefonsosegura.es/wp-content/uploads/globo-6.jpg 680w, https://ildefonsosegura.es/wp-content/uploads/globo-6-300x190.jpg 300w" sizes="(max-width: 680px) 100vw, 680px" /></a></p><p>7.- Aplicamos ahora la variable RESPLANDOR INTERIOR</p><p><a href="https://ildefonsosegura.es/tutorial-photoshop-texto-estilo-globo-by-ildefonsosegura-incluye-editable/globo-7/" rel="attachment wp-att-2952"><img loading="lazy" decoding="async" class="size-full wp-image-2952 aligncenter" src="https://ildefonsosegura.es/wp-content/uploads/globo-7.jpg" alt="globo-7" width="680" height="398" srcset="https://ildefonsosegura.es/wp-content/uploads/globo-7.jpg 680w, https://ildefonsosegura.es/wp-content/uploads/globo-7-300x175.jpg 300w" sizes="(max-width: 680px) 100vw, 680px" /></a></p><p>8.- A continuación le damos SOMBRA INTERIOR</p><p><a href="https://ildefonsosegura.es/tutorial-photoshop-texto-estilo-globo-by-ildefonsosegura-incluye-editable/globo-8/" rel="attachment wp-att-2953"><img loading="lazy" decoding="async" class="size-full wp-image-2953 aligncenter" src="https://ildefonsosegura.es/wp-content/uploads/globo-8.jpg" alt="globo-8" width="680" height="394" srcset="https://ildefonsosegura.es/wp-content/uploads/globo-8.jpg 680w, https://ildefonsosegura.es/wp-content/uploads/globo-8-300x173.jpg 300w" sizes="(max-width: 680px) 100vw, 680px" /></a></p><p>9.- Nos situamos en BISEL Y RELIEVE dándole unos valores como sigue:</p><p><a href="https://ildefonsosegura.es/tutorial-photoshop-texto-estilo-globo-by-ildefonsosegura-incluye-editable/globo-9/" rel="attachment wp-att-2954"><img loading="lazy" decoding="async" class="size-full wp-image-2954 aligncenter" src="https://ildefonsosegura.es/wp-content/uploads/globo-9.jpg" alt="globo-9" width="680" height="406" srcset="https://ildefonsosegura.es/wp-content/uploads/globo-9.jpg 680w, https://ildefonsosegura.es/wp-content/uploads/globo-9-300x179.jpg 300w" sizes="(max-width: 680px) 100vw, 680px" /></a></p><p>10.- Dentro de bisel y relieve seleccionamos CONTORNO</p><p><a href="https://ildefonsosegura.es/tutorial-photoshop-texto-estilo-globo-by-ildefonsosegura-incluye-editable/globo-10/" rel="attachment wp-att-2955"><img loading="lazy" decoding="async" class="size-full wp-image-2955 aligncenter" src="https://ildefonsosegura.es/wp-content/uploads/globo-10.jpg" alt="globo-10" width="680" height="402" srcset="https://ildefonsosegura.es/wp-content/uploads/globo-10.jpg 680w, https://ildefonsosegura.es/wp-content/uploads/globo-10-300x177.jpg 300w" sizes="(max-width: 680px) 100vw, 680px" /></a></p><p> </p><p>11.- Casi finalizando aplicamos SATINADO</p><p><a href="https://ildefonsosegura.es/tutorial-photoshop-texto-estilo-globo-by-ildefonsosegura-incluye-editable/globo-11/" rel="attachment wp-att-2956"><img loading="lazy" decoding="async" class="size-full wp-image-2956 aligncenter" src="https://ildefonsosegura.es/wp-content/uploads/globo-11.jpg" alt="globo-11" width="680" height="402" srcset="https://ildefonsosegura.es/wp-content/uploads/globo-11.jpg 680w, https://ildefonsosegura.es/wp-content/uploads/globo-11-300x177.jpg 300w" sizes="(max-width: 680px) 100vw, 680px" /></a></p><p>12.- Hasta aquí ya tendríamos un efecto de texto de globo bastante aceptable.</p><p><a href="https://ildefonsosegura.es/tutorial-photoshop-texto-estilo-globo-by-ildefonsosegura-incluye-editable/globo-12/" rel="attachment wp-att-2957"><img loading="lazy" decoding="async" class="size-full wp-image-2957 aligncenter" src="https://ildefonsosegura.es/wp-content/uploads/globo-12.jpg" alt="globo-12" width="680" height="383" srcset="https://ildefonsosegura.es/wp-content/uploads/globo-12.jpg 680w, https://ildefonsosegura.es/wp-content/uploads/globo-12-300x168.jpg 300w" sizes="(max-width: 680px) 100vw, 680px" /></a></p><p>13.- En las opciones de fusión vamos a cambiar variables tanto de la sección de FUSION GENERAL como de FUSION AVANZADA</p><p>En la fusión general cambiaremos el tipo de fusión de capa a MULIPLICAR. En la fusión avanzada cambiaremos el porcentaje de relleno al 20%</p><p><a href="https://ildefonsosegura.es/tutorial-photoshop-texto-estilo-globo-by-ildefonsosegura-incluye-editable/globo-13/" rel="attachment wp-att-2958"><img loading="lazy" decoding="async" class="size-full wp-image-2958 aligncenter" src="https://ildefonsosegura.es/wp-content/uploads/globo-13.jpg" alt="globo-13" width="680" height="401" srcset="https://ildefonsosegura.es/wp-content/uploads/globo-13.jpg 680w, https://ildefonsosegura.es/wp-content/uploads/globo-13-300x176.jpg 300w" sizes="(max-width: 680px) 100vw, 680px" /></a></p><p> </p><p>14.- Para conseguir mayor transparencia en el texto seleccionaremos una variable dentro de la FUSIÓN AVANZADA que no he visto en ningún tutorial. Esa opción es FUSIONAR EFECTOS INTERIORES COMO UN GRUPO. Con esta opción seleccionada lo que se hace es fusionar los efectos de «resplandor interior», «satinado» y «superposición» con la capa antes de fusionarlos con el documento. Todas las opciones de fusión se fusionan con el documento y en función del contenido de las otras capas el resultado de las variables es diferente. Si tienes esta opción de FUSIONAR EFECTOS INTERIORES COMO UN GRUPO, los efectos interactuan con el contenido de la capa y no con el resto de capas.</p><p><a href="https://ildefonsosegura.es/tutorial-photoshop-texto-estilo-globo-by-ildefonsosegura-incluye-editable/globo-14/" rel="attachment wp-att-2959"><img loading="lazy" decoding="async" class="size-full wp-image-2959 aligncenter" src="https://ildefonsosegura.es/wp-content/uploads/globo-14.jpg" alt="globo-14" width="680" height="371" srcset="https://ildefonsosegura.es/wp-content/uploads/globo-14.jpg 680w, https://ildefonsosegura.es/wp-content/uploads/globo-14-300x163.jpg 300w" sizes="(max-width: 680px) 100vw, 680px" /></a></p><p>15.- Así el resultado es el siguiente que íbamos buscando:</p><p><a href="https://ildefonsosegura.es/tutorial-photoshop-texto-estilo-globo-by-ildefonsosegura-incluye-editable/globo-15/" rel="attachment wp-att-2960"><img loading="lazy" decoding="async" class="size-full wp-image-2960 aligncenter" src="https://ildefonsosegura.es/wp-content/uploads/globo-15.jpg" alt="globo-15" width="680" height="383" srcset="https://ildefonsosegura.es/wp-content/uploads/globo-15.jpg 680w, https://ildefonsosegura.es/wp-content/uploads/globo-15-300x168.jpg 300w" sizes="(max-width: 680px) 100vw, 680px" /></a></p><p> </p><p> </p>								</div>
				</div>
					</div>
		</div>
					</div>
		</section>
				<section class="elementor-section elementor-top-section elementor-element elementor-element-1272db76 elementor-section-full_width elementor-section-height-default elementor-section-height-default" data-id="1272db76" data-element_type="section" data-e-type="section">
						<div class="elementor-container elementor-column-gap-default">
					<div class="elementor-column elementor-col-50 elementor-top-column elementor-element elementor-element-1834e7b8" data-id="1834e7b8" data-element_type="column" data-e-type="column">
			<div class="elementor-widget-wrap elementor-element-populated">
						<div class="elementor-element elementor-element-5393f42d elementor-align-right elementor-invisible elementor-widget elementor-widget-button" data-id="5393f42d" data-element_type="widget" data-e-type="widget" data-settings="{&quot;_animation&quot;:&quot;shake&quot;}" data-widget_type="button.default">
				<div class="elementor-widget-container">
									<div class="elementor-button-wrapper">
					<a class="elementor-button elementor-button-link elementor-size-sm elementor-animation-grow" href="https://drive.google.com/open?id=0B_nJkCGJubucWFU4eTFhMzF1YVU">
						<span class="elementor-button-content-wrapper">
									<span class="elementor-button-text">BAJATE EL EDITABLE</span>
					</span>
					</a>
				</div>
								</div>
				</div>
					</div>
		</div>
				<div class="elementor-column elementor-col-50 elementor-top-column elementor-element elementor-element-726d94ee" data-id="726d94ee" data-element_type="column" data-e-type="column">
			<div class="elementor-widget-wrap elementor-element-populated">
						<div class="elementor-element elementor-element-38a200b6 elementor-widget elementor-widget-html" data-id="38a200b6" data-element_type="widget" data-e-type="widget" data-settings="{&quot;_animation&quot;:&quot;none&quot;}" data-widget_type="html.default">
				<div class="elementor-widget-container">
					<form action="https://www.paypal.com/cgi-bin/webscr" method="post" target="_blank">
<input type="hidden" name="cmd" value="_donations">
<input type="hidden" name="business" value="ildefonsosegura@gmail.com">
<input type="hidden" name="lc" value="ES">
<input type="hidden" name="item_name" value="MANTENIMIENTO DE LA PAGINA DE ILDEFONSOSEGURA">
<input type="hidden" name="no_note" value="0">
<input type="hidden" name="currency_code" value="EUR">
<input type="hidden" name="bn" value="PP-DonationsBF:paypal1.jpg:NonHostedGuest">
<input type="image" src="http://ildefonsosegura.es/wp-content/uploads/paypal-updated-1.png" border="0" name="submit" alt="PayPal. La forma rápida y segura de pagar en Internet.">
<img loading="lazy" decoding="async" alt="" border="0" src="https://www.paypalobjects.com/es_ES/i/scr/pixel.gif" width="1" height="1">
</form>				</div>
				</div>
					</div>
		</div>
					</div>
		</section>
				<section class="elementor-section elementor-top-section elementor-element elementor-element-29087141 elementor-section-boxed elementor-section-height-default elementor-section-height-default" data-id="29087141" data-element_type="section" data-e-type="section">
						<div class="elementor-container elementor-column-gap-default">
					<div class="elementor-column elementor-col-100 elementor-top-column elementor-element elementor-element-994285d" data-id="994285d" data-element_type="column" data-e-type="column">
			<div class="elementor-widget-wrap elementor-element-populated">
						<div class="elementor-element elementor-element-2089d69f elementor-widget elementor-widget-html" data-id="2089d69f" data-element_type="widget" data-e-type="widget" data-widget_type="html.default">
				<div class="elementor-widget-container">
					&nbsp;
<center><span style="color: #333333;"><strong>SUSCRÍBETE A MI CANAL DE YouTube</strong></span></center>&nbsp;
<div>
<div>
<div align="center">


<script src="https://apis.google.com/js/platform.js"></script>

<div class="g-ytsubscribe" data-channel="ildefonsosegura" data-layout="full" data-count="default"></div>
</div>
</div>
&nbsp;<p style="text-align: left;">No te lo pierdas y comparte tus trabajos en mi página de facebook (<span style="color: #ff0000;"><strong><a style="color: #ff0000;" href="http://www.facebook.com/IldefonsoSeguraPage" target="_blank" rel="noopener noreferrer">IldefonsoSeguraPage</a></strong></span>)</p>
Espero que te guste y compartas el vídeo. No dejes de compartir este post.
<p style="text-align: left;">Así es como me puedes ayudar 🙂 Gracias</p>

</div>				</div>
				</div>
					</div>
		</div>
					</div>
		</section>
				</div>La entrada <a href="https://ildefonsosegura.es/tutorial-photoshop-texto-estilo-globo-by-ildefonsosegura-incluye-editable/">#Tutorial #Photoshop texto estilo globo, plástico, látex by @ildefonsosegura (incluye editable psd con estilo)</a> apareció primero en <a href="https://ildefonsosegura.es">Ildefonso Segura</a>.]]></content:encoded>
					
					<wfw:commentRss>https://ildefonsosegura.es/tutorial-photoshop-texto-estilo-globo-by-ildefonsosegura-incluye-editable/feed/</wfw:commentRss>
			<slash:comments>0</slash:comments>
		
		
			</item>
		<item>
		<title>#Tutorial #Photoshop escrito: Texto tallado en madera by @ildefonsosegura</title>
		<link>https://ildefonsosegura.es/tutorial-photoshosop-escrito-texto-escrito-en-madera-by-ildefonsosegura/</link>
					<comments>https://ildefonsosegura.es/tutorial-photoshosop-escrito-texto-escrito-en-madera-by-ildefonsosegura/#comments</comments>
		
		<dc:creator><![CDATA[Ildefonso Segura]]></dc:creator>
		<pubDate>Mon, 29 Jul 2019 15:00:14 +0000</pubDate>
				<category><![CDATA[Efectos]]></category>
		<category><![CDATA[Estilos]]></category>
		<category><![CDATA[Photoshop]]></category>
		<category><![CDATA[PREMIUM]]></category>
		<category><![CDATA[Tecnicas]]></category>
		<category><![CDATA[Textos]]></category>
		<category><![CDATA[Tutorial Escrito]]></category>
		<category><![CDATA[Tutoriales]]></category>
		<category><![CDATA[CC]]></category>
		<category><![CDATA[cs4]]></category>
		<category><![CDATA[cs5]]></category>
		<category><![CDATA[cs6]]></category>
		<category><![CDATA[escrito]]></category>
		<category><![CDATA[estilo]]></category>
		<category><![CDATA[gloriasanis]]></category>
		<category><![CDATA[grabado]]></category>
		<category><![CDATA[halloween]]></category>
		<category><![CDATA[ildefonsosegura]]></category>
		<category><![CDATA[madera]]></category>
		<category><![CDATA[photoshop]]></category>
		<category><![CDATA[style]]></category>
		<category><![CDATA[text]]></category>
		<category><![CDATA[texto]]></category>
		<category><![CDATA[textura]]></category>
		<category><![CDATA[tuto]]></category>
		<category><![CDATA[tutorial]]></category>
		<category><![CDATA[wallpaper]]></category>
		<category><![CDATA[written]]></category>
		<guid isPermaLink="false">http://ildefonsosegura.es/?p=3143</guid>

					<description><![CDATA[<p>Con fecha 21 de octubre de 2013 se publica un videotutorial donde explico como conseguir un efecto de tallado de una calavera en una textura de madera. Con la misma técnica podrías conseguir la integración de un volumen sencillo en una textura determinada. Aprovechando estas fechas cercanas a Halloween, tienes a tu disposición un videotutorial [&#8230;]</p>
La entrada <a href="https://ildefonsosegura.es/tutorial-photoshosop-escrito-texto-escrito-en-madera-by-ildefonsosegura/">#Tutorial #Photoshop escrito: Texto tallado en madera by @ildefonsosegura</a> apareció primero en <a href="https://ildefonsosegura.es">Ildefonso Segura</a>.]]></description>
										<content:encoded><![CDATA[<div data-elementor-type="wp-post" data-elementor-id="3143" class="elementor elementor-3143">
						<section class="elementor-section elementor-top-section elementor-element elementor-element-28fd328 elementor-section-boxed elementor-section-height-default elementor-section-height-default" data-id="28fd328" data-element_type="section" data-e-type="section">
						<div class="elementor-container elementor-column-gap-default">
					<div class="elementor-column elementor-col-100 elementor-top-column elementor-element elementor-element-60bcc37" data-id="60bcc37" data-element_type="column" data-e-type="column">
			<div class="elementor-widget-wrap elementor-element-populated">
						<div class="elementor-element elementor-element-0f19028 elementor-widget elementor-widget-text-editor" data-id="0f19028" data-element_type="widget" data-e-type="widget" data-widget_type="text-editor.default">
				<div class="elementor-widget-container">
									<p>Con fecha <span style="color: #800000;"><strong>21 de octubre de 2013</strong></span> se publica un videotutorial donde explico como conseguir un efecto de tallado de una calavera en una textura de madera. Con la misma técnica podrías conseguir la integración de un volumen sencillo en una textura determinada.</p><p>Aprovechando estas fechas cercanas a Halloween, tienes a tu disposición un videotutorial junto con otros que ya publiqué y que te pueden servir también, donde te muestro unas técnicas sencillas con máscaras, filtros y capas de ajuste. El resultado es fantástico y te invito a ver el videotutorial haciendo clic en la imagen siguiente.</p><p style="text-align: center;"><a href="http://ildefonsosegura.es/tutorial-photoshop-fusionar-volumenes-con-texturas-by-ildefonsosegura-wallpaper-halloween" target="_blank" rel="attachment wp-att-3142 noopener noreferrer"><img loading="lazy" decoding="async" class="size-full wp-image-3142 aligncenter" src="http://ildefonsosegura.es/wp-content/uploads/Calavera-de-madera-wallpaper.jpg" alt="Calavera-de-madera-wallpaper" width="680" height="383" srcset="https://ildefonsosegura.es/wp-content/uploads/Calavera-de-madera-wallpaper.jpg 680w, https://ildefonsosegura.es/wp-content/uploads/Calavera-de-madera-wallpaper-300x168.jpg 300w" sizes="(max-width: 680px) 100vw, 680px" /></a></p><p style="text-align: center;"><strong style="color: #800000;">HAZ CLIC EN LA IMAGEN PARA VER EL VIDEOTUTORIAL</strong></p>								</div>
				</div>
					</div>
		</div>
					</div>
		</section>
				<section class="elementor-section elementor-top-section elementor-element elementor-element-52db58ed elementor-section-full_width elementor-section-height-default elementor-section-height-default" data-id="52db58ed" data-element_type="section" data-e-type="section">
						<div class="elementor-container elementor-column-gap-default">
					<div class="elementor-column elementor-col-50 elementor-top-column elementor-element elementor-element-1406c6bf" data-id="1406c6bf" data-element_type="column" data-e-type="column">
			<div class="elementor-widget-wrap elementor-element-populated">
						<div class="elementor-element elementor-element-5eda612a elementor-align-right elementor-widget elementor-widget-button" data-id="5eda612a" data-element_type="widget" data-e-type="widget" data-widget_type="button.default">
				<div class="elementor-widget-container">
									<div class="elementor-button-wrapper">
					<a class="elementor-button elementor-button-link elementor-size-sm elementor-animation-grow" href="https://drive.google.com/open?id=0B_nJkCGJubuca2tUelpSTUlDSmc">
						<span class="elementor-button-content-wrapper">
						<span class="elementor-button-icon">
				<i aria-hidden="true" class="far fa-arrow-alt-circle-down"></i>			</span>
									<span class="elementor-button-text">DESCARGA EL MATERIAL</span>
					</span>
					</a>
				</div>
								</div>
				</div>
					</div>
		</div>
				<div class="elementor-column elementor-col-50 elementor-top-column elementor-element elementor-element-460e16d1" data-id="460e16d1" data-element_type="column" data-e-type="column">
			<div class="elementor-widget-wrap elementor-element-populated">
						<div class="elementor-element elementor-element-471c22fd elementor-widget elementor-widget-html" data-id="471c22fd" data-element_type="widget" data-e-type="widget" data-settings="{&quot;_animation&quot;:&quot;none&quot;}" data-widget_type="html.default">
				<div class="elementor-widget-container">
					<center><form action="https://www.paypal.com/cgi-bin/webscr" method="post" target="_blank">
<input type="hidden" name="cmd" value="_donations">
<input type="hidden" name="business" value="ildefonsosegura@gmail.com">
<input type="hidden" name="lc" value="ES">
<input type="hidden" name="item_name" value="MANTENIMIENTO DE LA PAGINA DE ILDEFONSOSEGURA">
<input type="hidden" name="no_note" value="0">
<input type="hidden" name="currency_code" value="EUR">
<input type="hidden" name="bn" value="PP-DonationsBF:paypal1.jpg:NonHostedGuest">
<input type="image" src="http://ildefonsosegura.es/wp-content/uploads/paypal-updated-1.png" border="0" name="submit" alt="PayPal. La forma rápida y segura de pagar en Internet.">
<img loading="lazy" decoding="async" alt="" border="0" src="https://www.paypalobjects.com/es_ES/i/scr/pixel.gif" width="1" height="1">
</form></center>				</div>
				</div>
					</div>
		</div>
					</div>
		</section>
				<section class="elementor-section elementor-top-section elementor-element elementor-element-792abb9a elementor-section-boxed elementor-section-height-default elementor-section-height-default" data-id="792abb9a" data-element_type="section" data-e-type="section">
						<div class="elementor-container elementor-column-gap-default">
					<div class="elementor-column elementor-col-100 elementor-top-column elementor-element elementor-element-448b7dc7" data-id="448b7dc7" data-element_type="column" data-e-type="column">
			<div class="elementor-widget-wrap elementor-element-populated">
						<div class="elementor-element elementor-element-122cd2cf elementor-widget elementor-widget-text-editor" data-id="122cd2cf" data-element_type="widget" data-e-type="widget" data-widget_type="text-editor.default">
				<div class="elementor-widget-container">
									<pre> [widget id="custom_html-8"]</pre><p>Tutoriales relacionados con la temática Halloween</p><p><a href="http://ildefonsosegura.es/texto-con-textura-de-calabaza-con-cinema4d-y-photoshop-wallpaper-halloween/" target="_blank" rel="noopener noreferrer"><img loading="lazy" decoding="async" class="wp-image-1298 aligncenter" src="http://ildefonsosegura.es/wp-content/uploads/texto-calabaza4.jpg" alt="texto-calabaza4" width="194" height="110" srcset="https://ildefonsosegura.es/wp-content/uploads/texto-calabaza4.jpg 600w, https://ildefonsosegura.es/wp-content/uploads/texto-calabaza4-300x169.jpg 300w" sizes="(max-width: 194px) 100vw, 194px" /></a>  <a href="http://ildefonsosegura.es/vaciado-de-volumenes-con-boleanos-en-cinema4d/" target="_blank" rel="attachment wp-att-1304 noopener noreferrer"><img loading="lazy" decoding="async" class="wp-image-1304 aligncenter" src="http://ildefonsosegura.es/wp-content/uploads/Cara-de-calabaza.jpg" alt="Cara-de-calabaza" width="194" height="110" /></a>  <a href="http://ildefonsosegura.es/convertir-personas-en-zombis/" target="_blank" rel="attachment wp-att-3163 noopener noreferrer"><img loading="lazy" decoding="async" class="wp-image-3163 aligncenter" src="http://ildefonsosegura.es/wp-content/uploads/ZOMBIS-by-Ildefonsosegura1.jpg" alt="ZOMBIS-by-Ildefonsosegura" width="194" height="110" srcset="https://ildefonsosegura.es/wp-content/uploads/ZOMBIS-by-Ildefonsosegura1.jpg 600w, https://ildefonsosegura.es/wp-content/uploads/ZOMBIS-by-Ildefonsosegura1-300x169.jpg 300w" sizes="(max-width: 194px) 100vw, 194px" /></a></p><p>En este post te muestro un tutorial que completa al videotutorial citado dado que nos enseña a realizar el texto que aparece en el wallpaper de Halloween. El resultado es este y lo vemos paso a paso:</p><p><a href="http://ildefonsosegura.es/tutorial-photoshosop-escrito-texto-escrito-en-madera-by-ildefonsosegura/attachment/995/" rel="attachment wp-att-3148"><img loading="lazy" decoding="async" class="size-full wp-image-3148 aligncenter" src="http://ildefonsosegura.es/wp-content/uploads/995.jpg" alt="995" width="680" height="510" srcset="https://ildefonsosegura.es/wp-content/uploads/995.jpg 680w, https://ildefonsosegura.es/wp-content/uploads/995-300x225.jpg 300w" sizes="(max-width: 680px) 100vw, 680px" /></a></p><h1><span style="color: #800000;"><strong> TUTORIAL PHOTOSHOP</strong></span></h1><p><strong> PASO 1.-</strong>  Abrimos textura de madera donde pondremos el texto</p><p><a href="http://ildefonsosegura.es/tutorial-photoshosop-escrito-texto-escrito-en-madera-by-ildefonsosegura/attachment/1/" rel="attachment wp-att-3110"><img loading="lazy" decoding="async" class="alignnone size-full wp-image-3110 aligncenter" src="http://ildefonsosegura.es/wp-content/uploads/1.jpg" alt="1" width="680" height="510" srcset="https://ildefonsosegura.es/wp-content/uploads/1.jpg 680w, https://ildefonsosegura.es/wp-content/uploads/1-300x225.jpg 300w" sizes="(max-width: 680px) 100vw, 680px" /></a></p><p><strong>PASO 2.-</strong>  Añadimos capa de ajuste de Blanco y negro con los valores por defecto que son los que se ven en la imagen. Ponemos el modo de fusión de la capa en MULTIPLICAR</p><p style="text-align: center;"> <a href="http://ildefonsosegura.es/tutorial-photoshosop-escrito-texto-escrito-en-madera-by-ildefonsosegura/1a/" rel="attachment wp-att-3111"><img loading="lazy" decoding="async" class="alignnone size-full wp-image-3111" src="http://ildefonsosegura.es/wp-content/uploads/1a.jpg" alt="1a" width="680" height="504" srcset="https://ildefonsosegura.es/wp-content/uploads/1a.jpg 680w, https://ildefonsosegura.es/wp-content/uploads/1a-300x222.jpg 300w" sizes="(max-width: 680px) 100vw, 680px" /></a></p><p style="text-align: left;"><strong>PASO 3.-</strong>  Añadimos caja de ajuste de equilibrio de color con los valores de la imagen tanto en medios tonos como en sombras como en iluminaciones. Ponemos el modo de fusión de la capa en COLOR</p><p style="text-align: left;"><a href="http://ildefonsosegura.es/tutorial-photoshosop-escrito-texto-escrito-en-madera-by-ildefonsosegura/1b/" rel="attachment wp-att-3112"><img loading="lazy" decoding="async" class="alignnone size-full wp-image-3112 aligncenter" src="http://ildefonsosegura.es/wp-content/uploads/1b.jpg" alt="1b" width="680" height="504" srcset="https://ildefonsosegura.es/wp-content/uploads/1b.jpg 680w, https://ildefonsosegura.es/wp-content/uploads/1b-300x222.jpg 300w" sizes="(max-width: 680px) 100vw, 680px" /></a></p><p style="text-align: left;"><strong>PASO 4.-</strong>  tendríamos este resultado en la textura a partir del cual podemos trabajar el texto</p><p style="text-align: left;"><a href="http://ildefonsosegura.es/tutorial-photoshosop-escrito-texto-escrito-en-madera-by-ildefonsosegura/1c/" rel="attachment wp-att-3113"><img loading="lazy" decoding="async" class="size-full wp-image-3113 aligncenter" src="http://ildefonsosegura.es/wp-content/uploads/1c.jpg" alt="1c" width="680" height="510" srcset="https://ildefonsosegura.es/wp-content/uploads/1c.jpg 680w, https://ildefonsosegura.es/wp-content/uploads/1c-300x225.jpg 300w" sizes="(max-width: 680px) 100vw, 680px" /></a></p><p style="text-align: left;"><strong>PASO 5.-</strong>  Seleccionamos un color rojo oscuro para emular el color de la sangre. Código 550000</p><p style="text-align: left;"><a href="http://ildefonsosegura.es/tutorial-photoshosop-escrito-texto-escrito-en-madera-by-ildefonsosegura/1d/" rel="attachment wp-att-3114"><img loading="lazy" decoding="async" class="alignnone size-full wp-image-3114 aligncenter" src="http://ildefonsosegura.es/wp-content/uploads/1d.jpg" alt="1d" width="680" height="510" srcset="https://ildefonsosegura.es/wp-content/uploads/1d.jpg 680w, https://ildefonsosegura.es/wp-content/uploads/1d-300x225.jpg 300w" sizes="(max-width: 680px) 100vw, 680px" /></a></p><p style="text-align: left;"><strong>PASO 6.-</strong>  Seleccionamos un pincel de sangre que puedes encontrar en la red. Acuérdate de chequear que no tiene derecho de copyright</p><p style="text-align: left;"><a href="http://ildefonsosegura.es/tutorial-photoshosop-escrito-texto-escrito-en-madera-by-ildefonsosegura/1e/" rel="attachment wp-att-3115"><img loading="lazy" decoding="async" class="alignnone size-full wp-image-3115 aligncenter" src="http://ildefonsosegura.es/wp-content/uploads/1e.jpg" alt="1e" width="680" height="510" srcset="https://ildefonsosegura.es/wp-content/uploads/1e.jpg 680w, https://ildefonsosegura.es/wp-content/uploads/1e-300x225.jpg 300w" sizes="(max-width: 680px) 100vw, 680px" /></a></p><p style="text-align: left;"><strong>PASO 7.-</strong>  Vamos pintando con diferentes tamaños, pinceles, rotacion,&#8230; y bajamos la opacidad de la capa en torno al 65%</p><p style="text-align: left;"><a href="http://ildefonsosegura.es/tutorial-photoshosop-escrito-texto-escrito-en-madera-by-ildefonsosegura/1f/" rel="attachment wp-att-3116"><img loading="lazy" decoding="async" class="alignnone size-full wp-image-3116 aligncenter" src="http://ildefonsosegura.es/wp-content/uploads/1f.jpg" alt="1f" width="680" height="510" srcset="https://ildefonsosegura.es/wp-content/uploads/1f.jpg 680w, https://ildefonsosegura.es/wp-content/uploads/1f-300x225.jpg 300w" sizes="(max-width: 680px) 100vw, 680px" /></a></p><p style="text-align: left;"><strong>PASO 8.-</strong>  Tendríamo un resultado como este</p><p style="text-align: left;"><a href="http://ildefonsosegura.es/tutorial-photoshosop-escrito-texto-escrito-en-madera-by-ildefonsosegura/1g/" rel="attachment wp-att-3117"><img loading="lazy" decoding="async" class="alignnone size-full wp-image-3117 aligncenter" src="http://ildefonsosegura.es/wp-content/uploads/1g.jpg" alt="1g" width="680" height="510" srcset="https://ildefonsosegura.es/wp-content/uploads/1g.jpg 680w, https://ildefonsosegura.es/wp-content/uploads/1g-300x225.jpg 300w" sizes="(max-width: 680px) 100vw, 680px" /></a></p><p style="text-align: left;"><strong>PASO 9.-</strong>  Ponemos nuestro texto. El tipo de fuente que usé fue MULAN</p><p style="text-align: left;"><a href="http://ildefonsosegura.es/tutorial-photoshosop-escrito-texto-escrito-en-madera-by-ildefonsosegura/attachment/2/" rel="attachment wp-att-3118"><img loading="lazy" decoding="async" class="alignnone size-full wp-image-3118 aligncenter" src="http://ildefonsosegura.es/wp-content/uploads/2.jpg" alt="2" width="680" height="510" srcset="https://ildefonsosegura.es/wp-content/uploads/2.jpg 680w, https://ildefonsosegura.es/wp-content/uploads/2-300x225.jpg 300w" sizes="(max-width: 680px) 100vw, 680px" /></a></p><p style="text-align: left;"><strong>PASO 10.-</strong>  Aplicamos un estilo de capa. Clic derecho del ratón sobre la capa de texto y selecciona OPCIONES DE FUSION. Sigue los cuadros siguientes para copiar los valores de los atributos del estilo. Ojo&#8230; el relleno de la capa se reduce al 25%</p><p style="text-align: left;"><img loading="lazy" decoding="async" class="alignnone size-full wp-image-3119 aligncenter" src="http://ildefonsosegura.es/wp-content/uploads/3.jpg" alt="3" width="680" height="454" srcset="https://ildefonsosegura.es/wp-content/uploads/3.jpg 680w, https://ildefonsosegura.es/wp-content/uploads/3-300x200.jpg 300w" sizes="(max-width: 680px) 100vw, 680px" /></p><p style="text-align: left;"><a href="http://ildefonsosegura.es/tutorial-photoshosop-escrito-texto-escrito-en-madera-by-ildefonsosegura/attachment/4/" rel="attachment wp-att-3120"><img loading="lazy" decoding="async" class="alignnone size-full wp-image-3120 aligncenter" src="http://ildefonsosegura.es/wp-content/uploads/4.jpg" alt="4" width="680" height="454" srcset="https://ildefonsosegura.es/wp-content/uploads/4.jpg 680w, https://ildefonsosegura.es/wp-content/uploads/4-300x200.jpg 300w" sizes="(max-width: 680px) 100vw, 680px" /></a></p><p style="text-align: left;"><a href="http://ildefonsosegura.es/tutorial-photoshosop-escrito-texto-escrito-en-madera-by-ildefonsosegura/attachment/5/" rel="attachment wp-att-3121"><img loading="lazy" decoding="async" class="alignnone size-full wp-image-3121 aligncenter" src="http://ildefonsosegura.es/wp-content/uploads/5.jpg" alt="5" width="680" height="457" srcset="https://ildefonsosegura.es/wp-content/uploads/5.jpg 680w, https://ildefonsosegura.es/wp-content/uploads/5-300x201.jpg 300w" sizes="(max-width: 680px) 100vw, 680px" /></a></p><p style="text-align: left;"><a href="http://ildefonsosegura.es/tutorial-photoshosop-escrito-texto-escrito-en-madera-by-ildefonsosegura/attachment/6/" rel="attachment wp-att-3122"><img loading="lazy" decoding="async" class="alignnone size-full wp-image-3122 aligncenter" src="http://ildefonsosegura.es/wp-content/uploads/6.jpg" alt="6" width="680" height="448" srcset="https://ildefonsosegura.es/wp-content/uploads/6.jpg 680w, https://ildefonsosegura.es/wp-content/uploads/6-300x197.jpg 300w" sizes="(max-width: 680px) 100vw, 680px" /></a></p><p style="text-align: left;"><a href="http://ildefonsosegura.es/tutorial-photoshosop-escrito-texto-escrito-en-madera-by-ildefonsosegura/attachment/7/" rel="attachment wp-att-3123"><img loading="lazy" decoding="async" class="size-full wp-image-3123 aligncenter" src="http://ildefonsosegura.es/wp-content/uploads/7.jpg" alt="7" width="680" height="457" srcset="https://ildefonsosegura.es/wp-content/uploads/7.jpg 680w, https://ildefonsosegura.es/wp-content/uploads/7-300x201.jpg 300w" sizes="(max-width: 680px) 100vw, 680px" /></a></p><p style="text-align: left;"><strong>PASO 11.-</strong>  El estilo nos queda como sigue</p><p style="text-align: left;"><a href="http://ildefonsosegura.es/tutorial-photoshosop-escrito-texto-escrito-en-madera-by-ildefonsosegura/8-2/" rel="attachment wp-att-3124"><img loading="lazy" decoding="async" class="alignnone size-full wp-image-3124 aligncenter" src="http://ildefonsosegura.es/wp-content/uploads/8.jpg" alt="8" width="680" height="510" srcset="https://ildefonsosegura.es/wp-content/uploads/8.jpg 680w, https://ildefonsosegura.es/wp-content/uploads/8-300x225.jpg 300w" sizes="(max-width: 680px) 100vw, 680px" /></a></p><p style="text-align: left;"><strong>PASO 12.-</strong>  En el menú TEXTO rasterizamos el texto</p><p style="text-align: left;"><img loading="lazy" decoding="async" class="size-full wp-image-3125 aligncenter" src="http://ildefonsosegura.es/wp-content/uploads/9.jpg" alt="9" width="680" height="510" srcset="https://ildefonsosegura.es/wp-content/uploads/9.jpg 680w, https://ildefonsosegura.es/wp-content/uploads/9-300x225.jpg 300w" sizes="(max-width: 680px) 100vw, 680px" /></p><p style="text-align: left;"><strong>PASO 13.-</strong>  Seleccionamos un pack de pinceles de grietas. Os hago la misma recomendación que hice con los de sangre.</p><p style="text-align: left;"><a href="http://ildefonsosegura.es/tutorial-photoshosop-escrito-texto-escrito-en-madera-by-ildefonsosegura/attachment/91/" rel="attachment wp-att-3126"><img loading="lazy" decoding="async" class="alignnone size-full wp-image-3126 aligncenter" src="http://ildefonsosegura.es/wp-content/uploads/91.jpg" alt="91" width="680" height="510" srcset="https://ildefonsosegura.es/wp-content/uploads/91.jpg 680w, https://ildefonsosegura.es/wp-content/uploads/91-300x225.jpg 300w" sizes="(max-width: 680px) 100vw, 680px" /></a></p><p style="text-align: left;"><strong>PASO 14.-</strong>  Seleccionamos el color frontal blanco (como el texto). Un atajo rápido para hacerlo es pulsar D y luego X. Así el color frontal es blanco con total seguridad</p><p style="text-align: left;"><a href="http://ildefonsosegura.es/tutorial-photoshosop-escrito-texto-escrito-en-madera-by-ildefonsosegura/attachment/92/" rel="attachment wp-att-3127"><img loading="lazy" decoding="async" class="alignnone size-full wp-image-3127 aligncenter" src="http://ildefonsosegura.es/wp-content/uploads/92.jpg" alt="92" width="680" height="510" srcset="https://ildefonsosegura.es/wp-content/uploads/92.jpg 680w, https://ildefonsosegura.es/wp-content/uploads/92-300x225.jpg 300w" sizes="(max-width: 680px) 100vw, 680px" /></a></p><p style="text-align: left;"><strong>PASO 15.-</strong>  Si por un momento ponemos el relleno de la capa en el 100% y ocultamos los estilos de capa, podemos ver un ejemplo de como hemos pintado con las grietas el texto</p><p style="text-align: left;"><a href="http://ildefonsosegura.es/tutorial-photoshosop-escrito-texto-escrito-en-madera-by-ildefonsosegura/attachment/94/" rel="attachment wp-att-3129"><img loading="lazy" decoding="async" class="alignnone size-full wp-image-3129 aligncenter" src="http://ildefonsosegura.es/wp-content/uploads/94.jpg" alt="94" width="680" height="510" srcset="https://ildefonsosegura.es/wp-content/uploads/94.jpg 680w, https://ildefonsosegura.es/wp-content/uploads/94-300x225.jpg 300w" sizes="(max-width: 680px) 100vw, 680px" /></a></p><p style="text-align: left;">Si volvemos a poner el relleno en 25% y hacemos visibles los efectos tendemos este resultado</p><p style="text-align: left;"><a href="http://ildefonsosegura.es/tutorial-photoshosop-escrito-texto-escrito-en-madera-by-ildefonsosegura/attachment/93/" rel="attachment wp-att-3128"><img loading="lazy" decoding="async" class="size-full wp-image-3128 aligncenter" src="http://ildefonsosegura.es/wp-content/uploads/93.jpg" alt="93" width="680" height="510" srcset="https://ildefonsosegura.es/wp-content/uploads/93.jpg 680w, https://ildefonsosegura.es/wp-content/uploads/93-300x225.jpg 300w" sizes="(max-width: 680px) 100vw, 680px" /></a></p><p style="text-align: left;"><strong>PASO 16.-</strong>  Añadimos a la capa una máscara de capa con el icono que está abajo del panel de capas</p><p style="text-align: left;"><a href="http://ildefonsosegura.es/tutorial-photoshosop-escrito-texto-escrito-en-madera-by-ildefonsosegura/attachment/95/" rel="attachment wp-att-3130"><img loading="lazy" decoding="async" class="alignnone size-full wp-image-3130 aligncenter" src="http://ildefonsosegura.es/wp-content/uploads/95.jpg" alt="95" width="680" height="510" srcset="https://ildefonsosegura.es/wp-content/uploads/95.jpg 680w, https://ildefonsosegura.es/wp-content/uploads/95-300x225.jpg 300w" sizes="(max-width: 680px) 100vw, 680px" /></a></p><p style="text-align: left;"><strong>PASO 17.-</strong>  Mantenemos tecleada la techa ALT y hacemos clic en el ojo de la capa textura de madera. Con eso conseguimos que solo se vea esa capa</p><p style="text-align: left;"><a href="http://ildefonsosegura.es/tutorial-photoshosop-escrito-texto-escrito-en-madera-by-ildefonsosegura/attachment/96/" rel="attachment wp-att-3131"><img loading="lazy" decoding="async" class="alignnone size-full wp-image-3131 aligncenter" src="http://ildefonsosegura.es/wp-content/uploads/96.jpg" alt="96" width="680" height="510" srcset="https://ildefonsosegura.es/wp-content/uploads/96.jpg 680w, https://ildefonsosegura.es/wp-content/uploads/96-300x225.jpg 300w" sizes="(max-width: 680px) 100vw, 680px" /></a></p><p style="text-align: left;"><strong>PASO 18.-</strong>  Nos vamos a la paleta de canales. Con el botón derecho del ratón hacemos clic en el canal azul y le indicamos que duplique el canal</p><p style="text-align: left;"><a href="http://ildefonsosegura.es/tutorial-photoshosop-escrito-texto-escrito-en-madera-by-ildefonsosegura/attachment/97/" rel="attachment wp-att-3132"><img loading="lazy" decoding="async" class="alignnone size-full wp-image-3132 aligncenter" src="http://ildefonsosegura.es/wp-content/uploads/97.jpg" alt="97" width="680" height="510" srcset="https://ildefonsosegura.es/wp-content/uploads/97.jpg 680w, https://ildefonsosegura.es/wp-content/uploads/97-300x225.jpg 300w" sizes="(max-width: 680px) 100vw, 680px" /></a></p><p style="text-align: left;"><strong>PASO 19.-</strong>  Con CTRL+L vemos la paleta de niveles y buscamos acercarnos con los tonos hacia la izquierda dando luz a la mayoría del canal</p><p style="text-align: left;"><a href="http://ildefonsosegura.es/tutorial-photoshosop-escrito-texto-escrito-en-madera-by-ildefonsosegura/attachment/98/" rel="attachment wp-att-3133"><img loading="lazy" decoding="async" class="alignnone size-full wp-image-3133 aligncenter" src="http://ildefonsosegura.es/wp-content/uploads/98.jpg" alt="98" width="680" height="510" srcset="https://ildefonsosegura.es/wp-content/uploads/98.jpg 680w, https://ildefonsosegura.es/wp-content/uploads/98-300x225.jpg 300w" sizes="(max-width: 680px) 100vw, 680px" /></a></p><p style="text-align: left;"><strong>PASO 20.-</strong>  Con CTRL+clic en el canal se seleccionan las áreas blancas del mismo.</p><p style="text-align: left;"><a href="http://ildefonsosegura.es/tutorial-photoshosop-escrito-texto-escrito-en-madera-by-ildefonsosegura/attachment/99/" rel="attachment wp-att-3134"><img loading="lazy" decoding="async" class="alignnone size-full wp-image-3134 aligncenter" src="http://ildefonsosegura.es/wp-content/uploads/99.jpg" alt="99" width="680" height="510" srcset="https://ildefonsosegura.es/wp-content/uploads/99.jpg 680w, https://ildefonsosegura.es/wp-content/uploads/99-300x225.jpg 300w" sizes="(max-width: 680px) 100vw, 680px" /></a></p><p style="text-align: left;"><strong>PASO 21.-</strong>  Con esa selección realizada volvemos a la paleta de capas RGB</p><p style="text-align: left;"><a href="http://ildefonsosegura.es/tutorial-photoshosop-escrito-texto-escrito-en-madera-by-ildefonsosegura/attachment/991/" rel="attachment wp-att-3135"><img loading="lazy" decoding="async" class="alignnone size-full wp-image-3135 aligncenter" src="http://ildefonsosegura.es/wp-content/uploads/991.jpg" alt="991" width="680" height="510" srcset="https://ildefonsosegura.es/wp-content/uploads/991.jpg 680w, https://ildefonsosegura.es/wp-content/uploads/991-300x225.jpg 300w" sizes="(max-width: 680px) 100vw, 680px" /></a></p><p style="text-align: left;"><strong>PASO 22.-</strong> Añadimos una máscara de capa y automáticamente las zonas no seleccionadas se pintan de negro en la máscara y por lo tanto se ocultan esas zonas en la capa del texto</p><p style="text-align: left;"><a href="http://ildefonsosegura.es/tutorial-photoshosop-escrito-texto-escrito-en-madera-by-ildefonsosegura/attachment/992/" rel="attachment wp-att-3136"><img loading="lazy" decoding="async" class="alignnone size-full wp-image-3136 aligncenter" src="http://ildefonsosegura.es/wp-content/uploads/992.jpg" alt="992" width="680" height="510" srcset="https://ildefonsosegura.es/wp-content/uploads/992.jpg 680w, https://ildefonsosegura.es/wp-content/uploads/992-300x225.jpg 300w" sizes="(max-width: 680px) 100vw, 680px" /></a></p><p style="text-align: left;"><strong>PASO 23.-</strong>  Situados en la máscara podemos cambiar sus niveles (CTRL+L) para ajustar la apariencia de las zonas a ocultar o visualizar. En mi composición le di estos valores a los niveles</p><p style="text-align: left;"><a href="http://ildefonsosegura.es/tutorial-photoshosop-escrito-texto-escrito-en-madera-by-ildefonsosegura/attachment/993/" rel="attachment wp-att-3137"><img loading="lazy" decoding="async" class="alignnone size-full wp-image-3137 aligncenter" src="http://ildefonsosegura.es/wp-content/uploads/993.jpg" alt="993" width="680" height="510" srcset="https://ildefonsosegura.es/wp-content/uploads/993.jpg 680w, https://ildefonsosegura.es/wp-content/uploads/993-300x225.jpg 300w" sizes="(max-width: 680px) 100vw, 680px" /></a></p><p style="text-align: left;"><strong>PASO 24.-</strong>  El resultado hasta el momento es este</p><p style="text-align: left;"><a href="http://ildefonsosegura.es/tutorial-photoshosop-escrito-texto-escrito-en-madera-by-ildefonsosegura/attachment/994/" rel="attachment wp-att-3147"><img loading="lazy" decoding="async" class="size-full wp-image-3147 aligncenter" src="http://ildefonsosegura.es/wp-content/uploads/994.jpg" alt="994" width="680" height="510" srcset="https://ildefonsosegura.es/wp-content/uploads/994.jpg 680w, https://ildefonsosegura.es/wp-content/uploads/994-300x225.jpg 300w" sizes="(max-width: 680px) 100vw, 680px" /></a></p><p style="text-align: left;"><strong>PASO 25.-</strong>  Quitamos la unión entre la capa y su máscara de capa haciendo simplemente clic con el ratón en la cadena que las une. Esta debe desaparecer como en la imagen</p><p style="text-align: left;"><a href="http://ildefonsosegura.es/tutorial-photoshosop-escrito-texto-escrito-en-madera-by-ildefonsosegura/994a/" rel="attachment wp-att-3149"><img loading="lazy" decoding="async" class="alignnone size-full wp-image-3149 aligncenter" src="http://ildefonsosegura.es/wp-content/uploads/994a.jpg" alt="994a" width="680" height="467" srcset="https://ildefonsosegura.es/wp-content/uploads/994a.jpg 680w, https://ildefonsosegura.es/wp-content/uploads/994a-300x206.jpg 300w" sizes="(max-width: 680px) 100vw, 680px" /></a></p><p style="text-align: left;"><strong>PASO 26.-</strong>  Aplicamos un filtro en la capa. Filtro, distorsionar, RIZO con el valor que se muestra en la imagen</p><p style="text-align: left;"><a href="http://ildefonsosegura.es/tutorial-photoshosop-escrito-texto-escrito-en-madera-by-ildefonsosegura/994b/" rel="attachment wp-att-3150"><img loading="lazy" decoding="async" class="alignnone size-full wp-image-3150 aligncenter" src="http://ildefonsosegura.es/wp-content/uploads/994b.jpg" alt="994b" width="680" height="467" srcset="https://ildefonsosegura.es/wp-content/uploads/994b.jpg 680w, https://ildefonsosegura.es/wp-content/uploads/994b-300x206.jpg 300w" sizes="(max-width: 680px) 100vw, 680px" /></a></p><p style="text-align: left;"><strong>PASO 27.-</strong>  Con CTRL+F se repite el filtro y conseguimos un efecto de irregularidad en los bordes bastante real al objeto que buscamos</p><p style="text-align: left;"><a href="http://ildefonsosegura.es/tutorial-photoshosop-escrito-texto-escrito-en-madera-by-ildefonsosegura/994c/" rel="attachment wp-att-3151"><img loading="lazy" decoding="async" class="alignnone size-full wp-image-3151 aligncenter" src="http://ildefonsosegura.es/wp-content/uploads/994c.jpg" alt="994c" width="680" height="467" srcset="https://ildefonsosegura.es/wp-content/uploads/994c.jpg 680w, https://ildefonsosegura.es/wp-content/uploads/994c-300x206.jpg 300w" sizes="(max-width: 680px) 100vw, 680px" /></a></p><h1 style="text-align: left;"><span style="color: #800000;"><strong>CONCLUSION</strong></span></h1><p style="text-align: left;"><a href="http://ildefonsosegura.es/tutorial-photoshosop-escrito-texto-escrito-en-madera-by-ildefonsosegura/attachment/995/" rel="attachment wp-att-3148"><img loading="lazy" decoding="async" class="alignnone size-full wp-image-3148 aligncenter" src="http://ildefonsosegura.es/wp-content/uploads/995.jpg" alt="995" width="680" height="510" srcset="https://ildefonsosegura.es/wp-content/uploads/995.jpg 680w, https://ildefonsosegura.es/wp-content/uploads/995-300x225.jpg 300w" sizes="(max-width: 680px) 100vw, 680px" /></a></p><p style="text-align: justify;">Si te ha gustado el tutorial, espero que dejes un comentario y que lo compartas con tus amigos. Asi me ayudas a continuar. Gracias</p><p style="text-align: left;"> </p>								</div>
				</div>
					</div>
		</div>
					</div>
		</section>
				</div>La entrada <a href="https://ildefonsosegura.es/tutorial-photoshosop-escrito-texto-escrito-en-madera-by-ildefonsosegura/">#Tutorial #Photoshop escrito: Texto tallado en madera by @ildefonsosegura</a> apareció primero en <a href="https://ildefonsosegura.es">Ildefonso Segura</a>.]]></content:encoded>
					
					<wfw:commentRss>https://ildefonsosegura.es/tutorial-photoshosop-escrito-texto-escrito-en-madera-by-ildefonsosegura/feed/</wfw:commentRss>
			<slash:comments>1</slash:comments>
		
		
			</item>
	</channel>
</rss>
<br />
<b>Fatal error</b>:  Uncaught TypeError: mysqli_num_fields(): Argument #1 ($result) must be of type mysqli_result, bool given in /var/www/vhosts/ildefonsosegura.es/httpdocs/wp-includes/class-wpdb.php:3941
Stack trace:
#0 /var/www/vhosts/ildefonsosegura.es/httpdocs/wp-includes/class-wpdb.php(3941): mysqli_num_fields()
#1 /var/www/vhosts/ildefonsosegura.es/httpdocs/wp-includes/class-wpdb.php(785): wpdb-&gt;load_col_info()
#2 /var/www/vhosts/ildefonsosegura.es/httpdocs/wp-content/plugins/w3-total-cache/DbCache_WpdbInjection_QueryCaching.php(230): wpdb-&gt;__get()
#3 /var/www/vhosts/ildefonsosegura.es/httpdocs/wp-content/plugins/w3-total-cache/DbCache_WpdbNew.php(216): W3TC\DbCache_WpdbInjection_QueryCaching-&gt;query()
#4 /var/www/vhosts/ildefonsosegura.es/httpdocs/wp-content/plugins/aaa-option-optimizer/src/class-database.php(199): W3TC\DbCache_WpdbNew-&gt;query()
#5 /var/www/vhosts/ildefonsosegura.es/httpdocs/wp-content/plugins/aaa-option-optimizer/src/class-plugin.php(182): Progress_Planner\OptionOptimizer\Database::batch_insert()
#6 /var/www/vhosts/ildefonsosegura.es/httpdocs/wp-includes/class-wp-hook.php(353): Progress_Planner\OptionOptimizer\Plugin-&gt;update_tracked_options()
#7 /var/www/vhosts/ildefonsosegura.es/httpdocs/wp-includes/class-wp-hook.php(377): WP_Hook-&gt;apply_filters()
#8 /var/www/vhosts/ildefonsosegura.es/httpdocs/wp-includes/plugin.php(523): WP_Hook-&gt;do_action()
#9 /var/www/vhosts/ildefonsosegura.es/httpdocs/wp-includes/load.php(1308): do_action()
#10 [internal function]: shutdown_action_hook()
#11 {main}
  thrown in <b>/var/www/vhosts/ildefonsosegura.es/httpdocs/wp-includes/class-wpdb.php</b> on line <b>3941</b><br />