
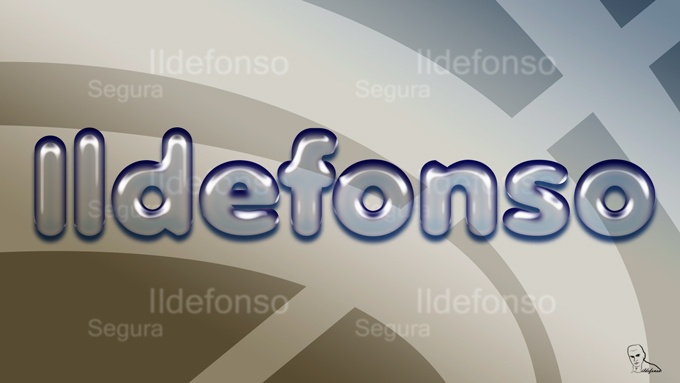
Con este tutorial aprenderemos a usar los estilos de capa para emular un efecto de material de globo, plástico o latex. Si usas variaciones sencillas del ejemplo, puedes conseguir otros efectos que harán que el texto parezca otro material. En cualquier caso, abajo te dejo el editable, estilo y la fuente para que puedas tener el efecto sin necesidad de crearlo.
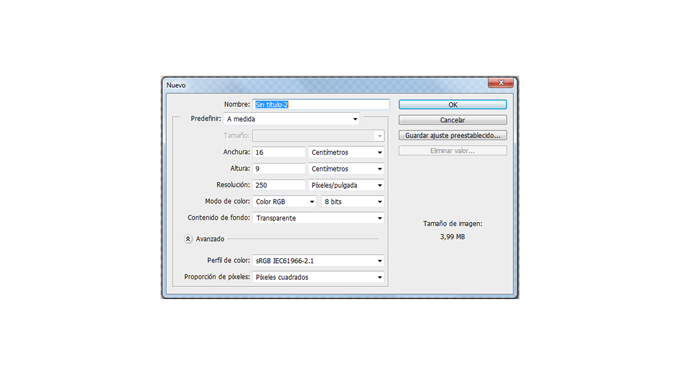
1.- Abre un nuevo canvas de trabajo con una resolución de 250 ppp. Yo usé un tamaño en cm de 16:9 (wide screen)
2.- Pon un fondo que tu elijas. Yo usé uno creado por mi sencillo

3.- Selecciona la herramienta texto de la barra de herramientas. Usa la fuente Anja con color blanco ffffff y tamaño aproximadamente 90 px
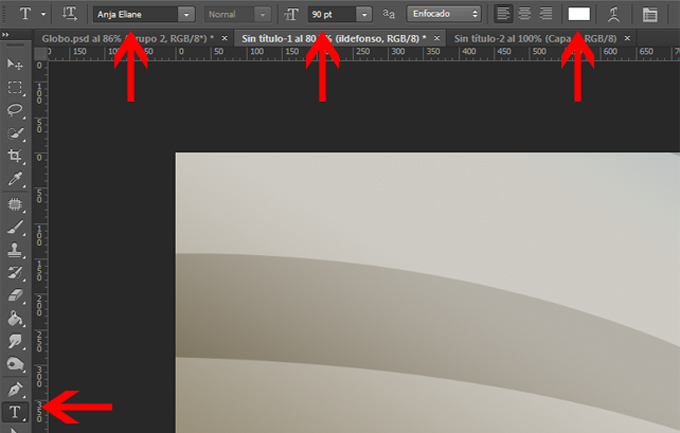
4.- Escribe tu texto

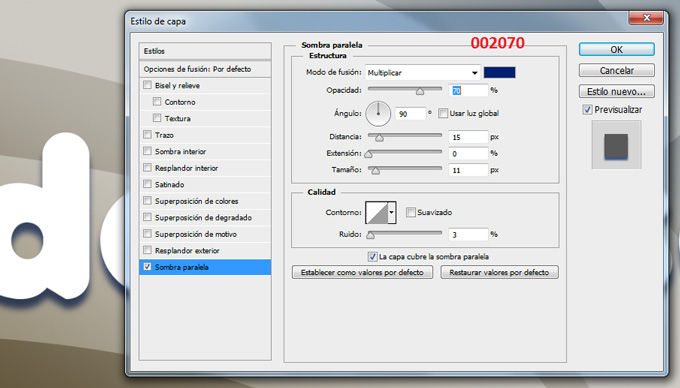
5.- Haz clic derecho en la capa de texto y selecciona OPCIONES DE FUSION. Comienza seleccionando SOMBRA PARALELA
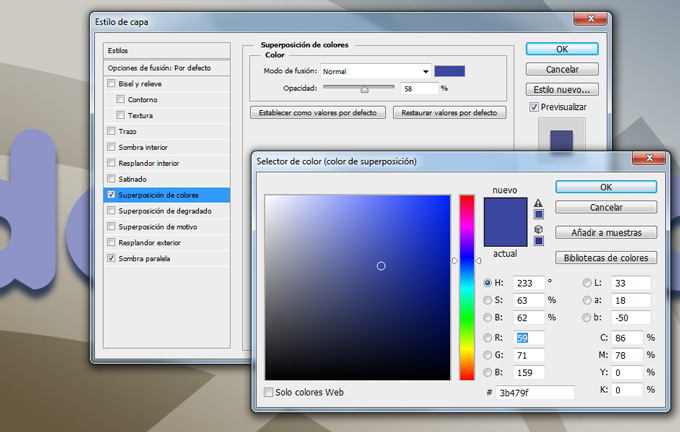
6.- Continuamos con SUPERPOSICION DE COLORES buscando un tono azul
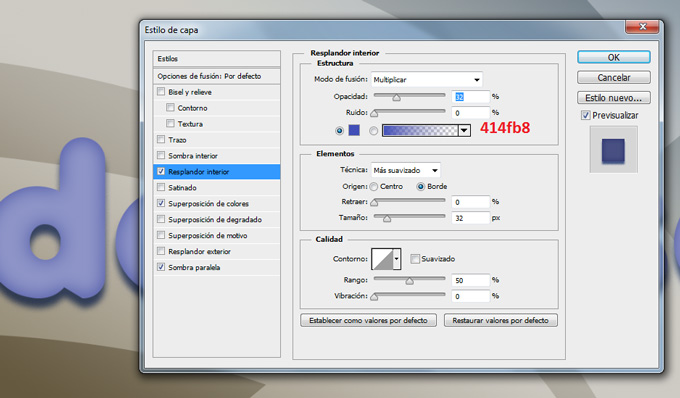
7.- Aplicamos ahora la variable RESPLANDOR INTERIOR
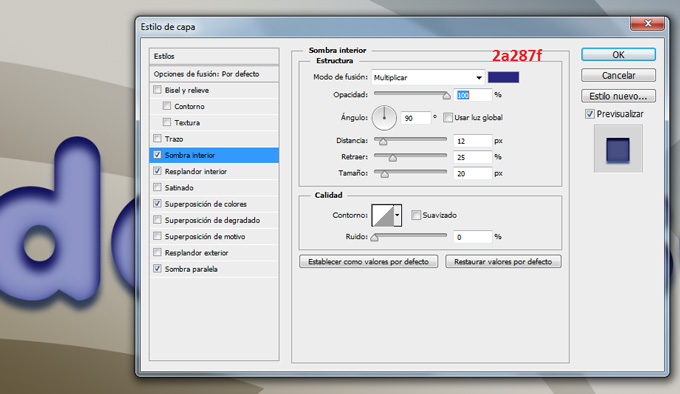
8.- A continuación le damos SOMBRA INTERIOR
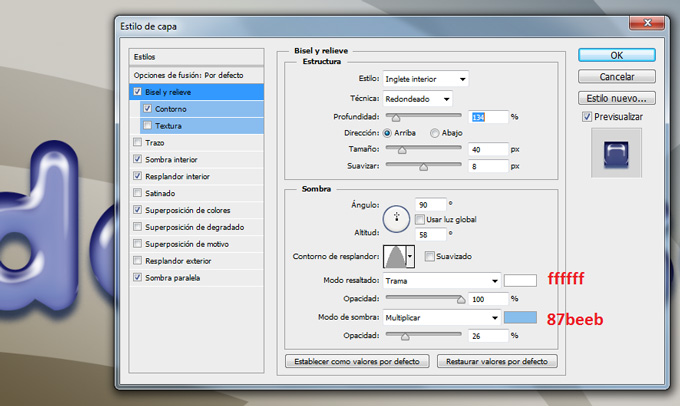
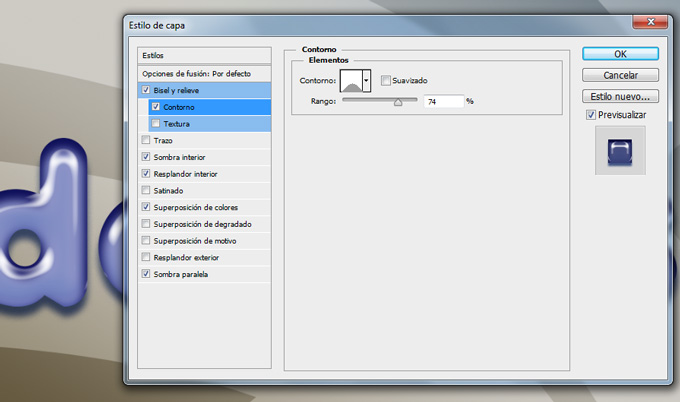
9.- Nos situamos en BISEL Y RELIEVE dándole unos valores como sigue:
10.- Dentro de bisel y relieve seleccionamos CONTORNO
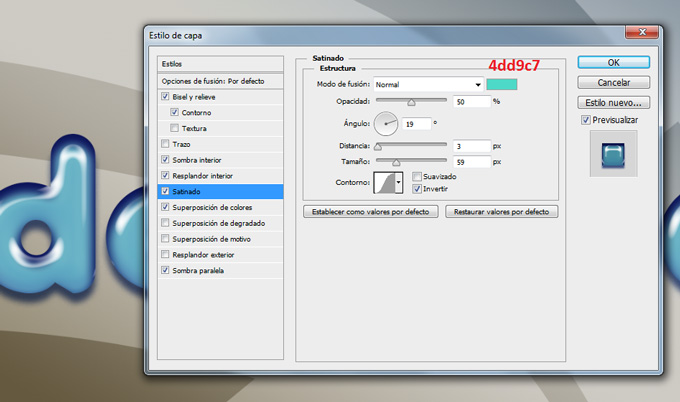
11.- Casi finalizando aplicamos SATINADO
12.- Hasta aquí ya tendríamos un efecto de texto de globo bastante aceptable.

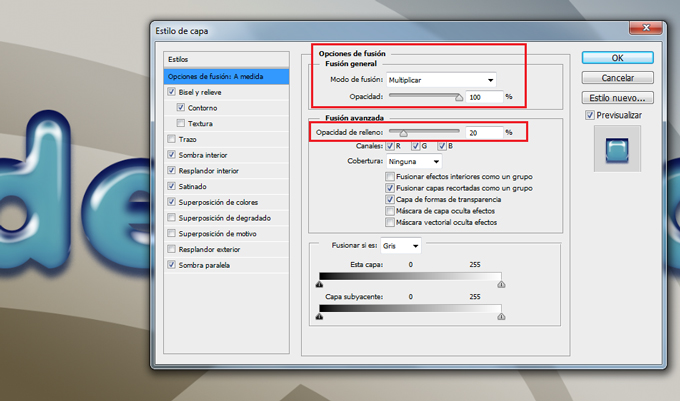
13.- En las opciones de fusión vamos a cambiar variables tanto de la sección de FUSION GENERAL como de FUSION AVANZADA
En la fusión general cambiaremos el tipo de fusión de capa a MULIPLICAR. En la fusión avanzada cambiaremos el porcentaje de relleno al 20%
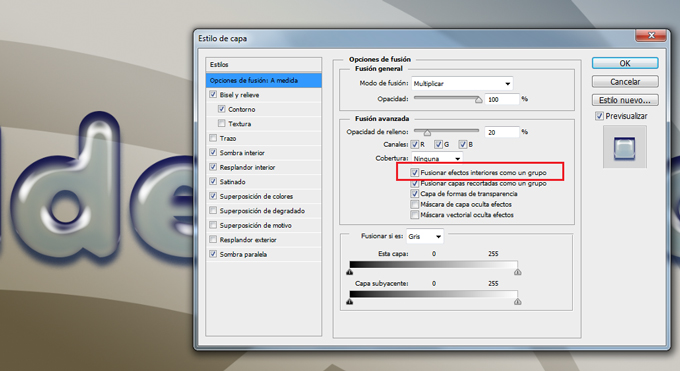
14.- Para conseguir mayor transparencia en el texto seleccionaremos una variable dentro de la FUSIÓN AVANZADA que no he visto en ningún tutorial. Esa opción es FUSIONAR EFECTOS INTERIORES COMO UN GRUPO. Con esta opción seleccionada lo que se hace es fusionar los efectos de «resplandor interior», «satinado» y «superposición» con la capa antes de fusionarlos con el documento. Todas las opciones de fusión se fusionan con el documento y en función del contenido de las otras capas el resultado de las variables es diferente. Si tienes esta opción de FUSIONAR EFECTOS INTERIORES COMO UN GRUPO, los efectos interactuan con el contenido de la capa y no con el resto de capas.
15.- Así el resultado es el siguiente que íbamos buscando:
Con fecha 21 de octubre de 2013 se publica un videotutorial donde explico como conseguir un efecto de tallado de una calavera en una textura de madera. Con la misma técnica podrías conseguir la integración de un volumen sencillo en una textura determinada.
Aprovechando estas fechas cercanas a Halloween, tienes a tu disposición un videotutorial junto con otros que ya publiqué y que te pueden servir también, donde te muestro unas técnicas sencillas con máscaras, filtros y capas de ajuste. El resultado es fantástico y te invito a ver el videotutorial haciendo clic en la imagen siguiente.
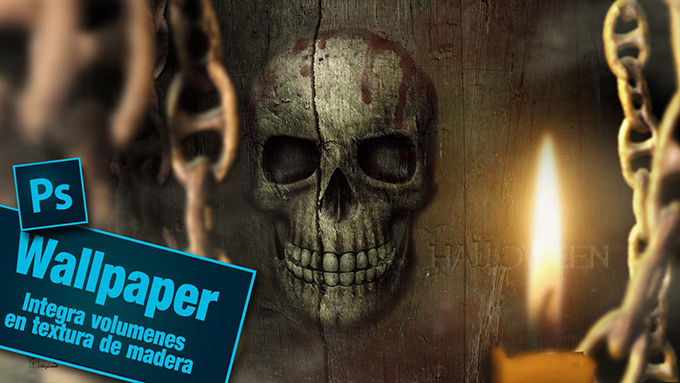
HAZ CLIC EN LA IMAGEN PARA VER EL VIDEOTUTORIAL
[widget id="custom_html-8"]
Tutoriales relacionados con la temática Halloween
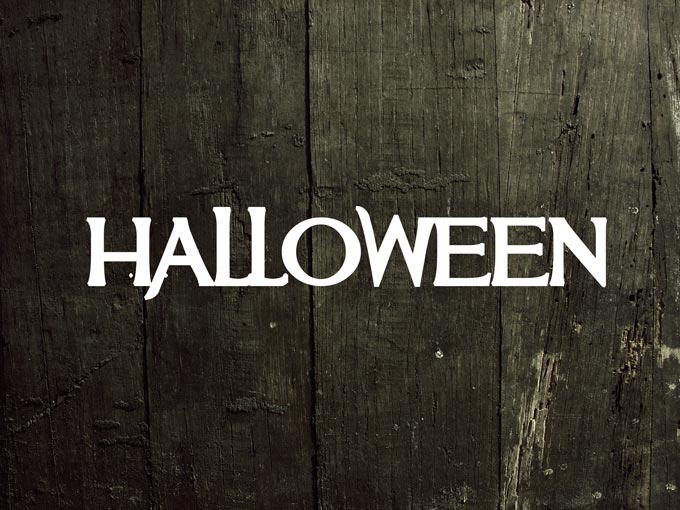
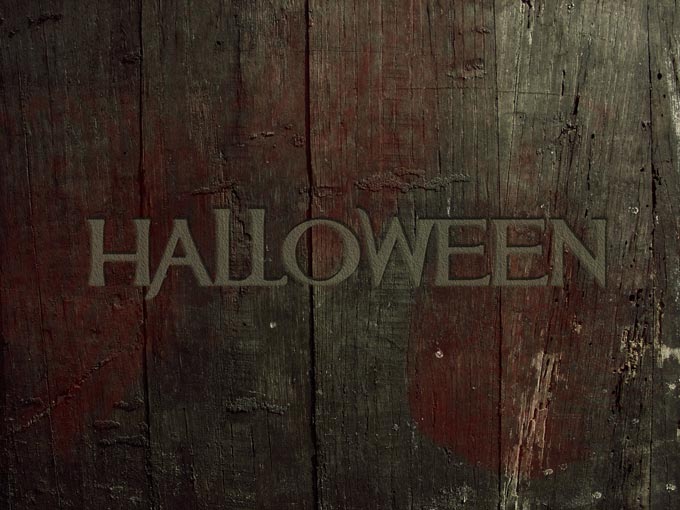
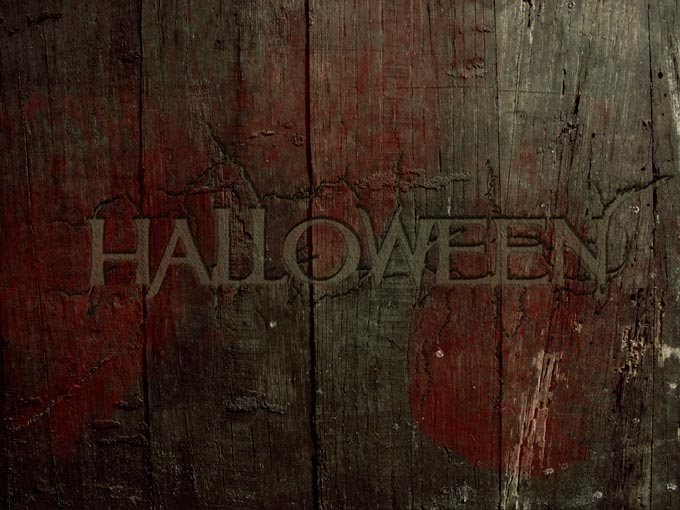
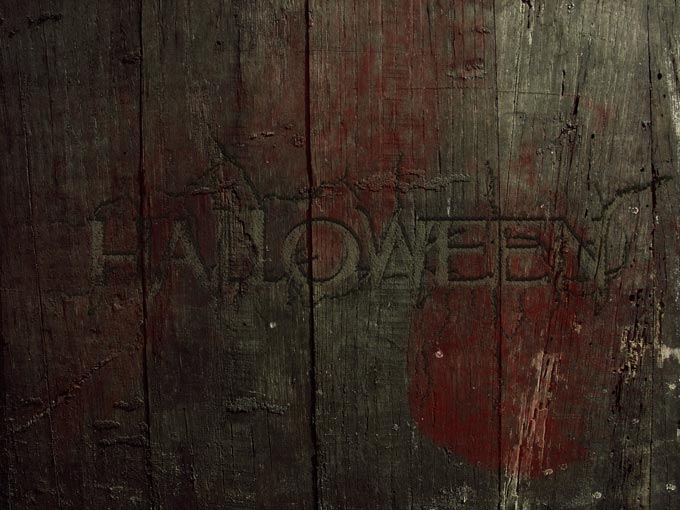
En este post te muestro un tutorial que completa al videotutorial citado dado que nos enseña a realizar el texto que aparece en el wallpaper de Halloween. El resultado es este y lo vemos paso a paso:

TUTORIAL PHOTOSHOP
PASO 1.- Abrimos textura de madera donde pondremos el texto

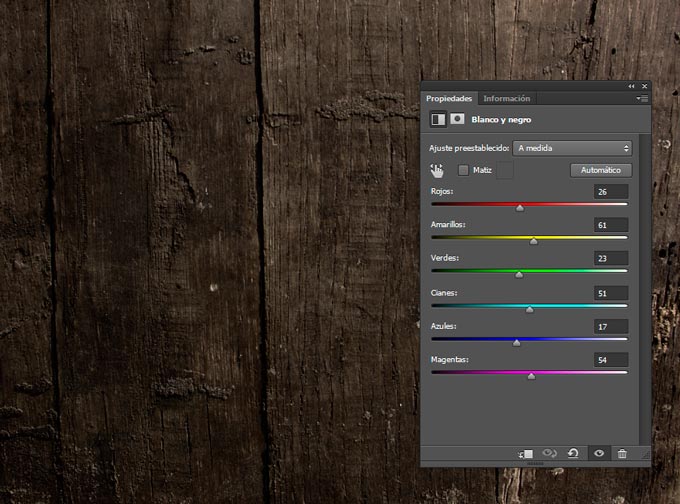
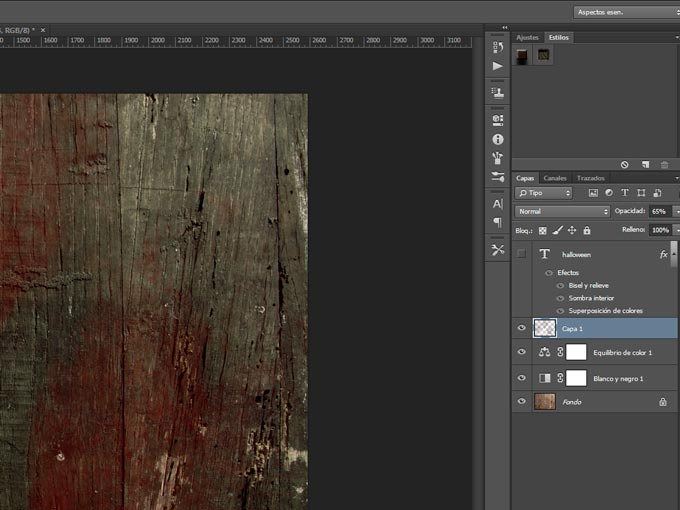
PASO 2.- Añadimos capa de ajuste de Blanco y negro con los valores por defecto que son los que se ven en la imagen. Ponemos el modo de fusión de la capa en MULTIPLICAR
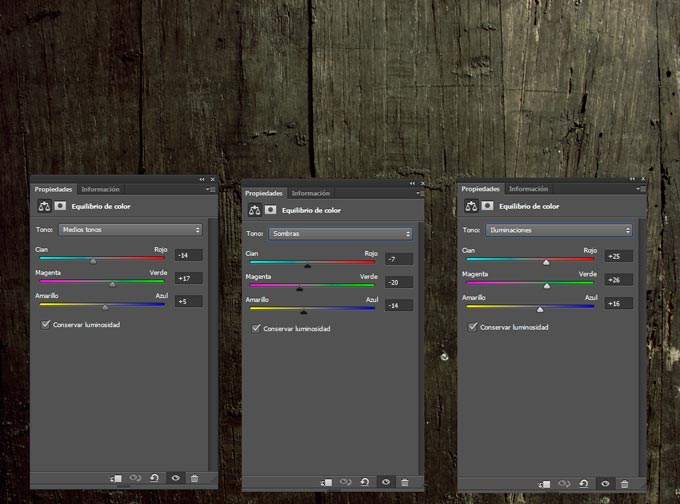
PASO 3.- Añadimos caja de ajuste de equilibrio de color con los valores de la imagen tanto en medios tonos como en sombras como en iluminaciones. Ponemos el modo de fusión de la capa en COLOR
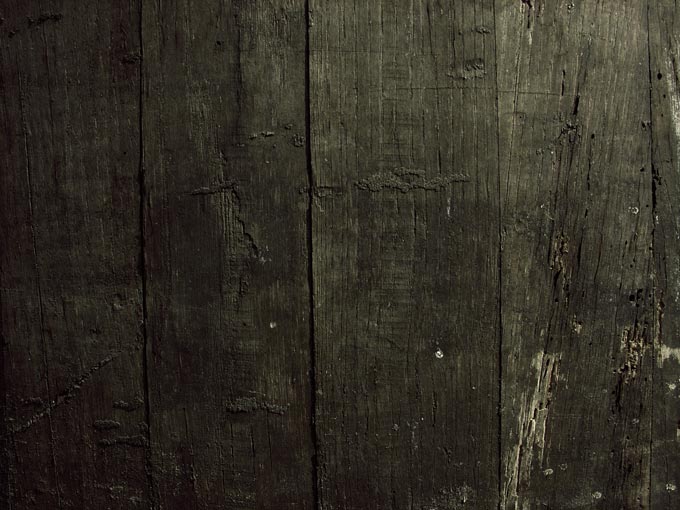
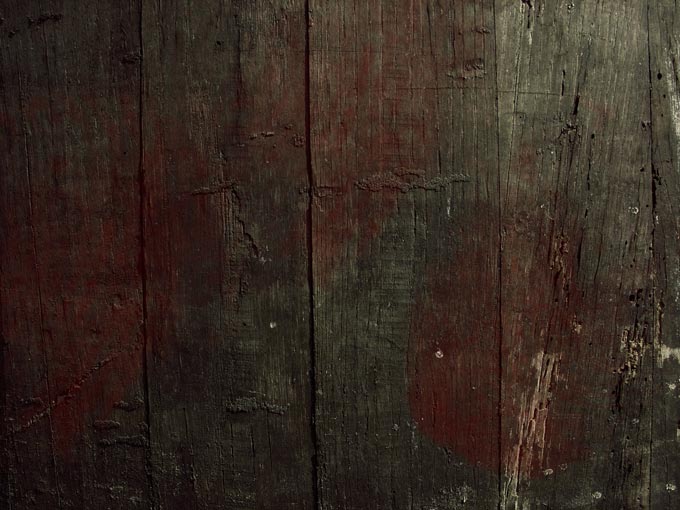
PASO 4.- tendríamos este resultado en la textura a partir del cual podemos trabajar el texto
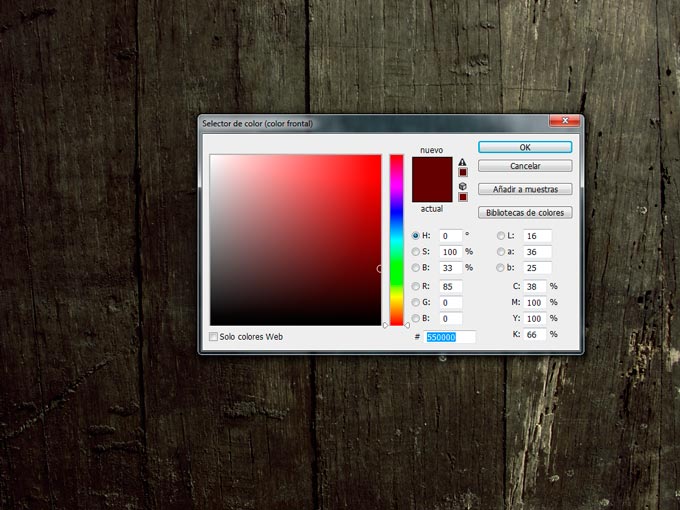
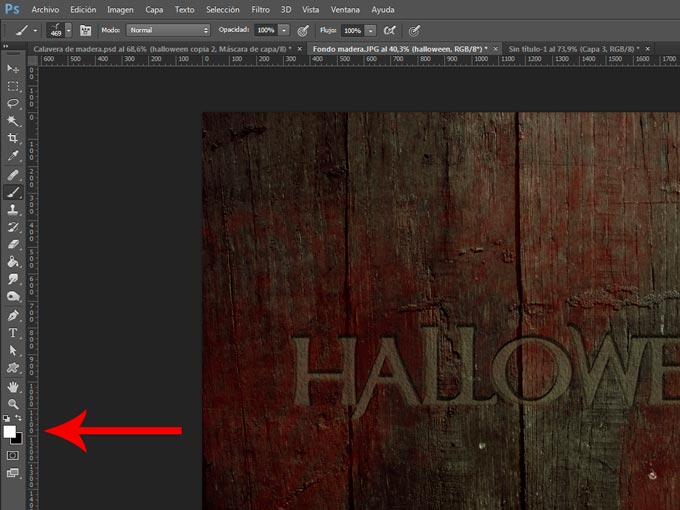
PASO 5.- Seleccionamos un color rojo oscuro para emular el color de la sangre. Código 550000
PASO 6.- Seleccionamos un pincel de sangre que puedes encontrar en la red. Acuérdate de chequear que no tiene derecho de copyright
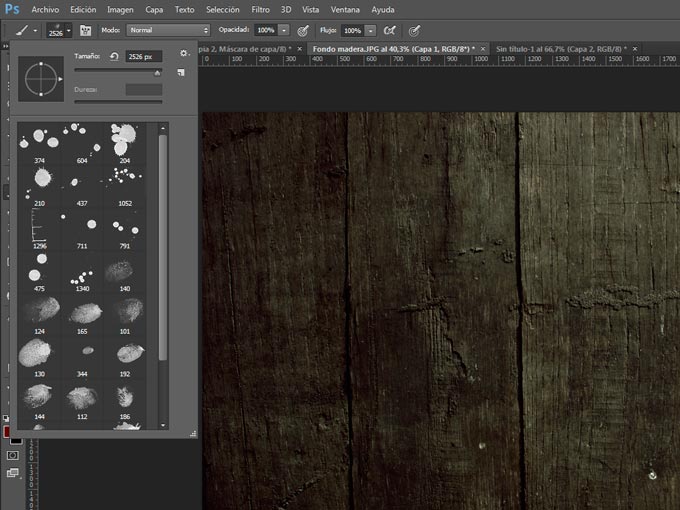
PASO 7.- Vamos pintando con diferentes tamaños, pinceles, rotacion,… y bajamos la opacidad de la capa en torno al 65%
PASO 8.- Tendríamo un resultado como este
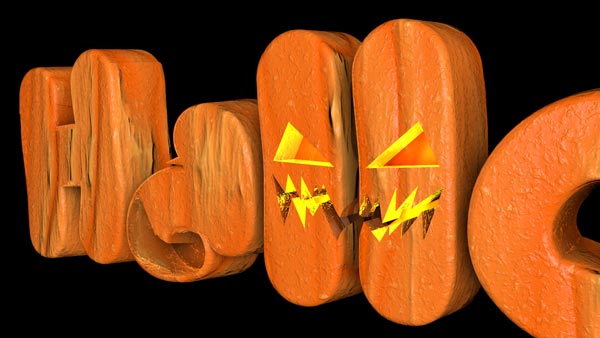
PASO 9.- Ponemos nuestro texto. El tipo de fuente que usé fue MULAN
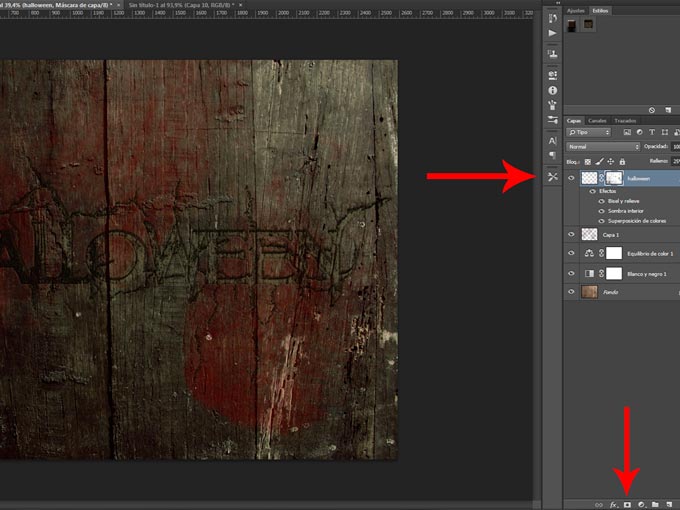
PASO 10.- Aplicamos un estilo de capa. Clic derecho del ratón sobre la capa de texto y selecciona OPCIONES DE FUSION. Sigue los cuadros siguientes para copiar los valores de los atributos del estilo. Ojo… el relleno de la capa se reduce al 25%
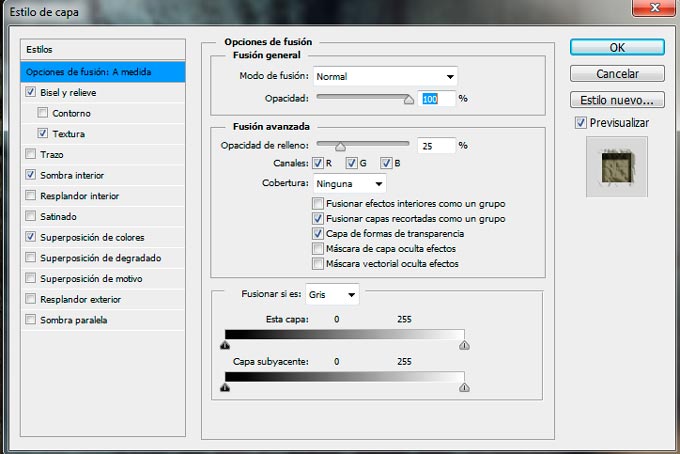
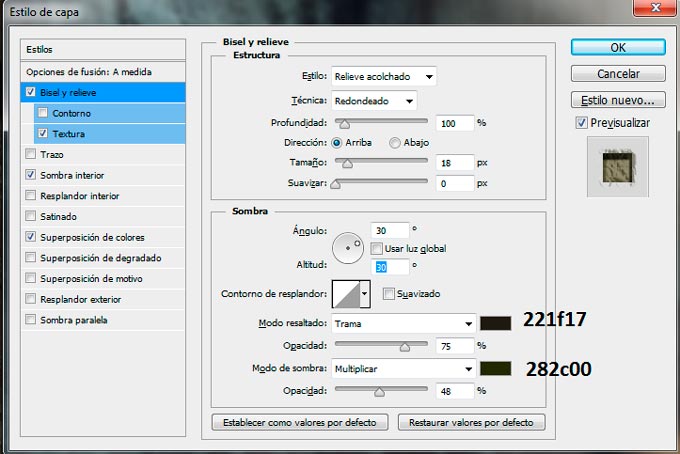
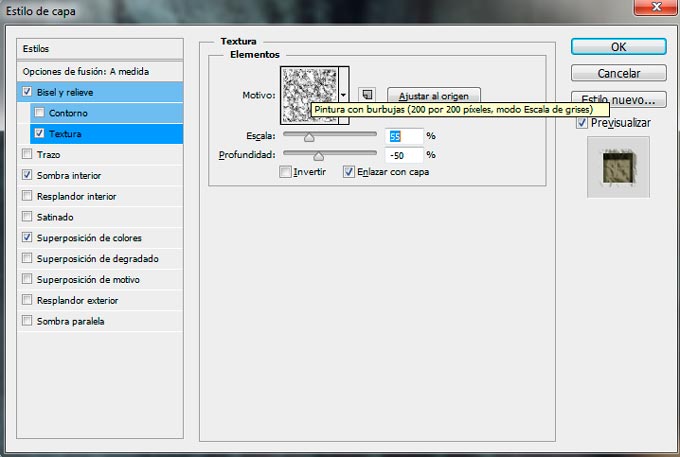
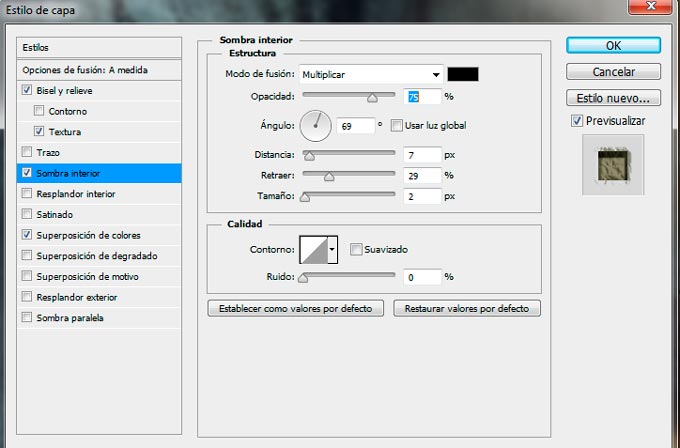
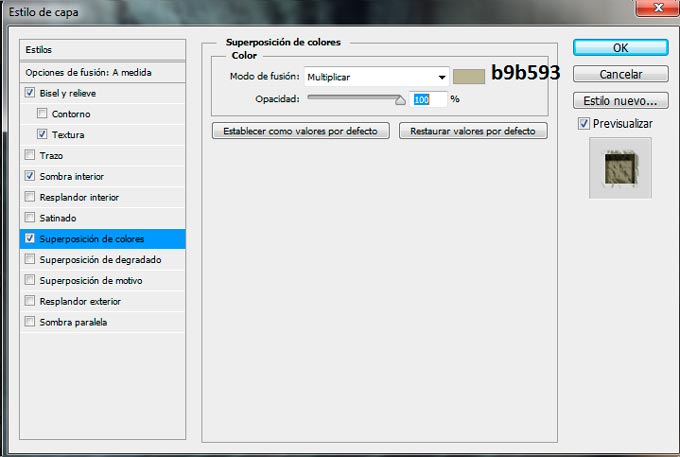
PASO 11.- El estilo nos queda como sigue
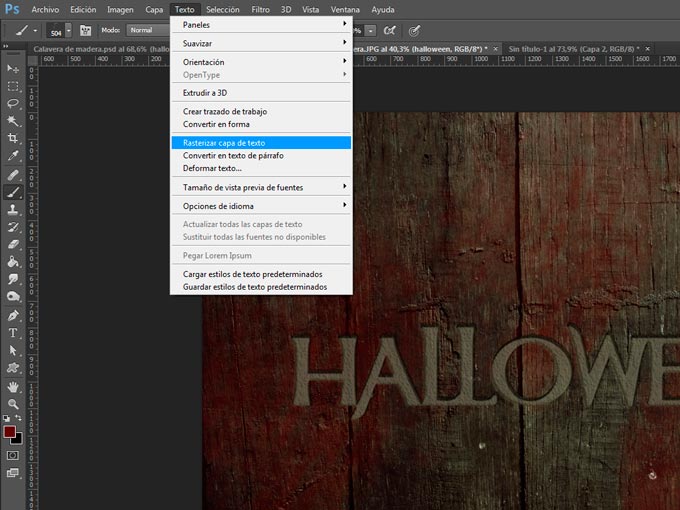
PASO 12.- En el menú TEXTO rasterizamos el texto
PASO 13.- Seleccionamos un pack de pinceles de grietas. Os hago la misma recomendación que hice con los de sangre.
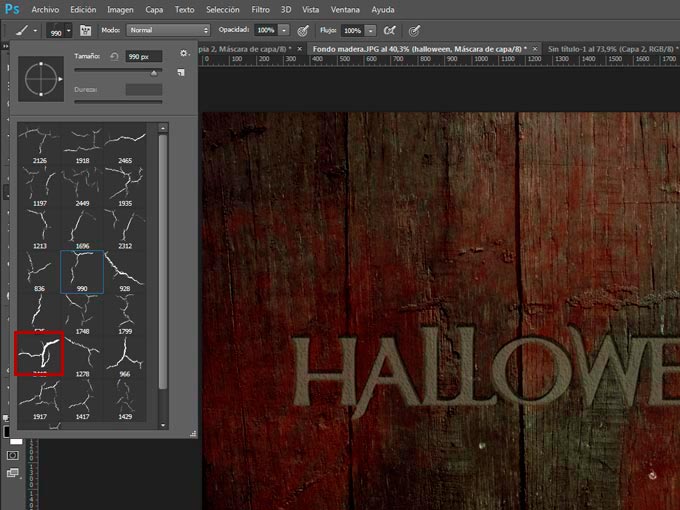
PASO 14.- Seleccionamos el color frontal blanco (como el texto). Un atajo rápido para hacerlo es pulsar D y luego X. Así el color frontal es blanco con total seguridad
PASO 15.- Si por un momento ponemos el relleno de la capa en el 100% y ocultamos los estilos de capa, podemos ver un ejemplo de como hemos pintado con las grietas el texto

Si volvemos a poner el relleno en 25% y hacemos visibles los efectos tendemos este resultado
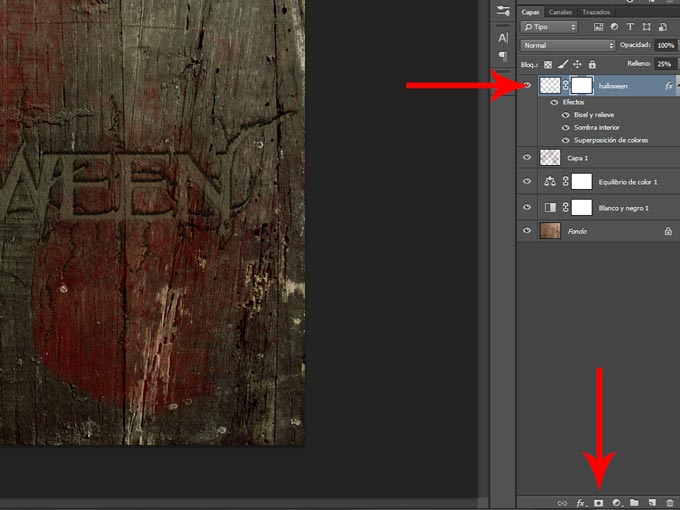
PASO 16.- Añadimos a la capa una máscara de capa con el icono que está abajo del panel de capas
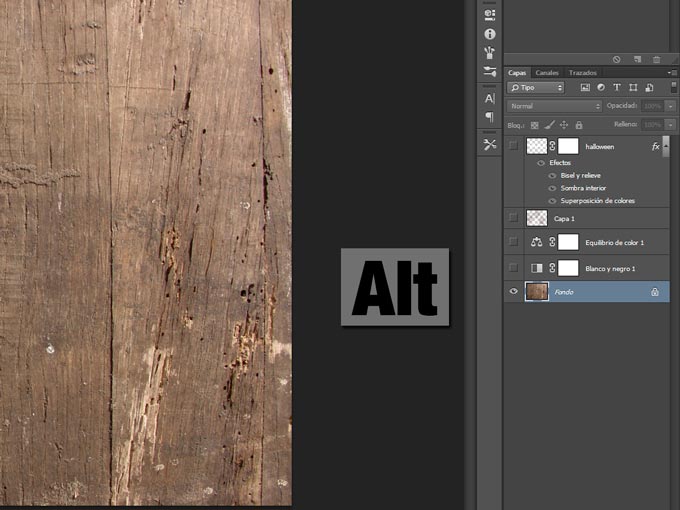
PASO 17.- Mantenemos tecleada la techa ALT y hacemos clic en el ojo de la capa textura de madera. Con eso conseguimos que solo se vea esa capa
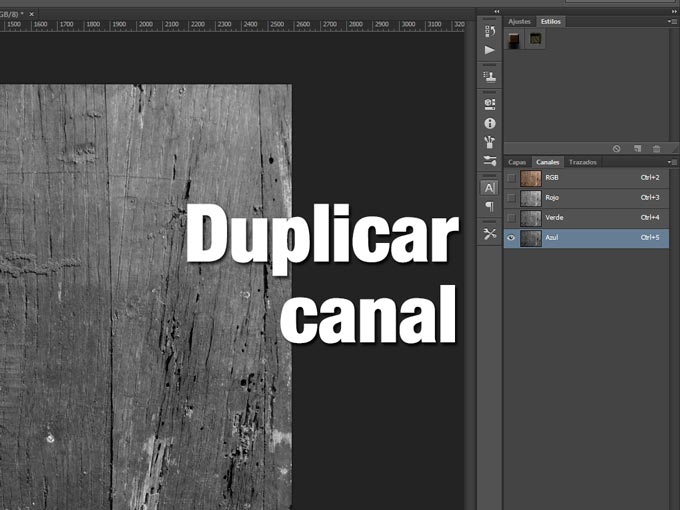
PASO 18.- Nos vamos a la paleta de canales. Con el botón derecho del ratón hacemos clic en el canal azul y le indicamos que duplique el canal
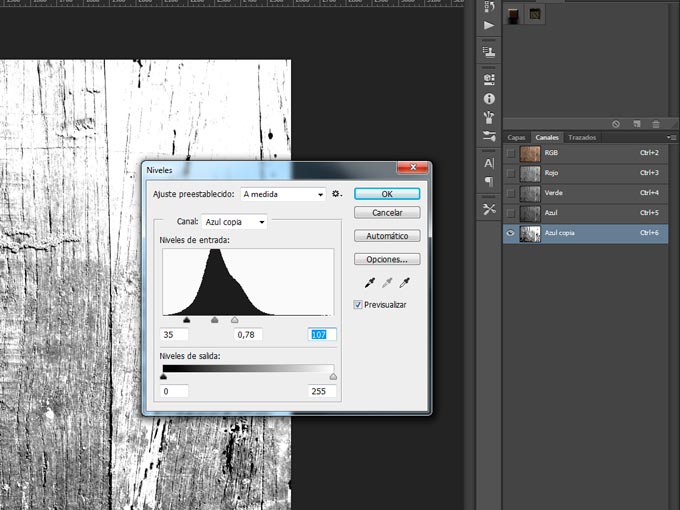
PASO 19.- Con CTRL+L vemos la paleta de niveles y buscamos acercarnos con los tonos hacia la izquierda dando luz a la mayoría del canal
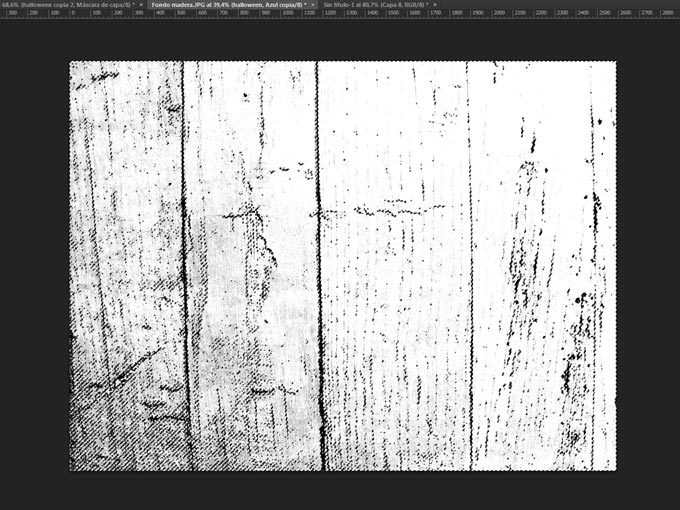
PASO 20.- Con CTRL+clic en el canal se seleccionan las áreas blancas del mismo.
PASO 21.- Con esa selección realizada volvemos a la paleta de capas RGB
PASO 22.- Añadimos una máscara de capa y automáticamente las zonas no seleccionadas se pintan de negro en la máscara y por lo tanto se ocultan esas zonas en la capa del texto
PASO 23.- Situados en la máscara podemos cambiar sus niveles (CTRL+L) para ajustar la apariencia de las zonas a ocultar o visualizar. En mi composición le di estos valores a los niveles
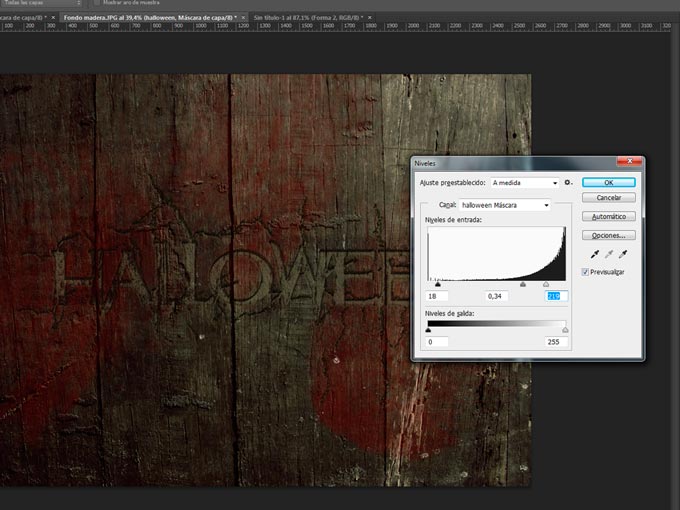
PASO 24.- El resultado hasta el momento es este
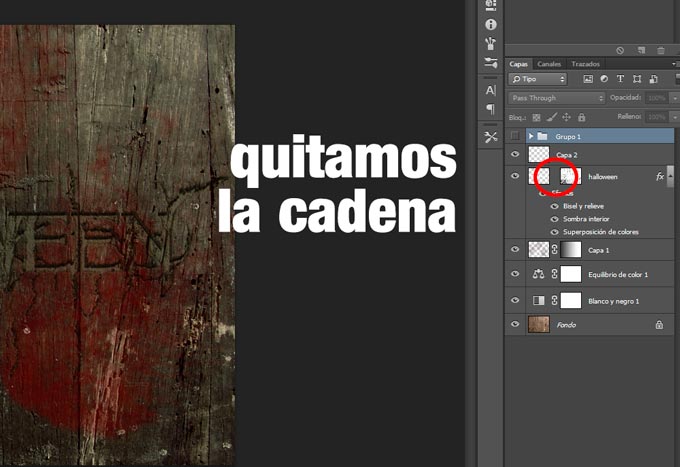
PASO 25.- Quitamos la unión entre la capa y su máscara de capa haciendo simplemente clic con el ratón en la cadena que las une. Esta debe desaparecer como en la imagen
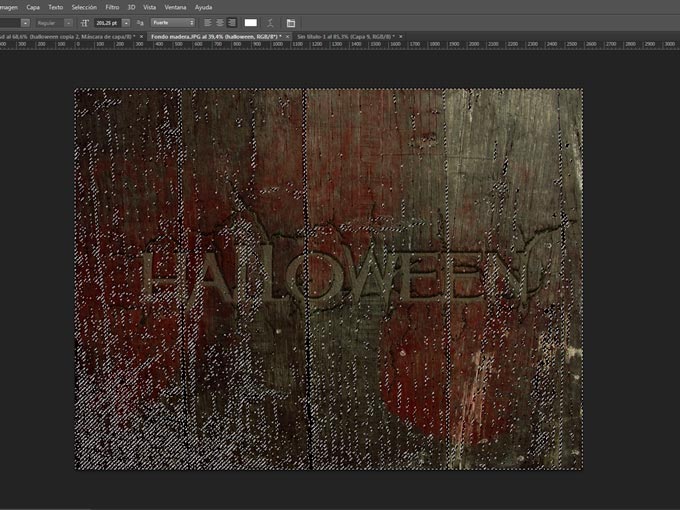
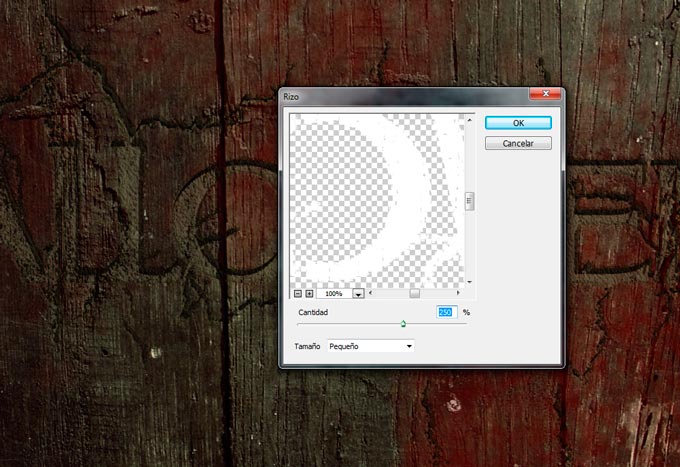
PASO 26.- Aplicamos un filtro en la capa. Filtro, distorsionar, RIZO con el valor que se muestra en la imagen
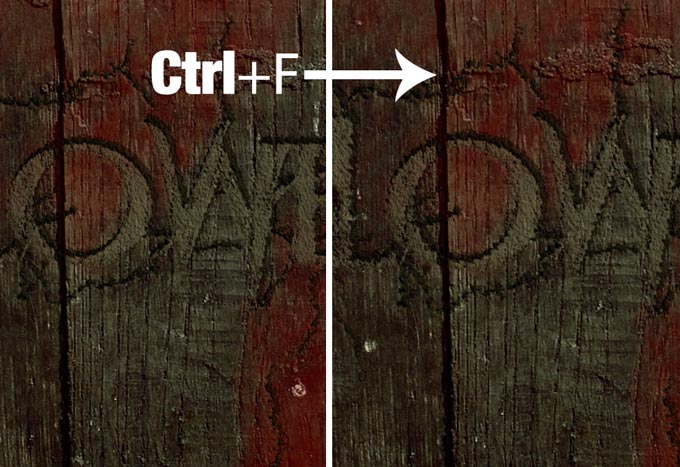
PASO 27.- Con CTRL+F se repite el filtro y conseguimos un efecto de irregularidad en los bordes bastante real al objeto que buscamos
CONCLUSION
Si te ha gustado el tutorial, espero que dejes un comentario y que lo compartas con tus amigos. Asi me ayudas a continuar. Gracias
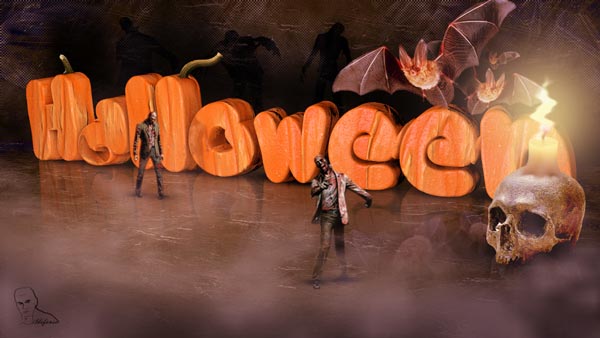
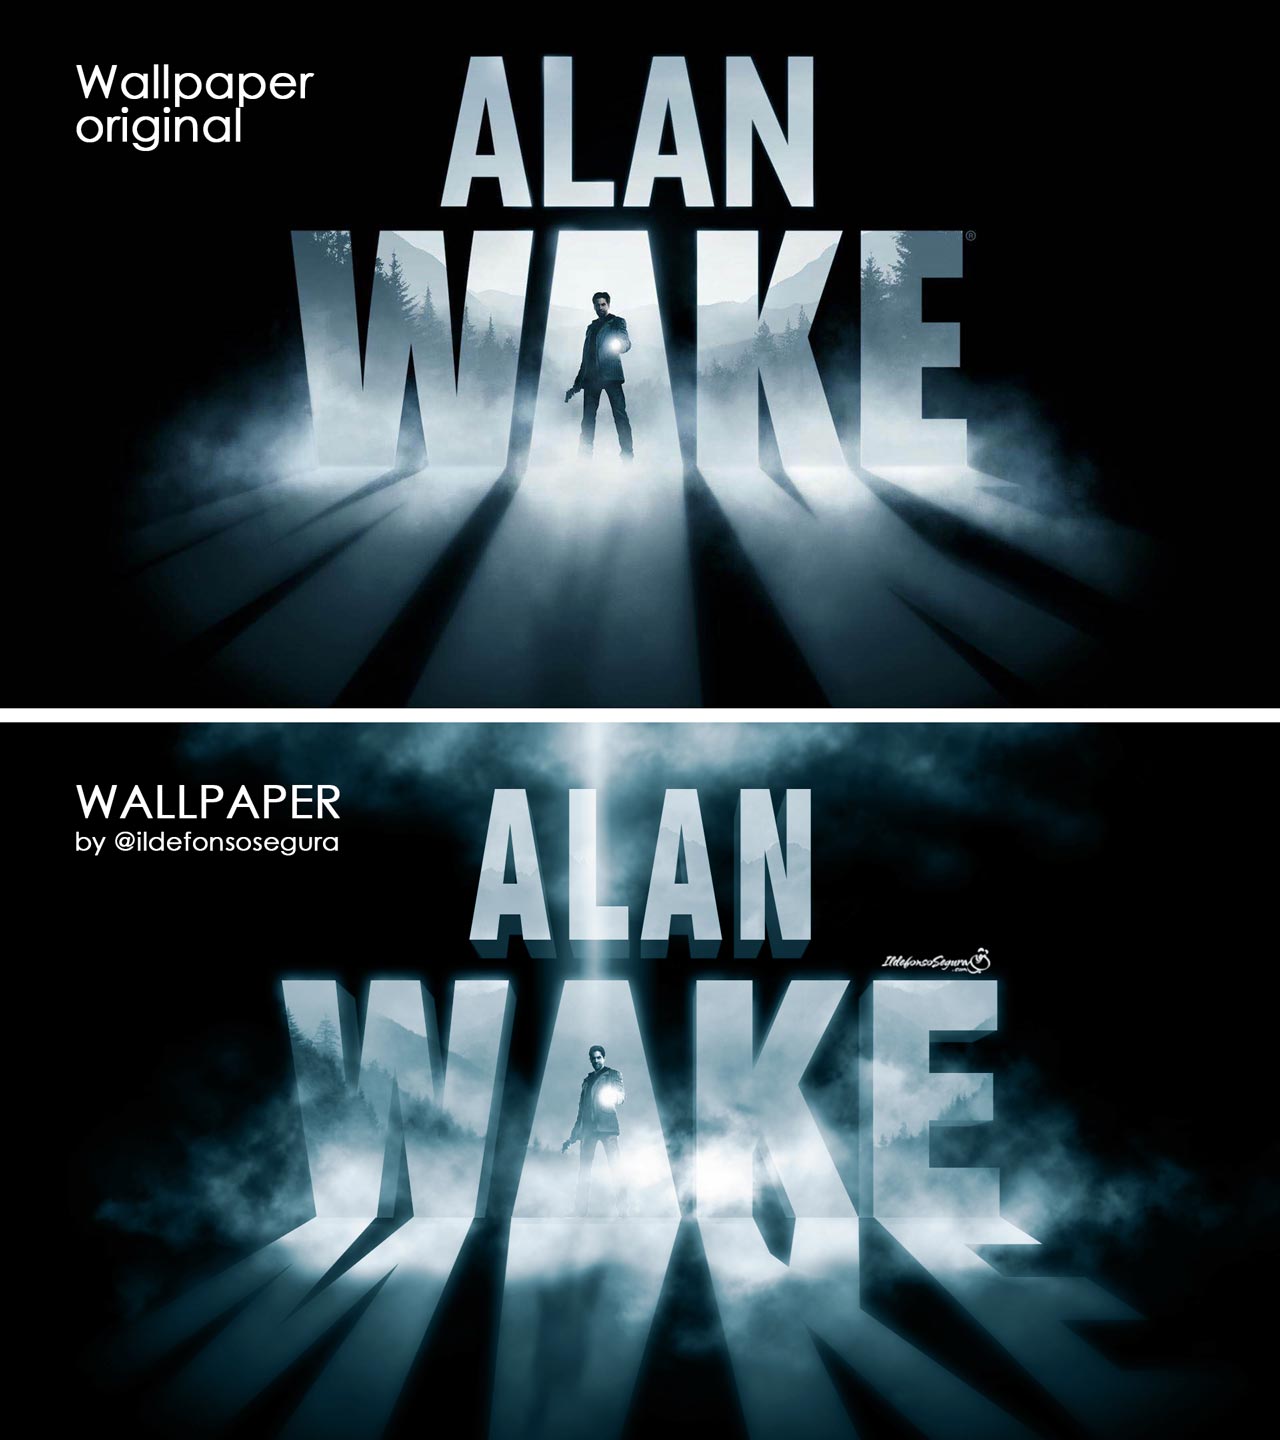
En este tutorial de photoshop aprenderemos a hacer un wallpaper/póster al estilo Alan Wake (vídeo juego del género thriller psicológico) pero añadiendo un esfecto 3D en el texto.
En este fotomontaje, usaremos objetos inteligentes, máscaras de capa y pinceles especiales para crear una escena de videojuego.
A continuación verás el wallpaper original del juego y más abajo el que construiremos con el tutorial. Como vés hay una similitud bastante elevada aunque nosotros incorporaremos en el tutorial de Photoshop algunos efectos como más iluminación, efecto 3D y otros …
No te lo pierdas y comparte tus trabajos en mi página de facebook (IldefonsoSeguraPage)
Espero que te guste y compartas el video
TUTORIAL EFECTO ALAN WAKE WALLPAPER
SPEEDART ALAN WAKE WALLPAPER
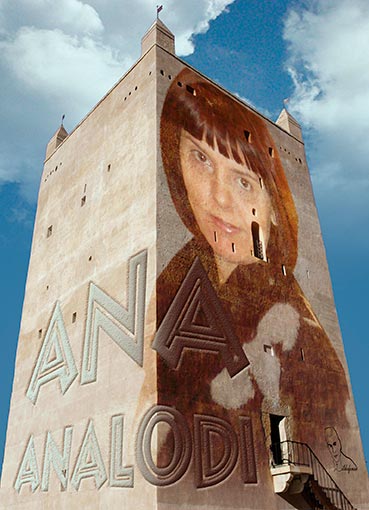
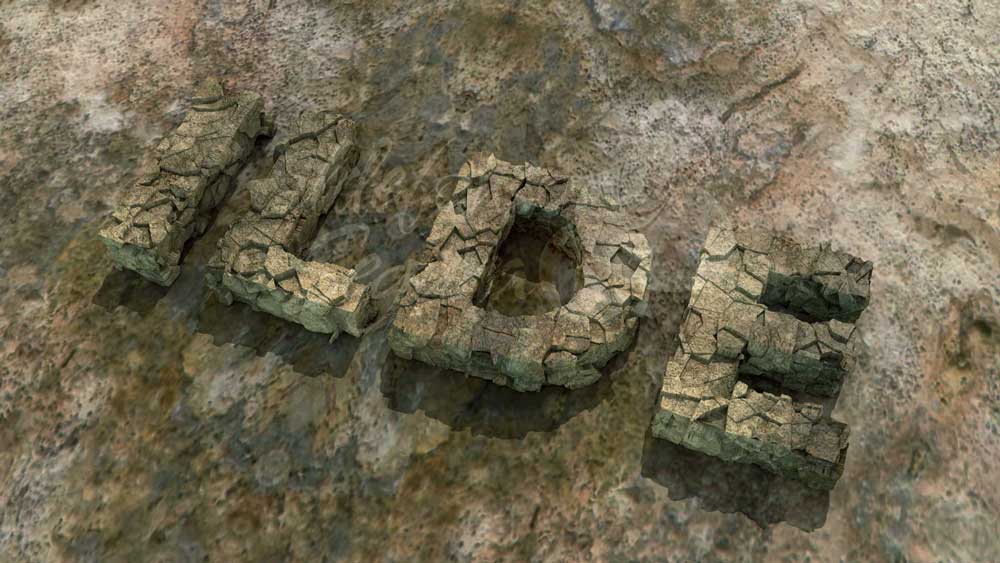
En este tutorial de Photoshop veremos una aplicación del filtro punto de fuga en un poster o wallpaper. Muchas veces no sabemos para qué sirve pero hoy veremos como podemos integrar un texto en un cartel de película al que le añadiremos otros efectos.
Conseguiremos un efecto de texto laminado con textura de madera con una perspectiva realizada con el punto de fuga. Aplicaremos sombras e iluminaciones para crear una escena increible.
[twenty20 img1=»6103″ img2=»6104″ offset=»0.5″ align=»center» width=»75%»]
Este wallpaper está inspirado en el trabajo del diseñador Charles William. Podeis ver su trabajo en BEHANCE
TUTORIAL VANISHING POINT
Puedes ver otro tutorial que tengo en mi web sobre este filtro. Puedes PINCHA AQUI para ver como trabajar esta composición que os muestro a continuación:
 No te lo pierdas y comparte tus trabajos en mi página de facebook (IldefonsoSeguraPage)
Espero que te guste y compartas el video
No te lo pierdas y comparte tus trabajos en mi página de facebook (IldefonsoSeguraPage)
Espero que te guste y compartas el video
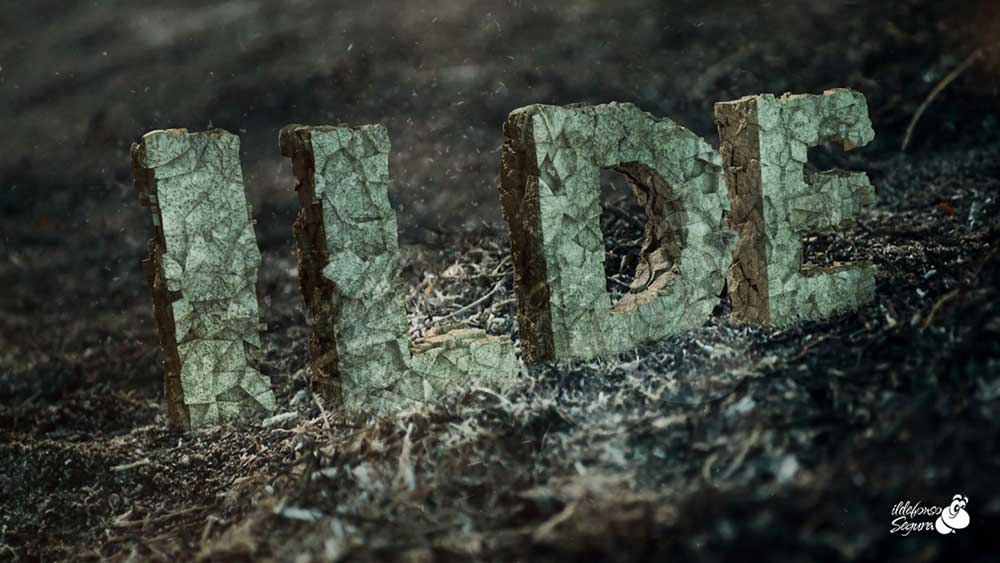
TUTORIAL TEXTO PIEDRA
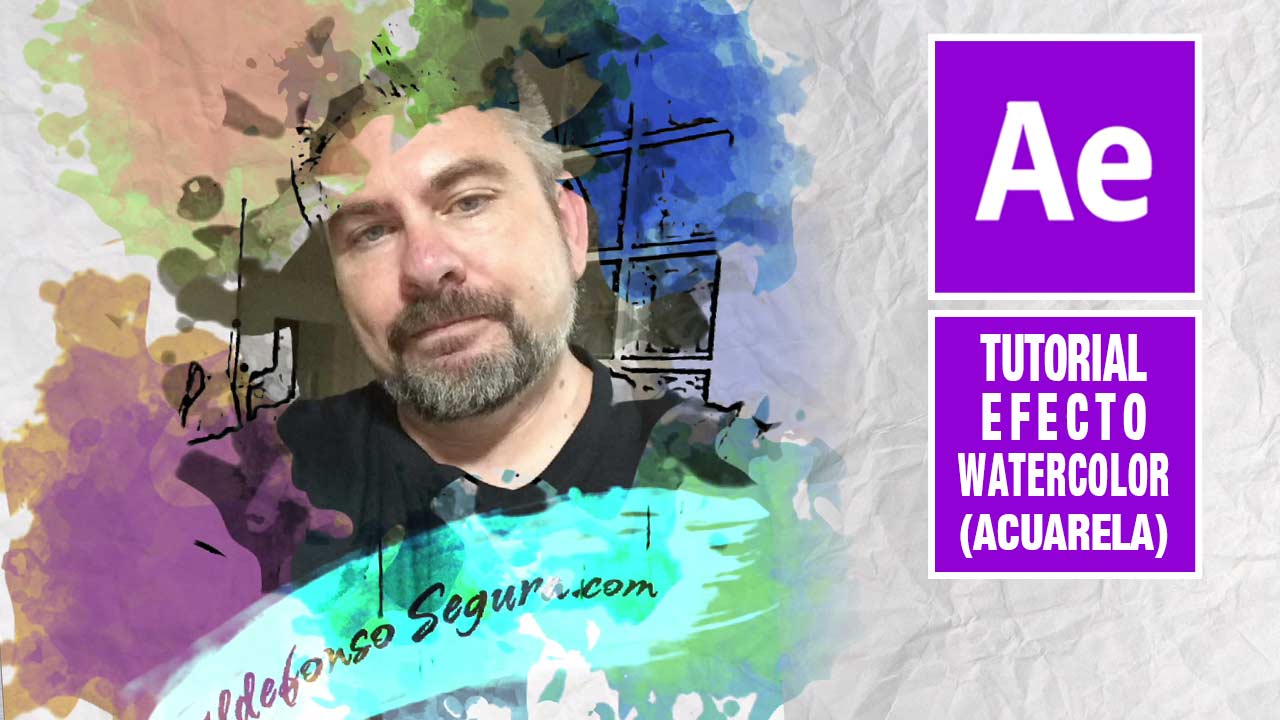
TUTORIAL BROCHAZO ANIMADO
Si quieres ver el tutorial donde muestro como hacer la aparición del dibujo que se convierte en foto, solo tienes que pinchar en la imagen siguiente:
No te lo pierdas y comparte tus trabajos en mi página de facebook (IldefonsoSeguraPage)
Espero que te guste y compartas el video
Suscríbete a mi canal de Youtube:
No dejes de compartir este post.
Así es como me puedes ayudar 🙂 Gracias
Es un tutorial mucho más teórico que de constumbre pero creo que era necesario por los resulados que se pueden obtener.
Que lo disfrutes
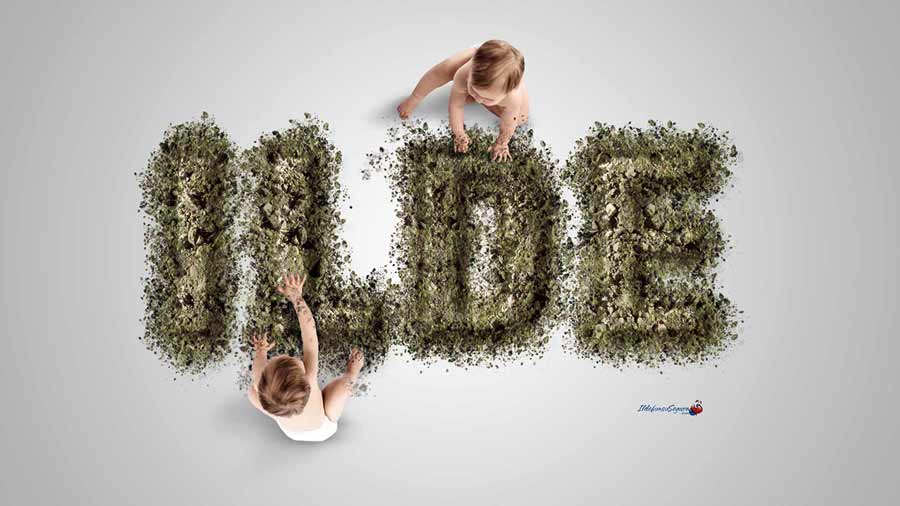
En un tutorial previo aprendíamos a hacer este efecto de tierra para texto y logos simples

En el tutorial aprenderás
- Usar FUSIONAR SI
- Usar máscara de recorte
- Crear trazados desde selecciones
- Elaborar un pincel desde una imagen
- Crear efecto dust (polvo y tierra) con aplicación de pinceles con difernetes valores
- Y muchos otros trucos que, aún siendo simples, te ilustrarán en su aplicación práctica
No te lo pierdas y comparte tus trabajos en mi página de facebook (IldefonsoSeguraPage)
Espero que te guste y compartas el video
TUTORIAL INTEGRACION DEL CESPED
Si quieres ver el tutorial para hacer el texto de tierra, puedes ver este video:
TUTORIAL EFECTO TIERRA
[vc_button title=»BAJATE LOS MATERIALES» target=»blank» color=»btn-danger» size=»btn-large» href=»https://goo.gl/jFPfau»]
Suscríbete a mi canal de Youtube:
No dejes de compartir este post.
Así es como me puedes ayudar 🙂 Gracias
La entrada Añade césped a un texto de tierra usando «fusionar si» con #Photoshop by @ildefonsosegura apareció primero en Ildefonso Segura.]]>